Archives

  • Production Tips with Sameer: Tricks for mixing drums

    Production Tips with Sameer: Tricks for mixing drums

    To book Sameer Sengupta for a mastering or mixdown session, contact Lynley via mastering@studios301.com or 02 9698 5888.

    I have been one of the resident Mastering Engineers here at Studios 301 for almost 3 years. You can usually find me in MS2 where I specialise in mastering electronic music. Alongside mastering, I also make music, producing artists, and mixdown albums.

    Today, I’ve decided to share some simple tricks I use when mixing drums.

    [1] Snappy snares.

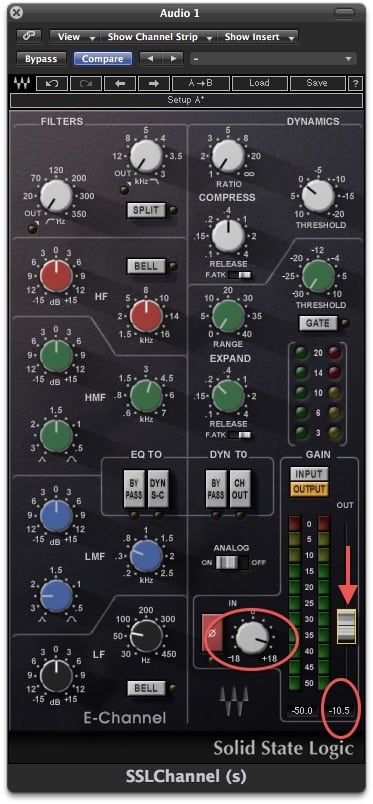
    I use the Waves SSL Channel a lot when I online mixing drums – I discovered I can bring a really nice snap to things like snares, kicks, rim shots or sometimes even a stabby bass line, just by driving the input of the channel strip really hard. I wind up the input gain knob till the signal is well into the red… then bring down the fader so that the output signal isn’t clipping at all. Leave it in ‘Analog’ mode, and apply a little EQ as needed, and leave compression off.  The result is a nicely saturated snare which is full bodied, yet snappy.
    [2] Drum buss saturation

    I use the PSP Vintage Warmer 2 in almost every mix. If you find that your drums are sounding a little ‘thin’ and lacking weight, instead of trying to layer additional drums on top, I suggest applying the PSP-VW2 across the entire drum buss. Start

    off by winding the MIX all the way to 0%. Increase the DRIVE to around +4 to +10 depending on how thick you really it to sound… and then gently wind the MIX knob up till you can hear the drums thicken up, but can still hear the transients from the dry signal. Adjust the DRIVE to a point where the needles are kissing the Red occasionally, but not constantly clipping. Set the MIX amount till you like what you hear. Like parallel compression, this is parallel saturation – works a treat!

    Another trick that I love is using the KNEE. If I find the drums are jumping around a little too much, instead of using a compressor, I’ll leave the DRIVE at zero, but dial in a little KNEE… this acts like a compressor, and will instantly ‘lock’ the sound from jumping around too much – but has a nice sound to it. Then adjust the SPEED knob to tweak the pumping. This works really well too for vocals.

    If I’m trying to get that Chemical Brothers WALL OF BREAKBEATS sound… I will wind up the DRIVE knob significantly too, then just play with the MIX knob until you like what you hear.

    Make sure you run it in FAT and MULTI mode… and I prefer to leave the Brickwall limiter OFF.
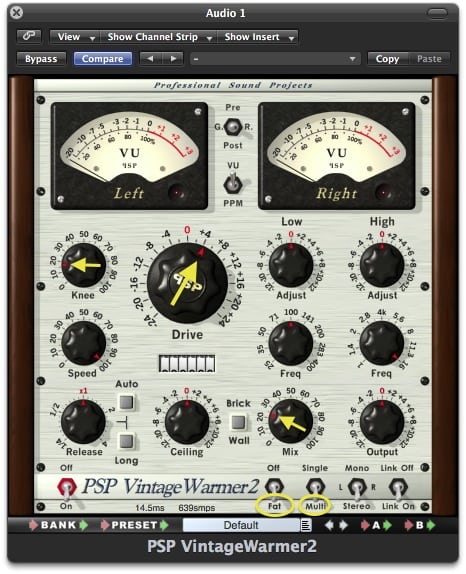
    PSP Vintage Warmer 2

    [3] EQ’ing Kicks

    The Kick of any dance track is the single most important sound to ‘get right’ because the whole basis and signature of most dance tracks will stem from how the sounds sounds. Once you’ve chosen the kick and bass sounds… you may find later on, that you’ve lost some definition between the kick & bass… to get this back, i’ll apply some very narrow band EQ to the kick. The kick’s unique character will come from somewhere between 100-300Hz. While the bottom end push of the kick will be much lower, its this ‘wood’ area that give it character, but this can also clash with what your bassline is doing.

    So, what I do is solo the Kick & Bass and sweep through the Kick with EQ until I find that magical point where the bassline instantly breathes a little more. Basically, I’m taking out a drastic but super narrow point in the kick that clashes with the bassline… this in a sense carves out a little niche in the kick to accommodate the bass sound. Its always better to solve a problem with subtractive EQ rather than additive, and this technique has solved many problems for me.
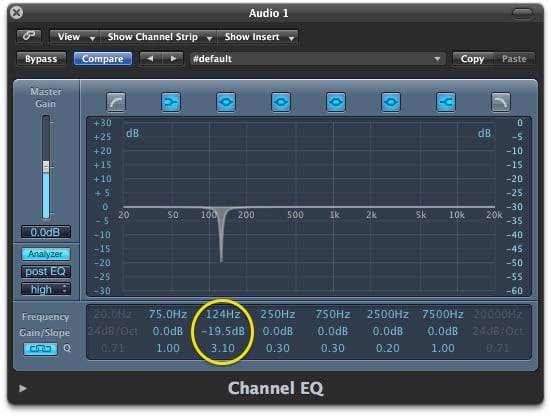
    Logic Channel EQ

    To book Sameer Sengupta for a mastering or mixdown session, contact Lynley via mastering@studios301.com or 02 9698 5888.
  • Jack Prest’s Tips & Tricks: Recording using only a few mics.

    Jack Prest’s Tips & Tricks: Recording using only a few mics.

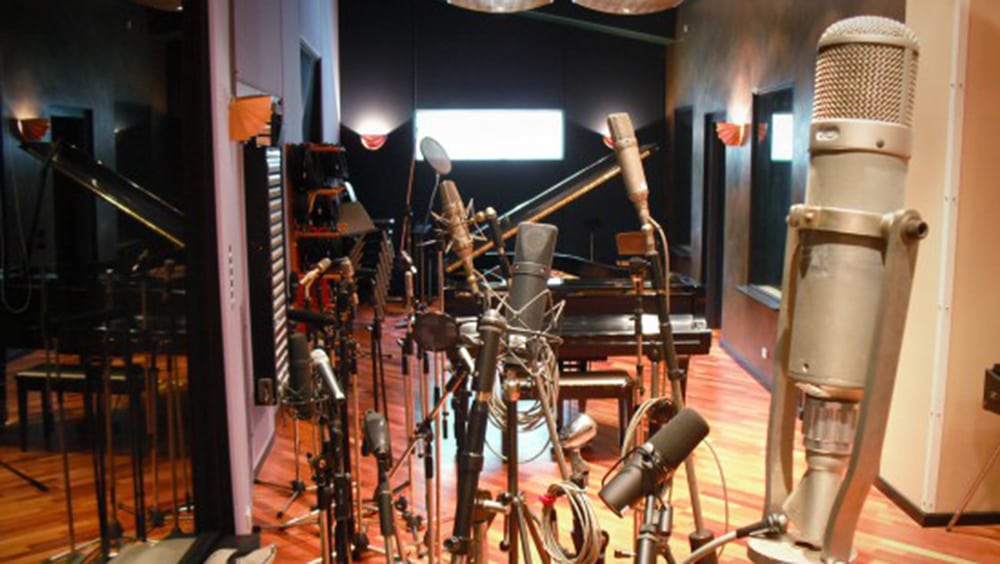
    One of the hot topics requested through our Facebook page has been ‘recording using a small number of microphones. This is a really easy technique and can be far simpler and effective than putting out every mic you have just because you can. It is especially effective when wanting to achieve that ‘vintage’ sound. Of course, this technique is also good for those that own, only a few mics.

    The first thing to be said about this technique is that it relies greatly on the quality of the musician, their instruments and the performance. This is because the fewer the microphones, the less scope you have to edit and tweak individual elements, in terms of timing, pitch and tone. This is an incredibly important thing to remember and to convey to a client when they request to use these types of techniques. Often the idea of recording in this way is alluring to an artist but unfortunately if they can not play their material well, many of the modern fixes for bad playing are not going to help due to the lack of separation in the sound sources. You want to have this discussion before your session and not after tracking!

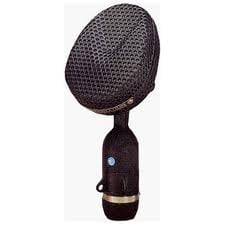
    Coles 4038

    Secondly the most important aspect of using a small number of microphones is mic selection and placement. When you are tracking with only a few mics it is imperative that you select mics with the right tone. When recording in this way you want to use as little compression and EQ as possible and what you hear during tracking should be as close as possible to the finished product. Once you have a microphone you feel suits your sound source be sure to play around with the position. Even small movements can make a drastic difference to the quality of your recording. Be sure (as always) to make sure the phase relationship (if your not sure what this is google it) of all your mics is good. You need to remember that you have no fall back option with this recording scenario, if you get it wrong you ave no additional mics to help correct things later.

    Recently I did a project with a four piece blues band who wanted to recreate the sound of early blues, i.e. Muddy Waters etc. They wanted to play all in room and all in one take. I made sure they understood this meant no (or very little editing) and they assured me they were well rehearsed and understood. This was great because to actually achieve an early blues sound the track needed to be played live. All of those early recordings are one take often recorded straight to acetate or vinyl and the energy of a live recording is very hard to emulate with multi-tracking.

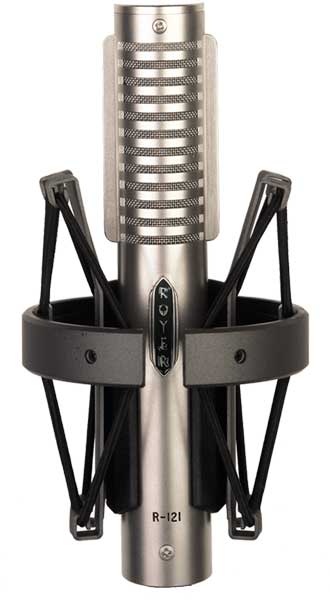
    Royer 121

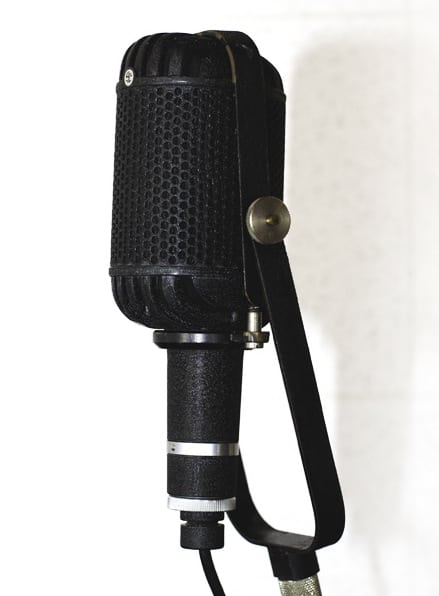
    I chose to use mainly ribbon microphones for the recording, the most popular type of microphone for the period, using a Coles 4038 as a mono drum overhead (all early recordings were mono so this lack of stereo spread actually helps it sound older), a Royer 121 copy (made by Carillon and are a great budget option) on the guitar amp and I was lucky enough to have a Coles 4033-A which served as the vocal mic and the room (because of the figure 8 polar pattern of the mic). That was all the ribbons at my disposal so I put dynamics on the bass amp, hi hat/snare and kick drum, and the Wurlitzer was DI’s, although the speakers in the Wurli meant it would feature in the room sound as well. I find for these kind of recordings any modern condensers sound too bright and clear, bringing the sound of the recording to far into the modern day.

    Coles STC 4033A

    I let the band position themselves in a circle to that they felt comfortable and able to perform their best. This is paramount above any micing consideration. If the band do not play well you will not get a good recording. Once they were set up I turn the bass and guitar amps away from the centre of the room to minimise direct spill.

    For the drums I placed my mono overhead directly over the drummers head, playing around till I found the sweet spot for the snare, position my hi hat mic loosely (so it picks up some snare) and placed my kick drum out outside the head directly in line with the drum beater. I also placed a couple of additional mics (pencil condensers) spotting the crash and a position over the top of the ride and floor tom (try and aim the mic right at the edge of the ride) just in case I needed to add a little more detail (FYI I ended up using these on one fo the tracks that needed a slightly more modern sound). I did mic up the snare (SM57) as well (just for safety) but I didn’t end up using it in any of the online mixes.

    a band in a circle

    Although I am a fan of making sonic choices and sticking to them, if you think you might need something later it’s better to grab it! Once I had checked all the phase and was happy with the sound it was just a matter of letting the band do the work. The most important element of this particular scenario was the vocal mic. The large amount of spill captured really made the whole mix glue together and gave it that live energy. So make sure if you’re doing this kind of recording that you have a good well placed room mic.

    Playing with recording in this way is one of the best parts of being an engineer and everyone has their own special placements and ideas on pulling great sounds (I heard of one engineer mic’ing the drummers feet!) so even if you only have a few basic mics (if you don’t own a mic GO AND BUY ONE!) experiment and have fun!

    [Jack Prest is an In-house Producer/Engineer at Studios 301]

  • Guy Gray’s Tips & Tricks: CRITICAL LISTENING

    Guy Gray’s Tips & Tricks: CRITICAL LISTENING

    Wyzga1

    Resident Producer/Engineer Guy Gray is back with another set of Tips & Tricks to share with you. This week, he lets you in on a simple but crucial skill – the gentle art of CRITICAL LISTENING.

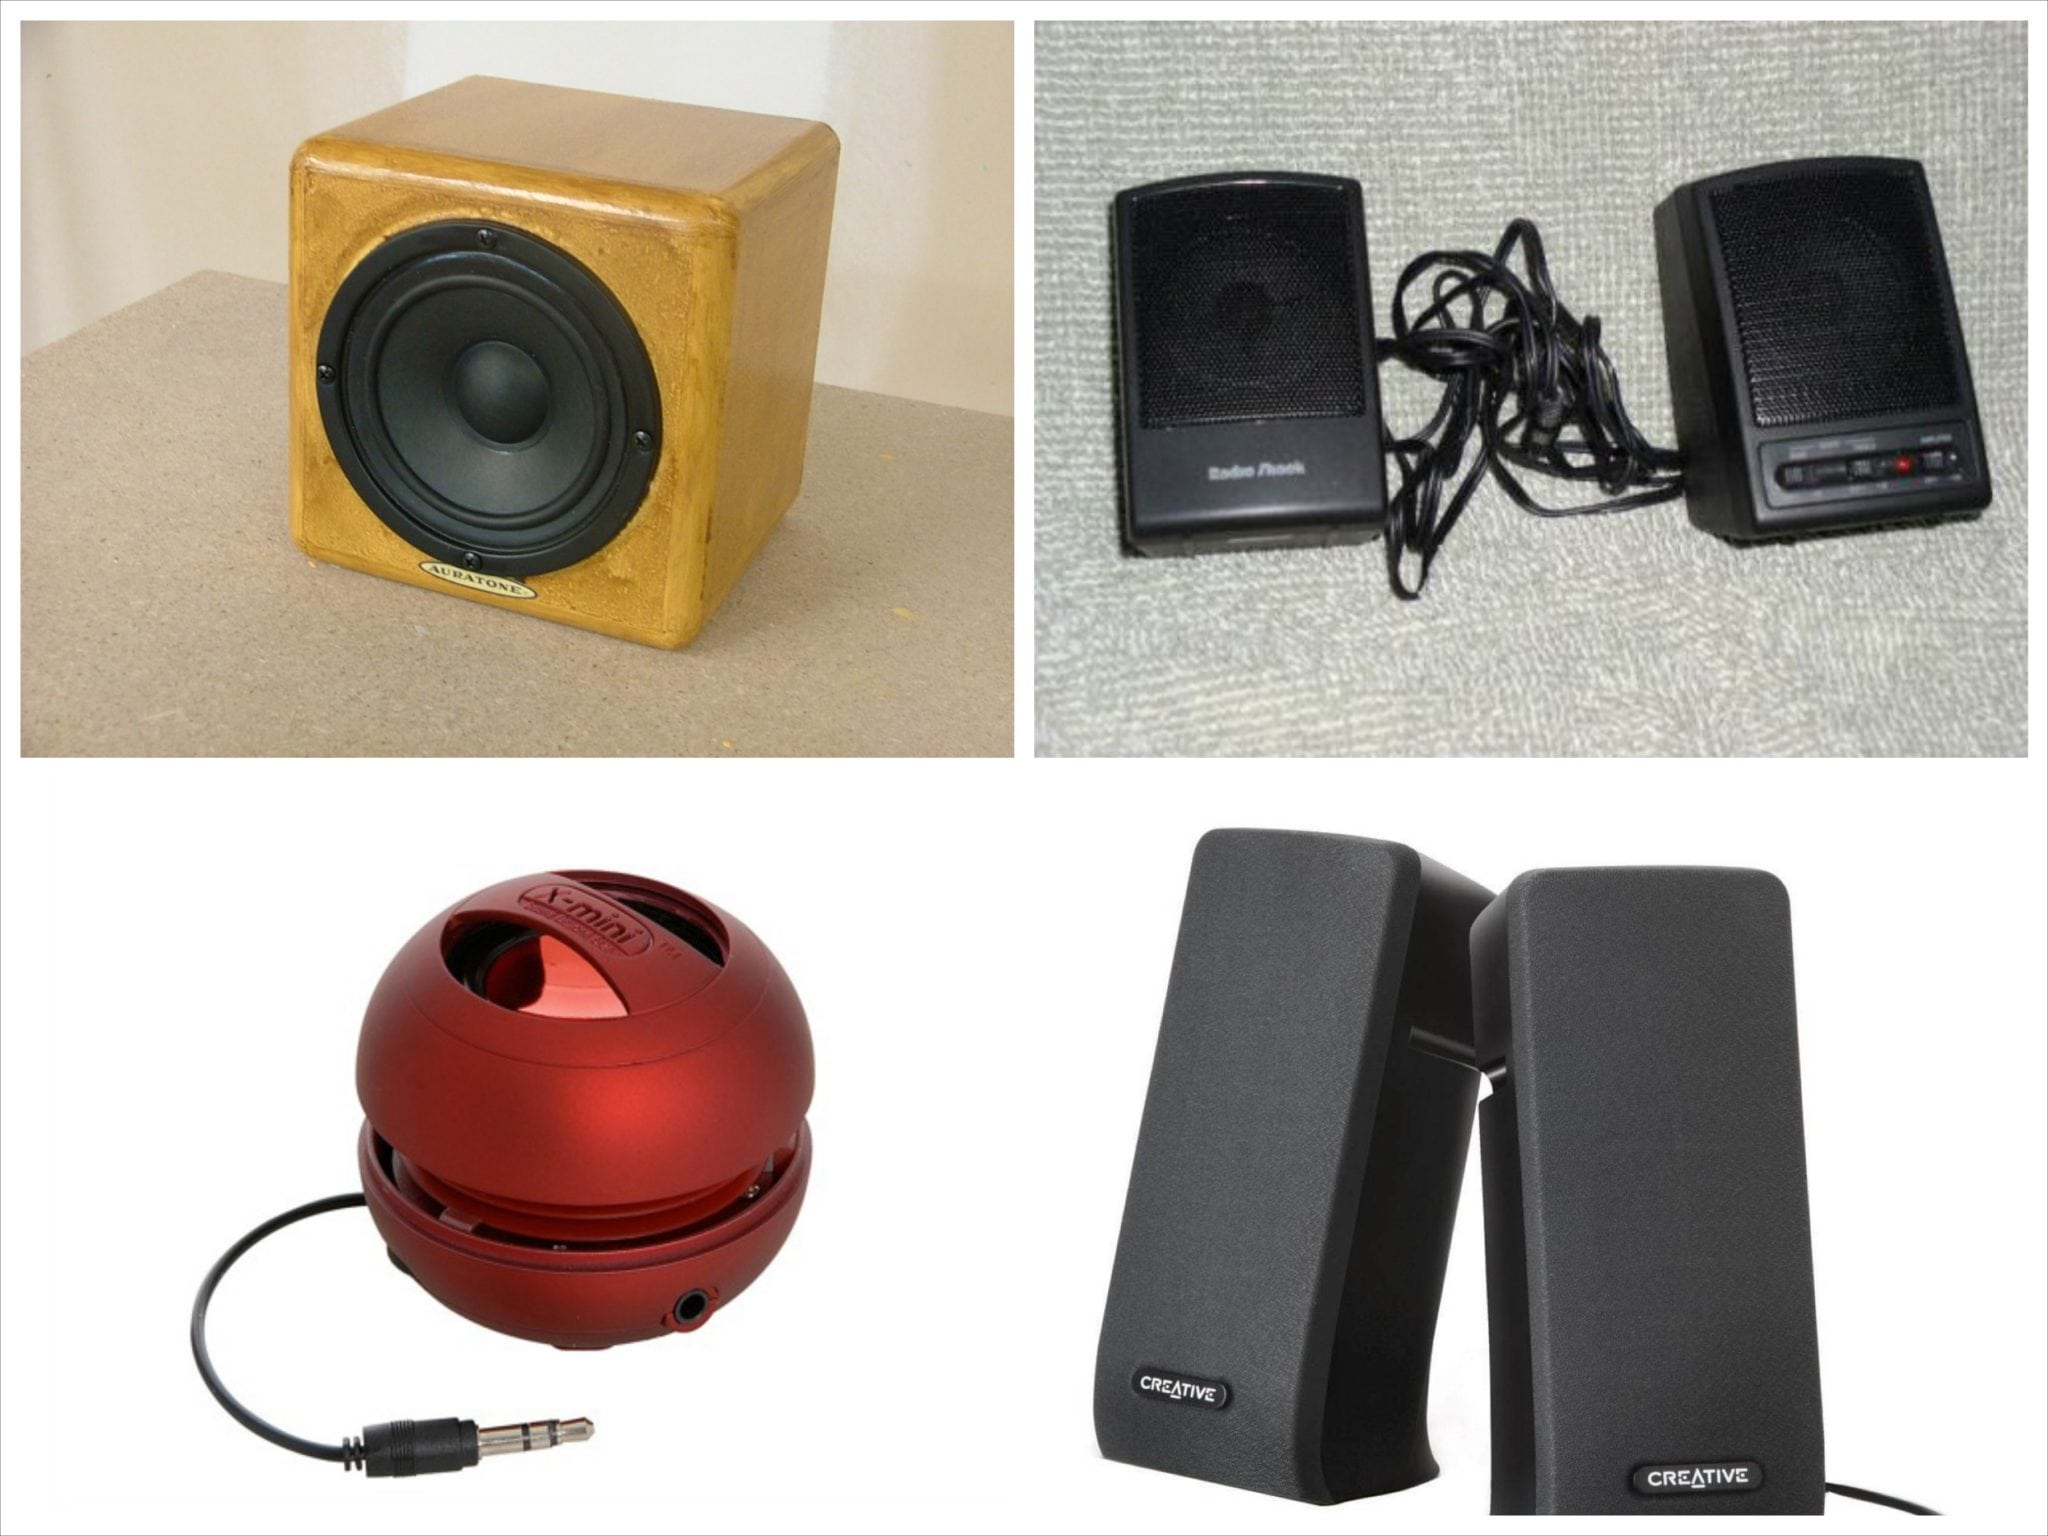
    Every so often during your mixdown session, you should listen to your mix in mono at a very low SP level on one monitor only. Do this preferably on a domestic, non-pro type house hold speaker. Small multi-media or laptop type speakers are perfect for this, given we are living in the Youtube century! Many large scale studios tend to have Auratone’s for this very purpose.

    speakersss

    Look (or ‘listen‘) for any obvious frequencies or level masking. Check for phase coherency and any instrument / frequency cancellation issues.

    And remember the Golden Rule: The main vocal is of paramount importance so make sure it sits just right in the mix. It’s amazing how this critical listening mode can help you. Just re-tweak a couple of levels to make your mix sound better balanced and more finished. Remember balance is the corner stone to a great sounding mix.

    [Award-winning producer/engineer/mixer Guy Gray has rejoined the Studios 301 team following his recent return to Australia.]

  • Guy Gray’s Tips & Tricks: MIXING

    Guy Gray’s Tips & Tricks: MIXING

    Guy Gray as 30 years of experience includes engineering scores, large orchestral recordings, surround mixing as well as music production for successful film projects throughout Australia and Southeast Asia. He will be providing you a with a short series of Tips & Tricks, as only he knows how. To begin with, he delves into some MIXING secrets.

    (1) When mixing vocals, use High Pass & Low Pass filters on your delay returns to help prevent masking of the vocal frequencies.

    (2) To give your DAW mix buss more headroom, before you even begin mixing, lower all your faders by approximately 4 – 8 db. Then use your Mix Buss Compressor / Limiter gain make-up to achieve a healthy gain structure on your final online mix level.

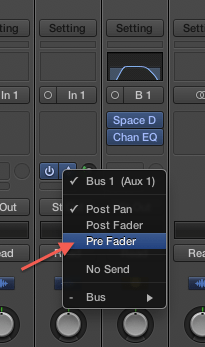
    (3) Using the PRE-fader mode on sends to a reverb can help you get that ‘3D’ sound and puts the source sound in it’s own space.Pre-Fader send

    (4) Try compressing the send to your drum reverb for a bigger, more coloured reverb effect.

    [Award-winning producer/engineer/mixer Guy Gray has rejoined the Studios 301 team following his recent return to Australia.]

  • Jack Prest’s Tips & Tricks – Parallel Compression

    Jack Prest’s Tips & Tricks – Parallel Compression

    We ran a survey recently to discover what aspect of production many of you want to learn about.

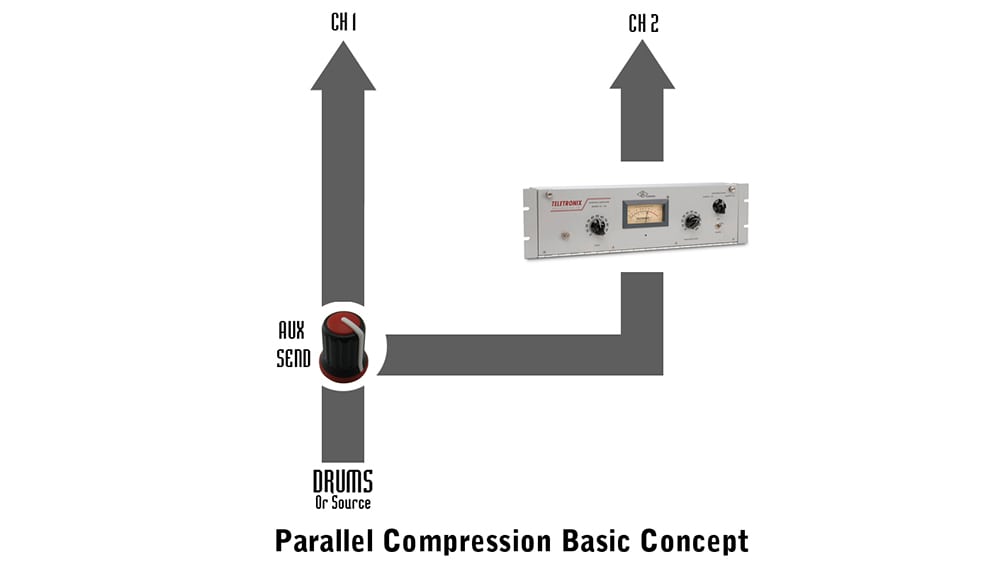
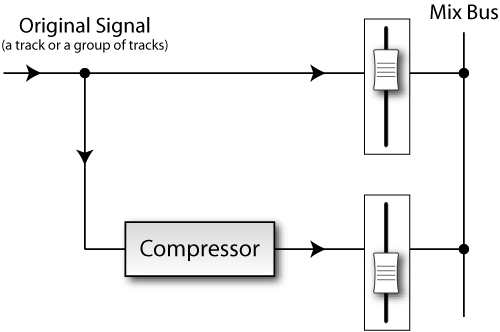
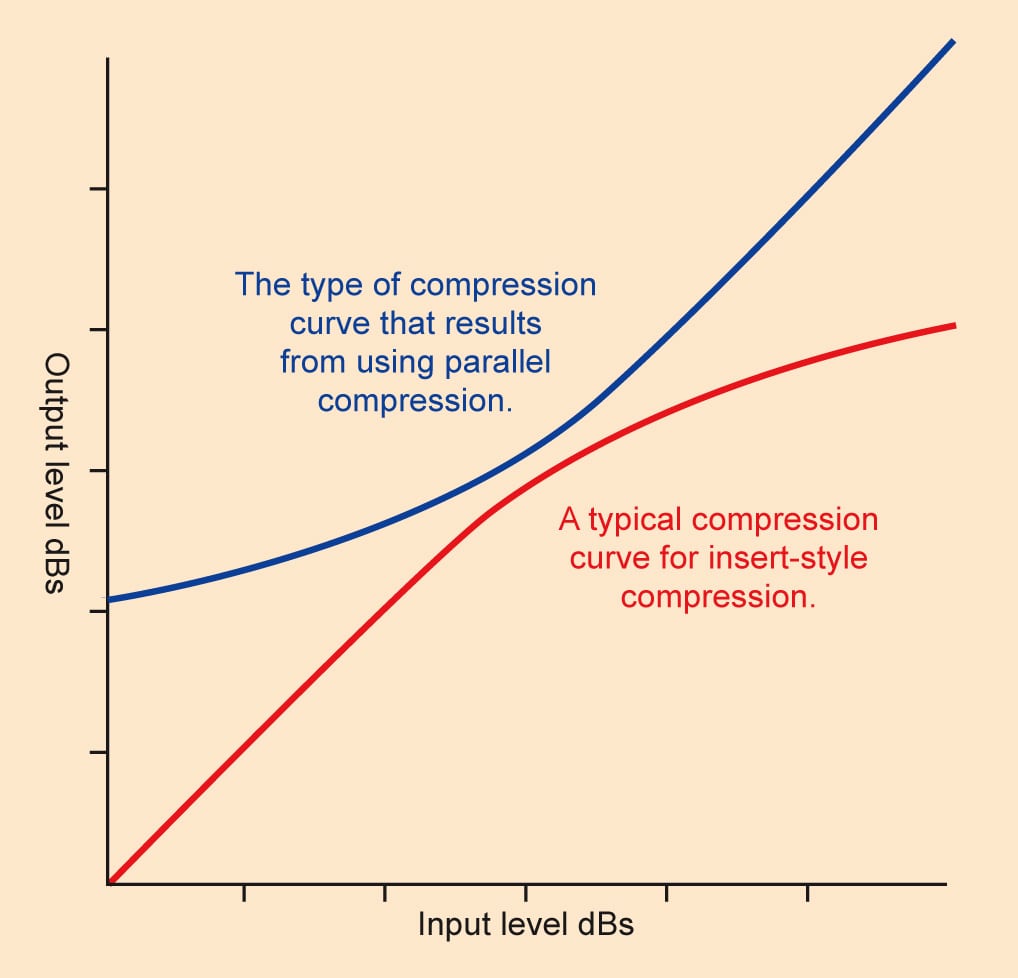
    So, this time around I’ll be looking at a popular topic and technique, parallel compression. This is where you blend a compressed version of your signal back into the original. The idea being you can create a bigger, harder compressed sound without messing with the dynamic range as heavily. (I’m presume you are familiar with how to do this, if not I’m sure youtube can help you out with tutorials.)

    Parallel-Compression-SF

    First off I’d like to say that I think parallel compression can be (and often is) overused. For myself personally I prefer to use good old fashioned balance, gain and volume to make things sound big and dynamic. Never underestimate your most powerful mixing tool, the volume fader! That said parallel compression is a great technique for adding punch to your mix.

    One technique I used on a mix recently was a brick wall limiter (such as an L1, L3 or UAD Precision Limiter) set to an extreme threshold setting but with the output pulled down. You can then feed important parts of you mix to this parallel bus so they are decimated through the limiter. Then make sure your parallel aux channel is metering a good 20-30db lower than your master fader. This technique brings in the distortion that many producers find appealing when they heavily limit their master bus without killing the dynamics of your track.

    QA_04

    Another technique for parallel compression, especially for drums, is with any 1176 emulation (my favourite at the moment is the Revision-A in the new UAD 1176 series). Set both the input and output to around 18, the attack to the fastest setting, the release around 5 (2 o’clock) and the ratio to something soft like 4/8. Then just feed a touch of your kick and snare to the parallel channel, you should be seeing about -7/-10 db of gain reduction. Then dial back the attack control to get the level of transient snap you like. You might also want to play with the release time to get it breathing with your track. Then bring down the volume fader on the parallel channel and bring it back up slowly stopping at the point where you start to hear the compressed signal. This technique also works well on staccato bass parts, especially synths.

    One more helpful technique is to use multi band compressors or EQ post compression to sculpt the area of the sound you want to add emphasis too. This is great for adding mid-range knock to kicks, low mid weight to snares and controlled subs to bass.

    Enjoy!

    Jack Prest is an In-house Producer/Engineer at Studios 301