We ran a survey recently to discover what aspect of production many of you want to learn about.
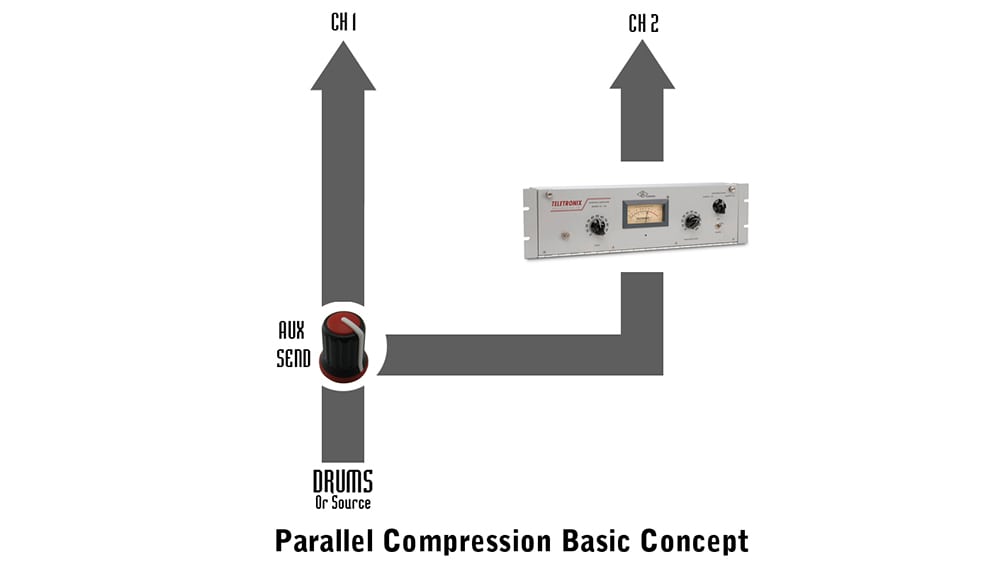
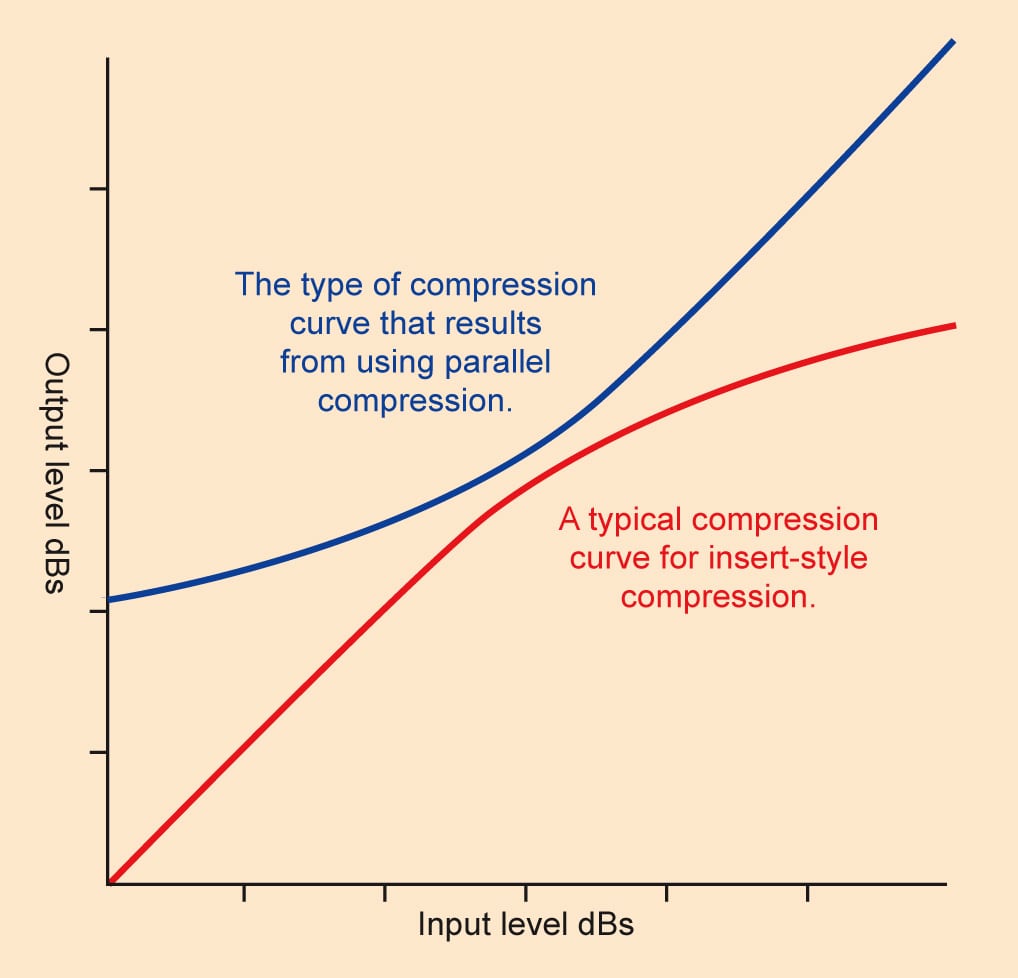
So, this time around I’ll be looking at a popular topic and technique, parallel compression. This is where you blend a compressed version of your signal back into the original. The idea being you can create a bigger, harder compressed sound without messing with the dynamic range as heavily. (I’m presume you are familiar with how to do this, if not I’m sure youtube can help you out with tutorials.)
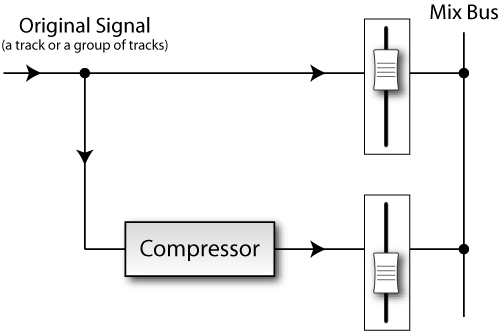
First off I’d like to say that I think parallel compression can be (and often is) overused. For myself personally I prefer to use good old fashioned balance, gain and volume to make things sound big and dynamic. Never underestimate your most powerful mixing tool, the volume fader! That said parallel compression is a great technique for adding punch to your mix.
One technique I used on a mix recently was a brick wall limiter (such as an L1, L3 or UAD Precision Limiter) set to an extreme threshold setting but with the output pulled down. You can then feed important parts of you mix to this parallel bus so they are decimated through the limiter. Then make sure your parallel aux channel is metering a good 20-30db lower than your master fader. This technique brings in the distortion that many producers find appealing when they heavily limit their master bus without killing the dynamics of your track.
Another technique for parallel compression, especially for drums, is with any 1176 emulation (my favourite at the moment is the Revision-A in the new UAD 1176 series). Set both the input and output to around 18, the attack to the fastest setting, the release around 5 (2 o’clock) and the ratio to something soft like 4/8. Then just feed a touch of your kick and snare to the parallel channel, you should be seeing about -7/-10 db of gain reduction. Then dial back the attack control to get the level of transient snap you like. You might also want to play with the release time to get it breathing with your track. Then bring down the volume fader on the parallel channel and bring it back up slowly stopping at the point where you start to hear the compressed signal. This technique also works well on staccato bass parts, especially synths.
One more helpful technique is to use multi band compressors or EQ post compression to sculpt the area of the sound you want to add emphasis too. This is great for adding mid-range knock to kicks, low mid weight to snares and controlled subs to bass.
Enjoy!
Jack Prest is an In-house Producer/Engineer at Studios 301