To book Steve for your mastering project, contact Lynley on 02 9698 5888 or mastering@studios301.com.
In most mastering situations, stereo mixes are used for the final mastering session. But sometimes I go a little further than that… And the producer or mixer brings in their computer, with their DAW mix sessions, into my mastering studio with them.
The advantage of this from a mixing perspective is that we can play the mixes in the mastering studio speakers and listening environment, where the engineer has the opportunity to listen to the mixes in a very accurate room with pristine converters, amps and speakers. From there, we can get into the project in its entirety to adjust any problematic aspect of the final mix (e.g. individual instrument levels, equalisation and compression). In doing this, we are able to make fine adjustments in the mix, without having any side affects that may occur to the mix by simply using overall mastering eq and compression. Overall, the mix sounds better, the master sounds better as a result, and the producer or artist hasn’t had to pay much more (if any) for a better sounding song.
As an example, in a track I was recently mastering, we had a great sounding kick drum with nice sub energy, but the bass guitar had large amounts of sub frequencies in it as well. Under normal situations in a mastering session, I would simply use a high pass filter or equaliser to tighten this up for a firm rhythm section… But the side effect can sometimes be that in tightening up the bass guitar, we loose the energy in the kick drum. In the situation where we have the mix opened up in the DAW, we can easily go in and make the adjustments to the bass guitar only, without any side effects to the kick drum!
In another instance, the vocal was too bright but the percussion was slightly dull, so we were able to go to the vocal eq in the mix and reduce the high frequencies. This then allowed me to add brightness to the whole track with my beautiful Sontec mastering eq.
And in another situation, we had guitar parts that were recorded using two microphones, but unfortunately one of them was out of phase. This gave us a really weak guitar sound, but having the mix at our fingertips, we were able to go in, find it, and phase flip it – which immediately ended up in a really strong sounding guitar. This is something I simply could not have fixed in mastering a normal stereo mix.
Overall, the common problems I hear when mastering – over compression, clashing eq and phase problems to name a few – can all be fixed much faster and more effectively in the mix, rather than trying to work around it in mastering.
Lastly, the benefits of this process for many mixers/producers have had longer-term benefits. By having the “fixed mix” saved in their DAW, and then referencing it back in their own studio, they have been able to use it as a reference to tweak their own studio monitoring systems for better results.
Here’s what to do If you want to mix in my mastering studio…
In order for us to do this together, you’ll just have to bring your laptop or tower containing the software and relevant mix projects (but don’t forget your iLok and other dongles!). From there, we hook you into our USB > AES/EBU device that runs straight to my Prism Dream DA convertor… and into my analogue mastering chain from there.
Displays, keyboards, extra peripherals, cables, etc. are all catered for at 301 – so you don’t need to pull your studio apart to make this happen.
How much does it cost?
I charge my usual hourly rate to work this way. Sometimes it works out quicker when you bring in your DAW, because I can quickly fix a problem like above, and then keep on mastering without having to work around mix issues. On the flip side, lack of preparation, or half-baked mixes can cause a blow-out in time – so I strongly recommend that if you are considering working this way, to get your online mix sounding as best as you possibly can – and then I can simply enhance it, rather than having to re-“mix” it with you in my mastering studio.
Finally, none of this is to say that all mixes need these adjustments, or this much intervention, but it’s a great option to have up your sleeve if you are looking for a lower cost way to improve the sound of your mixes (and thus masters.)
All in all, stay confident in your mixing ability, take the mix to the point where you believe it’s at its best and then from there it can only get better…
Steve.
Lynley, our Mastering Coordinator, is happy to talk through this process with you in more detail if you are interested in mix-mastering with Steve Smart. You can reach Lynley on 02 9698 5888 or mastering@studios301.com.
For part two of the Analogue versus digital shootout we will be comparing (arguably) the worlds most famous drum machine, the Roland TR-808 with its software equivalent inside Ableton, and the monstrous Korg MS-20 with its software MS-20 from the Korg Legacy collection.
Originally designed as an alternative for musicians who didn’t know (couldn’t afford) any drummers to perform with, the TR-808 (along with TR-909) went on to influence and shape and sound of a generation of electronic musicians. Testament to the universal appeal of the 808, in recent years it has become a staple of electronic production. Imagining club hip hop tracks without a booming 808 kick is like imagining garage rock without distorted guitars. The original TR-808 units have gained almost mythical status and fetch 10 times what they sold for when first released in the early 80’s; luckily enough we have one residing in Studio 6!
For this demo, I have programmed the same beat on the Ableton sampled 808, by cutting up audio of the TR-8 samples made in Studio 2 and then on the TR-808 analogue drum machine. There is also a version of the sequence inside Ableton triggering the analogue drum machine.
Our TR-808 via Fairchild 670 Sample Pack
For the MS-20, first I’ll A/B the basic waveforms with both the high and low-pass filters completely open. Then A/B of the high pass and low pass filters sweeping through their full range first with the resonance turned to 0 and second with the resonance turned to full.
Here are the recordings for you to compare:
For me this one is a no brainer, analogue hardware wins hands down. It’s the instantaneous feeling that you are working with a real sound. I find consistently when working with hardware that as soon as you get you sound right on the unit it requires little if any processing, where as I would need to work a lot harder to achieve a similar energy from a software instrument. In the case of the 808 the sequencer also brings something special with the groove and feel of the unit far out performing that of Ableton (although you can use groove quantizing to achieve similar results, the point is it’s already there to begin with on the hardware).
The other reason I love analog hardware is it’s hands on nature of operation which enable you to work far more organically that tweaking settings with a mouse. If you’re an electronic music producer I strongly recommend you get yourself some analogue hardware, even if it’s a crappy old cheap Casio. The limitations of the device enable you to generate something that can help to define your sound and give your production a unified direction. At the very least get yourself a quality midi controller and make templates for your favourite soft synths to help at least bring the interface into the real world.
[Written by Jack Prest who is an In-house Producer/Engineer at Studios 301]
To book Jack for your next project, contact us on 02 9698 5888
One of the most common questions people ask a mastering engineer is “why is my track not as loud as everyone else’s?”
In this article I’m going to explain in simple terms how humans perceive loudness and how it can be measured accurately. Since the early Motown days of pressing vinyl, there has always been a race to have the loudest cut. This was a skill developed by cutting engineers and is the foundation of mastering records. The idea being that the song would sound louder on a juke box and on the radio thus making it stand out from the rest. The loud cut was limited by the physical medium of the record and the cutting head.
When digital came along this all changed- there is a ceiling of 0 dBFS (decibel Full Scale) that is the maximum permissible limit of digital audio. Since the introduction of digital peak limiting and clipping in the 1990s the true “Loudness War” began, much to the detriment of listener enjoyment.
Television stations have been following loudness guidelines for years due to the many listener complaints that the ads were louder than the program content. In America this is known as the CALM act, and Australia is moving in a similar direction with OP59 standard. Most audio people know that the ads are louder do to the decrease in dynamic range of the ads compared to the normal program. Program audio has dialogue, music and background sounds so it needs to have some dynamic range in order to sound natural and also have impact for action scenes, whilst the ad is smashed to an inch of its life so the quiet parts are almost the same level as the loudest part.
Measuring loudness is quite difficult, and due to changing standards for television, accurate loudness metering has only recently been developed. Fortunately the same way of measuring loudness for broadcast is creeping into music, so when you tick Apple “Sound check” or Spotify’s “normalize” function the level of music is will remain consistent from track to track. This will be a revelation for the music industry and may put an end to the loudness war, as tracks mastered purely for loudness will actually sound worse when volume matched to music mastered at a more conservative level.
Human Perception
Sound has two properties, wavelength and amplitude. The frequency of the wavelength is measured in Hertz (Hz), and sound pressure level (SPL) is measured in Decibels (dB). The human ear of a small child can hear from 20Hz to 20kHz, and the high frequency response decreases with age and more rapidly with loud noise exposure. Just talk to a live sound engineer over dinner and you’ll get my drift. What many people don’t know is that humans do not hear the entire frequency range at the same loudness level. Furthermore; as amplitude changes, so does our ears response to the frequency spectrum.To understand why different frequencies are not heard equally, you’ll have to look at the research by Fletcher and Munson reported in a paper entitled “Loudness, its definition, measurement and calculation.”
The Y-axis represents Sound Pressure Level (dB SPL) or volume, in simple terms. The X-axis represents the frequency range. As you can see, our ears are most responsive to the middle range of the frequency spectrum around 1kHz-4kHz range right where human speech is. At lower volumes our ear does not hear the low or the high frequencies and well as the midrange. At higher volumes the curve begins to flatten out and we begin to hear a flatter frequency response compared to lower levels. The flattest response is around 85dB SPL, which is also about as loud as you should have your monitoring for 8 hours to avoid hearing damage.
an SPL meter.
Grab an SPL meter from Jaycar, which should set you back $40 and sit in an equilateral triangle between your monitors. Ensure your monitors are away from wall and the corners of the room or you will have an inaccurate boost in the bass response. Put the meter on C weighting and play some pink noise from your DAW at -18dBFS. Once you are around 85dB SPL this is your listening reference level. You can even measure your room frequency response if by downloading test tones http://realtraps.com/test-cd.htm
Frequency Balance
What does this have to do with music loudness? Think about the different frequencies of instruments in your mix and where they sit in the audio spectrum. Here is an excellent frequency range chart that can also show you how each range is related to our hearing response:
When people say to me “why is my track not as loud as everyone else’s” I point them to the mix, not the mastering. I’ve noticed over the years as clients mixes improve (meaning, they both sounded better in the control room AND in the real world), they also become louder.
Look at it like this: if you’re mixing a hard rock tune, and your guitar and bass are masking your kick and snare, you need to turn the kick and snare up louder to give them the impact you need. That means transient material that is louder relative to the more steady-state (RMS) stuff. And that means a quieter mix. Now, if you carve out some low end from the bass that allows the kick to speak with impact at a lower fader level, and carve out some midrange from the guitar that lets the snare speak at a lower fader level, your transient-to-steady-state (peak-to-RMS) level will be lower, meaning a louder mix. You will also have better separation.
Then you’ll find that when the track is mastered and pushed to commercial loudness levels, the mix balances don’t fall apart, compared to an average mix that is pushed too hard. A word of warning though- as our ears are most sensitive to midrange, this is the area that can become unpleasant with excessive midrange boost.
The loudness of your mix mostly comes down to the frequency balance and where the spectral energy is. It also comes down to dynamic range, which I will discuss in part 2. The older VU meters and average level meters (RMS) will react strongly to low end, giving you a false representation how loud your mix is compared to others. Loudness meters take the way we hear into consideration with weighting filters and will give you a much more accurate number.
If you can make your mixes sound tighter when you are mixing, then I can take it the next level when mastering.
If you listen to the old vinyl “sound” that everyone loves, one of the reasons it sounds so pleasing is that it is mixed to accommodate the boundaries of disc cutting. When I first started out, mastering was disc cutting… That is, the master you would deliver to the factory would come back as a vinyl LP or single. As well as the mastering engineer, mixing and recording engineers always worked with the finished vinyl at the back of their mind. So, with the technical boundaries that vinyl had, engineers were watching all the peaks, controlling everything that jumped out (inevitably causing problem on vinyl) – and that’s why everything sounded so nice, round and tight.
(We also used more de-essing when we were cutting to lacquer, because the medium wasn’t very friendly to top end and would cause “sibilant” distortion, especially on vocal s’s, high hats and anything with an excessive amount of top end. So not only did you have limiters controlling the sound for tightness and roundness, you had de-essers which were giving the mix a nice rounded top-end.)
In order to achieve nice tight mixes nowadays, these techniques from working with vinyl still apply, and this is where VU Meters come in. A VU meter is like a rev counter in a car, it gives you a feel for what the car is doing, and the VU gives you a feel for the song, and how tight and “round” it is sounding.
What are VU Meters?
VU (Volume Unit) Meters essentially display an average of what we hear, rather than the very fast peaks that we don’t. Average level is important, as controlling this will make the mix sound tight. For example, with a kick drum, if you have a VU meter, you can see if the kick drum is adding kick and punch to the mix, or if it’s adding a lot of wooliness and getting in the way of everything else. If the VU meter is moving radically, just working on the kick drum, then you know by looking that you are losing tightness.
In the particular instance of a kick drum, (or other low end elements in your mix) your room acoustics might be deficient in low frequencies – and this is also where VU meters are indispensable. They are like your third ear – they will show you the energy in the low end, and if there is radical movement, then you probably have an issue with frequencies that you aren’t hearing.
Leon’s custom VU Meters built by Stephen Crane.
Watching the VU Meters move.
In order to achieve mix tightness, VU meters should “dance” smoothly and in a gentle manner, usually in time with the music, rather than in big jumps and erratic, out of time movement. This erratic movement implies that there are drastic level changes, which will be hard to control in mastering. A common, but undesirable, scenario when I’m mastering a track is when the tom fill comes in, the VU’s have excursions of 10dB. I can go in and fix that in the stereo mix, however at that point it is going to effect the rest of the mix, because when I push the toms back down, everything else in the mix will also be pushed down.
When I get mixes from the great engineers, I usually only add a little, if any, peak limiting in mastering because it’s all been taken care of during the mix. 9 times out of 10, this was done on the individual channels of the mix (as opposed to a buss output compressor). In this instance, VU meters will show you when levels and compression are adequate in the mix.
Don’t confuse limiting or tightening with squashing. In this manner, limiting should just be controlling the peaks rather the squashing the entire signal, and your mixes will by default sound louder. Again, this is where VU meters come in – they help you see the erratic movement caused by peaks and will help you apply just enough dynamic control.
Choosing your VU Meters.
There are different types of VU meters out there, and I have spent many hours experimenting to find the ones I liked best. I encourage you to do the same – some will move faster, some slower, and you should find the ones that behave the best for your individual preference and purpose. On top of this, VU meters can usually be calibrated for both speed and volume level, and these settings are essential for getting the best out of them, though again, the particular settings are very much personal taste. The VU meters I use are custom built by Stephen Crane at Studios 301.
As far as software meters go, there are many options out there and I’m still experimenting with them. The main stumbling block I have found is finding software meters that behave how I want to “see” the signal, and are adjustable for the right reference level. So far, my favourite is the PSP VU2 meter plugin.
Everything is important about the gear and the studio you use it in, but if I had to pick my essential tools, they would be my monitoring – and my VU meters.
I recently wrote this piece for our friends at Liveschool, but realised its relevant to our audience too.
A wonderful thing about music production these days, is that you can do it without the need for a big studio. But if you’re interested in making bass heavy music, then there’s nothing more important than getting to know your bass better.
One of the main reason people struggle with getting their mixes to sound tight and punchy is because of poor monitoring environments, especially in the bottom end.
Example of a simple home studio environment.
One way to hear whats down there is to turn it up, and if you don’t have the luxury of an acoustically isolated space, you’re going to piss off your neighbours, girlfriend, parents, etc. Another way to do it would be to fork out on absurdly good headphones or a subwoofer (and again, piss off your….).
But there is cheap and effective solution!
I discovered this years ago by accident but got so used to it, that I still rely on it to this very day.
I used to place my monitors on my desk in a fairly small room; this created all sorts of negative issues, such as causing the table to resonate, and given how close the speakers were to the back wall, the entire room would sometimes resonate at certain frequencies, especially at higher volumes.
Another example home studio.
But at lower volumes when the room didn’t resonate, I noticed something else. The speakers were sitting directly on the wooden table because I couldn’t even afford any acoustic sponge to sit them on. This in turn caused low-frequencies to vibrate directly through the table. Another way to do it, is to actually touch the speaker cone, ever so carefully. This gives you a very precise sense of any bass movement, but be sure not to apply too much force, or you could damage the drivers!
Through this, I found myself *feeling* the bass. This became especially useful even when they were turned up, because even though I didn’t have a subwoofer, I could feel what was going on below 40Hz.
Another way is to actually look at the woofer. If at a moderate volume, you can visibly see the woofer moving back & forth (~5-15Hz) then you need to hi-pass something.
Feel the bass!
Doing this, I was able to have a sense of how fast the low-end was moving, or feel the separation between the kick and bass. I could also feel just how low the bass went. This in turn affected sound design and mix decisions… and when you get the low-end sounding good, the rest is a lot easier to build.
At first, it takes some getting used to… ie, knowing how much movement is *just right*, but you eventually pick it up, and it never leaves you. In fact you’ll start to be more aware of sub-sonic in clubs and other loud spaces. Lastly, you may have seen this technique in this part of that film “It’s All Gone Pete Tong” – I still use do this today and swear by it.
We have just completed a very special interview with none other than producer extraordinaire, Nick Launay. Nick is a veteran of the tape medium, and having had a long standing relationship with both 301 and Steve Smart, he was very kind to offer us his time to share his insights and some hilarious (read: outstanding) stories over a mammoth talk we had with him.
For those that may not know, Nick is an English music Producer, Engineer, and Mixer who has worked with everyone from Arcade Fire, Yeah Yeah Yeahs, Midnight Oil and INXS, to Grinderman, Kate Bush, Phil Collins and Talking Heads – basically, he’s a bonafide legend, and an awfully nice chap to boot.
The focus for our discussion with Nick was to learn about his appreciation of tape – that being, everything from tape splicing, his techniques, the technology, right through to its glorified sound.
To begin the series, he reveals his philosophy on “Analogue vs Digital”.
301: Do you find yourself going back & forth between mediums? For example there are artists like Lenny Kravitz who have gone and bought famous old desks and tape machines, only to dive into large ProTools systems, then later gone back to tape.
Nick: I don’t go back and forth. I would say I go forth only.
301: And what direction is forth?
Nick: Well, I record through vintage equipment all the time, always and only. I capture onto digital through the best A/Ds [analogue to digital convertors] I can find, which are Lavry or Prisms. Those are the two I like the best.
301: Are you going through pre-amps of any sort?
Nick: The studio I use in LA is one my friend owns, but I use all the time. There’s an API desk on its knees over there, and I have a rack of 16x Neve 1081s, so it’s half of a Neve and half an API that totals 48 channels. So I’m going through the best analogue that was ever made. I’m also using vintage tube and ribbon mics.
301: Do you go to tape?
Nick: I don’t print to tape anymore, I used to though. The thing with that is that I’ve worked out other ways of getting that same feeling. And let’s be very clear about one thing… Music primarily is about feeling. That’s what it’s about. The difference between a record that people like or don’t like is the feeling. So the whole romantic thing about analogue tape is, “what feeling is it giving you”? And I think once you recognise that and hone in on that… Is it then about the saturation of the tape? Is it about the distortion of the tape? Is it about the hiss?
It is about all of those things, and those are the names that we can identify, and put onto these things that are important to us. But it’s the feeling that it gives us, versus the incredibly stark nature of digital – which is just this kind of square box instead of it having curves. So I think that there are ways of creating the feeling of analogue tape by cleverly using analogue equipment, and there are also lots of plug-ins that are actually very good.
301: In that case, what is your view of tape emulation plug-ins?
Nick: I think some of them are good. I haven’t used a lot of them. I, again, have different ways of doing things. I think a lot of the great feeling that we used to get from analogue was actually the saturation and distortion. So I use distortion a lot.
301: What about analogue distortion?
Nick: Well, I use Decapitator. Decapitator’s great. I also use Radiator. The thing, I think, the good thing that I have is that I have this very, very strong memory and experience of analogue. So I know what I want to hear and I achieve those sounds and those feelings by using various plug-ins to create it.
301: So when you are using plug-ins, you are referencing your hardware experience?
Nick: Yes, in my mind. I’m trying to get back that feeling and I think I managed to achieve it by using various plug-ins. I put things through Amp Farm and Sansamp. The Decapitator is my favourite because you can really vary it a lot. I haven’t used lots of tape simulators like HEAT. I think there are a lot of clever people out there, inventing things within the digital domain now. And I think they’ve got it right. A big round of applause to them because they’ve kind of worked out…. ‘What is it about this analogue thing?’.
For many years, I avoided digital. And then it came – when Pro Tools started being a tool, a very, very sophisticated editing tool, I couldn’t ignore it and I wanted it. So what I ended up doing was recording my backing tracks to tape and my overdubs to Pro Tools. Bear in mind that whenever I work with a band, I always record the whole band together. So let’s say with your average band, you’ve got your bass player, drummer, and two guitar players. So I would do my backing track, i.e. drummer, bass player, and two guitar players all playing at once, playing the song, and then record that onto analogue tape…. that’s 24-track tape. Then I got
it and edited the tape to get the arrangement. Once I was absolutely certain that the arrangement of the song on the tape was brilliant, I would then stripe it with code, and I would then sync it up to Pro Tools and transfer everything into Pro Tools. Then I would continue all my overdubs in Pro Tools. So I’d do all my vocals and vocal comps and guitar takes – and then once I finished, I would sync it up again. When I came to mixing, I would sync up the original 24-track analogue up to Pro Tools and I would mix. So about 50% of what I was mixing was absolutely analogue, analogue, analogue, all original. So the drums, bass, and main guitars were the analogue and all my guitar, keyboards, overdubs, vocal comps, backing vocals, and strings sections would be on digital. I did that for many, many years, probably ten years.
And then about six years ago, I stopped doing that. And the reason for that was when we went to 96kHz. I could hear the difference and it was satisfactory – it was because of two factors.
Pro Tools got better sonically. The A/D converters got better. Prisms suddenly existed and also this whole thing of using Pro Tools A/Ds with a library Clock or Big Ben made a huge massive difference. Suddenly, digital didn’t sound quite as bad as it used to. That’s one factor. The other factor which I think you cannot ignore, is that iTunes suddenly became the main way that people are listening to music. In iTunes, most people were listening to MP3s. So in my mind, I just could not justify the little bit of difference that was now the difference between analogue and digital in ‘good digital’.
On top of that, there’s also the expense of tape, which now costs about $400 a reel. And the tape machine lining up and realigning, and then the copying time – It was just eating up so much studio time. For one album, you had to add almost two weeks of studio time just for tape transfers and rewinding. The other thing that I started realising, is that young bands that were not used to analogue. Suddenly the singer would be in the mood, they’d do a take, they’d do a great take, and they want to do another one. No. With tape, you have to sit there and wait for the tape to rewind. And then the vibe’s gone. So suddenly I was like, “Hang on. I’m weighing up this tiny bit of romantic-ness of tape versus the reality that most people are gonna listen to an MP3 on iTunes.” … it doesn’t add up.
So that’s when I stopped using analogue recording.
Come back soon for the next part in this series, where Nick discusses tape splicing.
In the meantime, you can also read an interview with Nick in the latest issue of Audio Technology.
It has been nearly two years since Apple launched “Mastered For iTunes” and almost as long since Studios 301 started mastering for the format. Over this time, Leon Zervos has mastered more releases for iTunes than most other mastering engineers combined, and as a result has a few thoughts about hi quality audio, good and bad mp3’s, and a bit of nostalgia for how it once was….
To book Leon Zervos for your mastering project, contact Lynley on mastering@studios301.com or 02 9698 5888
The beginning of mp3
When all the downloading started, everyone was making/taking 128 mp3s and as a result, there was almost half a generation that got too used to listening to bad sound. They were accepting that as how music should be listened to. I even remember getting some files for mastering and they’d converted from 128kb mp3 to 44.1kHz wav. You could hear it straight away.
So I think we have to thank Apple for taking the initiative, for effectively saying “No, no, we’re going to shoot for the stars here. We want everything to be as high-res as possible.”
The change in consumer headphones
At the same time that poor quality mp3’s were being used; people were listening to music on tiny little ear buds that were shocking. They weren’t even the slightly better quality ones from Apple we currently have. Now you look in the street and see guys walking around with big headphones – Beats, Sennheiser and many other higher quality brands. It’s taking music, and the listening experience, to another level. So now people are demanding higher standards of audio and people are getting used to it.
The difference between a 128kb mp3’s, 256kb AAC (iTunes) and a hi-res audio file
For a start, the stereo imaging is completely different. The imaging in a high-res file is true, It’s got depth and clarity. A 128 mp3 just sounds horrible.
An iTunes AAC file (at 256kb) is a big step up. I still think a CD at 44.1/16-bit is better – much better. But will the regular guy or girl in the street hear the difference? I don’t know. But in a studio environment, you can hear it straight away. There’s no guesswork, you can pick it.
How we got used to 128kb mp3s.
I think a lot of people don’t know because they’re not in a professional environment like we are, where we can sit down and compare things. I think if they were, they’d go, “Wow! That sounds so much better,” then they’d use that, they’d always demand that. I mean, like I said, we’re always striving for the best.
In the days of vinyl, record companies were cutting discs and they would get test pressings first, they would listen to it as well as the producer, musicians and engineers. If it wasn’t right, they’d re-cut, there would be more pressings, then re-pressings if needed, until it was perfect. There was this safety net in the process and everyone signed off on it when they were happy with the record. Nowadays, probably because of tighter deadlines, this doesn’t happen and there is no safety net. And then it comes out and then it’s down-sampled or converted and it sounds different again.
Apple is now storing files at up to 24/96 on their iTunes servers.
As part of their Mastered For iTunes initiative, Apple receive the files from the label exactly as we mastered them, at up to 24 bit, 96kHz for storage on their servers. These files don’t get sold to the customer (they go through Apple’s codec to convert to AAC), however it is intriguing that they are keeping these files on their systems. Why are they doing this?
Maybe they don’t know themselves yet, perhaps they’re just future proofing. I think keeping everything at 24/96 is the best possible thing to do. In the future, when downloads become quicker and drive space is not an issue, perhaps we will be listening to everything at 96kHz. And that’ll happen, but you probably wouldn’t even need the storage space because you’ll be listening to something that’s getting streamed at 96kHz – which would be perfect.
Referencing mixes at 128kb
I get people occasionally sending me a YouTube link to “make it sound like this”. Streaming music from YouTube and Soundcloud (as opposed to downloading) is usually at 128kb and this is not desirable for me. When the client sends me a link, sometimes I don’t even go and listen to it because I’m just not prepared to reference lo-res audio, as a comparison to what I’m doing here in my studio. At full bandwidth and with the equipment I have – it just doesn’t stack up.
Comparing a 128k stream to a hi-res file is like comparing apples to oranges.
I think it’s really dangerous because, again, it’s going back to people getting used to a bad-sounding audio and thinking that’s how it should be. If they had the high-res file (or even a CD) of the song, they could use that as a reference, because that’s what was done at the final stage and that’s what was approved by the producer/artist/label. Anything else as a reference shouldn’t be used because it’s gone through some kind of data compression and the sound has changed.
I think if you’re going get to the point where you’re mixing, and you’re calling yourself professional, you should be doing it in a professional way. Streaming it on Soundcloud or YouTube is not professional. Buy the CD or find some way to get the best possible high-res file you can get of that song. I couldn’t listen to it streaming at 128kb and use that as the reference when I know there’s something much better out there.
“Mastered for iTunes is a marketing ploy by Apple”
I think, at a professional level, a company that wants to accept files that are only of a certain quality is very good. Let’s face it, Apple are a company, they’re in business to make money. And if this is a sales pitch and they’re making money off it, fine. But the upside for music lovers is that one of the biggest companies in the world is creating awareness of higher audio quality.
Hi resolution masters (24/44 and higher)
If I were the artist, I’d want to have in my possession the best possible master that could be done. And if it’s out there and it’s available at 24-bit, it might entice more people to download and listen to it.
As engineers, we’ve always wanted to better what we do in audio. Through the years, we had quarter-inch 15 IPS tape, then we had quarter-inch 30 IPS, then it was half-inch 30 IPS. Then digital came in and has been greatly improved over the years, particularly with better convertors – always advancing. So I think it’s only natural that the industry should move forward all the time, instead of settling for something that doesn’t sound good.
When cassettes came out, you had the choice of low-noise cassettes, chrome cassettes, metal cassettes, there were different brands, and you could go and get your preferred type. With mp3’s, it’s almost like the music that was coming out a few years ago was coming out on ordinary cassettes and Apple are trying to make everything come out on noiseless metal tape. So if I were an artist, I’d want my music to come out the best way possible.
To book Leon Zervos for your mastering project, contact Lynley on mastering@studios301.com or 02 9698 5888
From the Desk of Steve Smart: Mastering for Vinyl – Part 3
Steve with the Vinyl cutting lathe.
Going back to your time as a vinyl cutting engineer, what was the day-to-day process?
First of all, when the engineer finished mixing, either they or the assistant would put together the many different takes of the mixes onto two reels of tape – for side 1 and side 2 of the LP. They put the gaps the way they wanted them, but there would be discrepancies between the individual tracks – the volume level and the individual sound/tone – which affected the continuity of the album. And that’s where the first mastering engineer truly was a master engineer. He would get the master tape, play the reel through, make some notes, set-up some equalisers and compressors for each individual track and then, with those settings in mind, and in real time, transfer or cut that tape on to a disc by means of a cutting lathe.
Would you change the settings on the mastering gear between songs or would you do a quick patch to other units?
Well, we had the luxury of four equalizers, where two equalizers were used for the operation of each song. One equalizer being for the music that went to the cutter head, the other equaliser being for the music that went to the brains of the lathe. This “brain” was called the preview, because the lathe had to mechanically know what was coming up at the same time as what was going into the groove itself.
So there was one bank of EQ (two units) for one song, and while that song was actually cutting, you’d set up the second bank of EQs. During the crossfade or the gap between songs, you’d simply crossfade between one batch of EQs to the other. Then, while that next song was travelling along, you’d set up the next bank of EQs for the song following.
It was very attention grabbing. You had to set up your EQs and your compressors and you had to also drive the lathe at the same time. Fortunately, everything was on remote control to the central desks so you could keep it all within hand-grabbing distance. But it was quite fast and furious and if anything went horribly wrong, that whole cut just simply went in the bin – it was ruined.
Custom Mastering Room
What would be the success rate for cuts generally?
Well, a good cutting engineer knew exactly what to do – he could play a tape, knew what potential problems may be laying in the music itself, and note the corrections that had to be made. Let’s just say if there was a ballad followed by a big rock track, a cutting engineer would guesstimate how much real estate would be consumed by the various amounts of “energy” in each song. The ballad would take up less room, the rock track requiring a lot more, so you’d plan your consumption of the side of the record to accommodate. If you had, say, 25 minutes per side, you could get away with cutting that at -2dB, or -1dB if you are lucky, depending on what sort of music it was.
But you also did little test cuts of each track just to make sure that it translated to the actual lacquer and played back as you intended, because it was also the slight change of the physical playback of the groove itself that influenced it greatly.
How does the audio content affect the grooves on a record?
If it’s a mono signal, the groove remains at the same depth, but moves from side to side, known as a lateral excursion. If it’s in stereo, and the content of that groove exceeds a certain degree of phase, the groove depth (known as vertical excursion) can change anywhere between 10 to 50 microns. It’s always noted that in record cutting, a groove is half as deep as it appears wide (by physical design). So when you’ve got stereo information in low frequency content, you don’t really have a lot of depth to play with before you actually end up with a groove that’s so small, that it’s smaller than the point of the playback stylus on the turntable. So, that stylus will want to force itself towards the centre of the groove.
Conversely, if you’ve got a groove that’s too deep, then when in the cutting process, it can actually cut so deep that it can go into the aluminium substrate of the lacquer itself. That will completely sever the tip of the ruby stylus, which is very costly.
Essentially, the thing that dictates the depth/width of the groove is the amount of time that the music runs for, versus the song volume levels that you wanted to cut the record at.
CBS DISComputer Lathe
Is there anything to bear in mind with the high frequencies when cutting?
It’s interesting because I think it begins when you are recording an actual track itself. If you recorded a kick drum onto a tape machine at excessive level, it would start to overload, distort and bleed into the other tracks on the multi track tape. Also, there was a very strict level of what you could record a hi-hat at. The medium of tape itself dictated at what level you could record. Interestingly, by the time you push the mix up, you generally find that those things were all in context. Things were, I guess, forced to be where they were.
If the mixing engineer or producer decided that he just wanted the hi-hat a little bit brighter or louder on the day, it was then up to the cutting engineer to decide whether he could get away with that or not. If the high frequencies were too excessive when cut to the lacquer, it would saturate and distort when played back. Also, high frequency grooves on lacquers are very jagged and would physically tear when you separated the metal from the lacquer (during the subsequent plating process).
So you had to, through experience, make an educated assumption of how much you can get away with. On some lathes, particularly the one that I’ve used and (I’ve still got a piece of the equipment from it), there were high frequency limiters installed for the sole purpose of protecting the cutting amps and the cutter head from overloading on high frequency. This is because the high frequencies demand the most amount of electric current from a cutter head. It has to generate – it has to resonate – that stylus at an incredibly high rate for it to carve that high frequency signal into the lacquer.
But, you know, the art of a good cutting engineer was just how much you could get away with.
What other roles were involved in the process?
There was a whole team of people and excellent manufacturing facilities required. I mean you had to have great quality lacquers, a great cutting lathe, a plating department…. And top quality silver, top quality nickel, and great quality vinyl to press records from…. Plus all of the fitters and turners that looked after the pressers and fed the steam lines. If everybody got it right, that whole company could produce a really high quality record. And there were companies, for example, like Deutsche Grammophon who used to be just be renowned for cutting fantastic classical records. They used to have it down pat, you know, they just really knew their stuff. It became an art form and engineers / producers who mixed records sought out specific cutting engineers, because they knew that they could get a really, really good sounding result on to the record at a really good level.
Part of the level thing was in order to cheat the surface noise, which was the biggest drawback of vinyl. It was that increasing surface noise each time you plated it, it just got louder and louder. And each time the dog sat near the record collection, you know, it just got dirtier and dirtier.
What about the vinyl wearing out?
The vinyl wearing over continual playing is an issue, as is the static dust that accumulates on a piece of black plastic like vinyl. They just got worse and worse over time and so, you know, major record companies used to make a killing out of just repressing. I think while I was working at CBS, I had to cut Bat Out of Hell by Meat Loaf more times than I’d care to remember!
301 Neumann HF Limiter
People kept buying it because it kept wearing out?
Well, it kept selling and it also kept wearing out and, you know, you can only get so many records pressed off the metal stampers (that pressed the vinyl) before they physically wear out. They just get blunt, you might say, and the cut sounds distorted and noisy.
You know, with all that said that vinyl records are great, they’re possibly one of the most environmentally unfriendly music carriages of all time. They are a petroleum based extract. The waste products that come from manufacturing a vinyl record are insurmountable. Getting rid of a bad bath of nickel and silver isn’t cheap these days. Apart from that, they’re hardly portable and they’re noisy and obtaining a vinyl cutting lathe, obtaining the nickel and the silver and the processing that goes with it, the presses, it’s no easy avenue to get into. It’s quite expensive accumulating all of that sort of equipment and putting it all back together and having enough work to – supplied to you – to meet your demands.
Once you’ve mastered something for vinyl, what is the process to actually get it onto vinyl?
In our vinyl mastering process, we aim to have the clients totally happy with the sound of that song, and possibly with some information garnished from us, go to a reputable vinyl cutting house.
Once the master leaves 301, the complete process of vinyl pressing is a series of stages. When something is mastered at 301, we supply the file, and the vinyl cutting engineer then uses a digital workstation to play that file back. He can simply lower the cutter head on to the lacquer and cut one side. This is the lacquer – well the record is actually two lacquers – Side 1 and Side 2. Those lacquers are then dipped in to a large chemical bath, which is charged with electricity, called an electrolysis galvanic plating process. The lacquer is dipped into the bath and coated with silver, then with nickel, growing the “plate” on its surface. This plate is then separated from the lacquer and is called a “father” (The lacquer is rendered useless and destroyed). The father is plated again, producing a “mother”, which can be played and checked. The mother is then plated again to produce a “stamper”. This whole process is repeated for the second side, then the two stampers are finally loaded into the pressing machine for bulk manufacturing of the vinyl.
People sometimes shortcut the three step plating process simply by generating a plate straight from the lacquer and putting that into the press. This is most commonly known as DMM cutting (Direct Metal Mastering).
The father and mother plating process is deemed necessary to mass-produce a record into thousands. If you are only doing a 500 run, you can go for the single plating process where you simply grow the metal stamper straight on to lacquer and then bolt that metal stamper into the press and press from that. That saves a lot of money, as it saves time and cuts down on waste.
I’ve noticed some records are heavy and some are light, why is this?
It depends on what sort of press is used. There were three pressing plants in Australia – EMI, Festival and CBS, and they used various methods for pressing (the CBS press where I worked was steam-rammed). You can hold the pressings from different plants up and you can definitely tell the difference between where they were pressed, just by physically looking at them.
Was one better quality than the other?
No, just different. Absolutely just different. Different ways of pressing the same thing. the CBS records were thinner and more flexible. The EMI and Festival records were much heavier.
What about coloured vinyl?
Standard vinyl is pressed using black plastic and the coloured vinyl can be whatever the client orders. When CBS was pressing coloured vinyl, they would have to change the bag of vinyl (that was feeding to the presses) to a particular colour. It would take a few attempts to get the colour to run clean (eliminating any black residue).
I used to like sneaking into the pressing factory when they were doing this, because the first records that were pressed were useless due to the remnants of the black vinyl in there. So, the first twenty or so had streaks of black and you always ended with really cool designs in them. I souvenired a few of those in my time!
To book Steve Smart for your mastering project, click here or contact Lynley on 02 9698 5888 or mastering@studios301.com
To book Sameer Sengupta for a mastering or mixdown session, contact Lynley via mastering@studios301.com or 02 9698 5888.
I have been one of the resident Mastering Engineers here at Studios 301 for almost 3 years. You can usually find me in MS2 where I specialise in mastering electronic music. Alongside mastering, I also make music, producing artists, and mixdown albums.
Today, I’ve decided to share some simple tricks I use when mixing drums.
[1] Snappy snares.
I use the Waves SSL Channel a lot when I online mixing drums – I discovered I can bring a really nice snap to things like snares, kicks, rim shots or sometimes even a stabby bass line, just by driving the input of the channel strip really hard. I wind up the input gain knob till the signal is well into the red… then bring down the fader so that the output signal isn’t clipping at all. Leave it in ‘Analog’ mode, and apply a little EQ as needed, and leave compression off. The result is a nicely saturated snare which is full bodied, yet snappy.
[2] Drum buss saturation
I use the PSP Vintage Warmer 2 in almost every mix. If you find that your drums are sounding a little ‘thin’ and lacking weight, instead of trying to layer additional drums on top, I suggest applying the PSP-VW2 across the entire drum buss. Start
off by winding the MIX all the way to 0%. Increase the DRIVE to around +4 to +10 depending on how thick you really it to sound… and then gently wind the MIX knob up till you can hear the drums thicken up, but can still hear the transients from the dry signal. Adjust the DRIVE to a point where the needles are kissing the Red occasionally, but not constantly clipping. Set the MIX amount till you like what you hear. Like parallel compression, this is parallel saturation – works a treat!
Another trick that I love is using the KNEE. If I find the drums are jumping around a little too much, instead of using a compressor, I’ll leave the DRIVE at zero, but dial in a little KNEE… this acts like a compressor, and will instantly ‘lock’ the sound from jumping around too much – but has a nice sound to it. Then adjust the SPEED knob to tweak the pumping. This works really well too for vocals.
If I’m trying to get that Chemical Brothers WALL OF BREAKBEATS sound… I will wind up the DRIVE knob significantly too, then just play with the MIX knob until you like what you hear.
Make sure you run it in FAT and MULTI mode… and I prefer to leave the Brickwall limiter OFF.
[3] EQ’ing Kicks
The Kick of any dance track is the single most important sound to ‘get right’ because the whole basis and signature of most dance tracks will stem from how the sounds sounds. Once you’ve chosen the kick and bass sounds… you may find later on, that you’ve lost some definition between the kick & bass… to get this back, i’ll apply some very narrow band EQ to the kick. The kick’s unique character will come from somewhere between 100-300Hz. While the bottom end push of the kick will be much lower, its this ‘wood’ area that give it character, but this can also clash with what your bassline is doing.
So, what I do is solo the Kick & Bass and sweep through the Kick with EQ until I find that magical point where the bassline instantly breathes a little more. Basically, I’m taking out a drastic but super narrow point in the kick that clashes with the bassline… this in a sense carves out a little niche in the kick to accommodate the bass sound. Its always better to solve a problem with subtractive EQ rather than additive, and this technique has solved many problems for me.
To book Sameer Sengupta for a mastering or mixdown session, contact Lynley via mastering@studios301.com or 02 9698 5888.
This is the 2nd part continuing on from last week’s post, where we sat down with Senior Mastering Engineer, Steve Smart to chat about his experiences working with Vinyl.
To book Steve Smart for your mastering project, click here or contact Lynley on 02 9698 5888 or mastering@studios301.com
What should be considered during recording and mixing to get the best out of the Vinyl release?
It all starts in the recording and the mixing process to always have in mind, what you can and what you can’t get away with. Specifically if you’re going to do it for vinyl, you have to seriously keep in mind the restrictions that the music will be placed on through the process of being physically cut to vinyl. So you know, stereo bass lines are not gonna cut it. If you’re doing dance music, you can’t have that hi-hat as loud as that kick drum. It’s just not mechanically or technically possible to be able to get away with that on vinyl.
If you don’t intend for it to be released on vinyl at all, you can do whatever you want really, as long as in your opinion you think that sounds good. It’s not really fair for everyone to say, well, “that’s not good because I think so”. If it’s your music and that’s how you wanted it to sound, then so be it. That’s the way it comes out.
Tell us about some interesting cuts that you did back at CBS
We had a lot of fun doing some really interesting records. I remember one we did, Severed Heads “Petrol”, where Tom Ellard (from Severed Heads) really wanted to experiment with the 7” format. We tinkered with the Neumann cutting lathe, so that when we cut the single it wouldn’t cut a run-out groove. We got the lathe to actually stop and then we lifted the cutter head and dropped 5 or 6 concentric little grooves in the space where the run out groove usually goes – then we put loops in there so that you could play the loop and have it play over and over again. The song would end forever on a loop, and then if you actually physically lifted it off, there would be 4 or 5 little loops there after that. I wish I still had a copy of it…
Tom was always into experimenting, he was fascinated by it all. Someone else that was also fun to work with was an engineer called Nick Mainsbridge. We worked on a band in the mid 80’s called Tall Tales and True. We cut one side as a 12” 45, so that basically, it was a 12” inch single. But on the B-Side were another 5 tracks, cut at 12” 33. It was a 12” single, but on the other side was half of an album as well.
You mentioned something about Blue Monday a while back…
One of the first 12” singles that I ever cut was “Blue Monday” by New Order. It was a luxury to have that much real estate to put one song on. It was just out of this world, the whole single format was completely blown out of the water. It was something like 7 minutes, at the time it was completely unheard of. But clubs were on the ever increase and DJ’s just wanted extra long versions of a song so they could play with it. To this date, I think that song is the biggest selling 12” single of all time. I think it started to revolutionise the way that record companies saw the marketing of the single as such. You weren’t necessarily stuck to the constraints of the 7” single’s purpose, for sticking in jukeboxes, they were on the decline. It was basically radio stations and clubs that were their new market, so all the record companies were all requesting extended versions done as 12” singles.
Steve Smart is one of the few mastering engineers in Australia who started his career as a Vinyl Cutting Engineer (back at CBS records in the 1980’s). Based on his experience of seeing Vinyl come, go, and come back again, we asked him a few questions about Mastering for the format in the 21st Century.
This is the first of a three part series:
From the Desk of Steve Smart: Mastering for Vinyl – Part 1
To book Steve Smart for your mastering project, click here or contact Lynley on 02 9698 5888 or mastering@studios301.com
Vinyl vs CD vs Hi-Res files
The difference between vinyl and CD in the very beginning was that the CD was deemed to be indestructible and you didn’t have the surface noise of vinyl, you didn’t have that crackle. They were immune to dust because they were read by a laser and so all of the – you know the comparisons – that’s why I think they were welcomed so readily ‘cause you could (sort of) be rough with them and abuse them a little bit. Also in the early stages, the dynamic range was far superior to vinyl and the frequency response was restricted, but also far superior to vinyl. It had a frequency of 20 Hz to 20 kHz. With Vinyl, you couldn’t really get away with too much low frequency and you couldn’t get away with too much mid frequency and so a lot of vinyl records don’t have a lot of bottom end.
Is there a general frequency range that vinyl can reproduce?
Well you can get away with 20Hz to 20kHz on vinyl, but the mechanical and physical constraints of cutting a 20 Hz frequency, is such a violent excursion of the groove on the record. 20 Hz on a groove produces all manner of distortion factors, just by the tracing of the groove and the tracing of the needle itself. Same for that fact with high frequencies. So if you brought the frequency range in a little bit, you could get away with a really nice sounding cut. It’s said that in vinyl, all you really had to do is get the bottom end right and everything else would fall into place.
But in CDs, all you really got to do is get the top end right and everything else will fall into place.
Is that because there is so much more high frequency content available on the CD medium?
Yeah, a lot of people say that vinyl sounds warmer. You know, what is warm? I guess it’s a colourful explanation of the way something sounds. So in warmth, I’d say that there aren’t exceptionally high frequencies just due to the limitations of the vinyl medium itself. There’s more presence, and I think the mid frequencies are catered to a little bit better. Because most of the information is in the mid frequency area anyway, a lot of cutting engineers paid particular attention to the mid frequencies just to get them right so that it sounded like a really good, level cut.
The Loudness War
I think what’s happened is that CDs got out of control. Maybe it is due to the fact that the artist/label demands it to be louder than everybody else’s master. The whole loudness war started with the 7” single and in cafés and jukeboxes because every artist wanted their 7” single to be played back in the café louder than the other records. That’s the first loudness war. But the loudness of a record or a loudness of a CD doesn’t really matter on radio or television because they have multiband limiters to take it to a certain level anyway during broadcast. And so for that fact is iTunes, it stops at a certain level. If it’s too loud, it gets turned it down. If it’s too quiet, it get turned it up.
You mean the iTunes player?
Yes, iTunes playback. The whole loudness war got really out of hand, especially when there’s only a certain amount of level you can put on to a digital device, after that it starts clipping and goes into red distortion. Digital distortion isn’t as nice as analogue distortion. It tends to end up just being a crackly annoying sound. Analogue distortion can take on some sort of interesting facets where it becomes quite pleasing. So with everyone wanting their CD louder than the next guy’s, someone ended up writing software and implementing that into devices at the hardware level, which is called “Look-Forward Limiting“. This is where the limiter basically looks at the transient’s absolute peak, or the most significant bit of the program itself, and chops it off. It just squares it into a square wave, instead of a nice sine wave.
Hence the distortion?
Hence the clipping distortion. CDs just got louder and louder and louder and of course the one thing that really started to suffer was the music itself. The dynamic range started to decrease significantly. That nice transient deluxe kind of quality of the whole high frequencies where the most energy is, started to just simply get squared off.
So CDs, I guess, now started to sound more and more and more horrible and horrible…. and horrible.
You mean harsh?
Harsh, hard, abrasive and very confronting. The basic dynamic in digital is on and off. It’s a word. It’s a 0 or a 1. The basic dynamic in analogue is loud or soft. So there’s a big difference there between the two in a way that you’re listening to them. Either your ear is switching on or off or your ear is detecting loud and soft. It goes against the grain for the brain to switch on and off. It can slowly switch on and slowly switch off.
But I think that’s what’s encouraged this resurgence in vinyl music, apart from just the pure fascination of it, is where basically you do have limitations which you’re stuck to – if you make a record too loud, it physically won’t playback. The grooves will make contact with each other and cause skipping and jumping so that record is basically a failure. The way to make a record sound loud is in sound, not just its pure level.
You mean generally, or on vinyl?
Particularly on vinyl and, I guess in generally, you can apply that as well. You can make a record sound loud, without it actually being loud, just by the choice of frequencies that you apply to it. Commonly, if you apply upper mids to a piece of music, it’ll sound louder. It’s just the way the human ear works. So you can only go to a certain level with vinyl records and then you physically can’t go any louder. Vinyl records are pretty much generally within a couple of dB, all very much the same level. And the beauty of a good cut and a bad cut is in the way it sounds, not actually it’s levels.
But unfortunately what’s going on with CDs of late has now been misconstrued. What is a good CD, is it loud or soft? Because it’s irrelevant if it sounds good or not. It’s whether it’s loud or not. I’ve been asked as a mastering engineer to just smash it. And, as a mastering engineer, that’s almost like destroying your work.
Limiting
Steve Smart cutting a record at CBS in the 1980s
You do what you’re instructed to do by the client, within your recommendations. But then if they bring out a CD that’s had look-forward limiting applied in the recording process and look-forward limiting applied in the online mixing process and look-forward limiting applied to the mastering process, versus something that hasn’t had any compression or limiting at all, it’s almost impossible to match that without destroying the pure sonic integrity of the music itself.
You know, there’s a lot of CDs out there that I’ve bought because I like the music, but I don’t play very often.
Because they’re too loud?
Well they’ve been, I guess, destroyed by this ever increasing need to have a loud CD. I mean, I can to listen to it but I can’t exactly be too close to the speakers. That’s probably being a little too fussy, but I’ve got to pretty much ”put the stereo on and go in the backyard” because it’s just too annoying to be too close to the speakers.
But you know, when you get a vinyl record, you are almost drawn to the speakers. You’re invited in to what’s being played for you.
So all things being equal, does vinyl sound better than CD?
I think vinyl does sound in some ways better than CD because of the limitations that the medium applies on the music. But CDs can – and do – sound better than vinyl if they are treated technically properly.
Admittedly, I’m not a big fan of the 44 kHz / 16-bit sound. I don’t really think, that in its vocabulary, it truly understands harmonics. I’ve recorded pianos on analogue and I’ve recorded pianos on digital. And the analogue recording sounds like a piano. The digital recording sounds like a keyboard.
It’s the same microphone, at the same level – I remember reading somewhere, some bizarre misconception that they didn’t really want the public to have any more capability of digital recording because it was getting far too close to the realms of military spec!
Really?
So they restricted it – Well, apart from the obvious case that you can’t really fit that much data on a one-sided 700MB-ish disc, it can only be done either at the sacrifice of the sampling frequency or at the sacrifice of the bit depth.
So there was an equal trade-off between 44 kHz, which was deemed acceptable and 16-bit, which was deemed acceptable for digital.
So what about 24/96 or any variation thereof, as opposed to vinyl?
I much prefer the sound of 88 kHz / 24-bit. I think that just seems to sound a little bit better than 96 kHz / 24-bit. To me anyway, sitting in here, I just find that there’s a little bit more subtlety about the recording itself at the 88 kHz frequency.
Why is that?
I’m not quite sure whether what I’m hearing, but there does tend to be a coldness about the 192 and 96 kHz sampling frequencies. Whether it’s paying too much attention to the real sound and not masking some details of it, and you’re actually hearing too much information, or – I’m just not sure, but 88 kHz / 24-bit is capable of recording and playing back natural sounding instruments like trumpets, and particularly wind instruments, very well. You end up hearing a lot of that natural distortion and intermodulation that you get from trumpets and trombones.
In the harmonics?
Absolutely.
So analogue doesn’t necessarily sound better than digital?
I think that, you know, it’s a personal thing. When you’re listening to vinyl as versus CD, vinyl has more inherent side effects to the music than the CD. If the digital information is properly recorded and properly mastered and played back with a much more musical and sympathetic approach to doing the job, rather than actually just flippantly slamming it down, CDs can sound better than vinyl. In fact, they do. But, you know, it’s just simply the constraints of the vinyl medium that prevent you from overdoing it, in which case, you know, there’s quite a lot of CDs out there that are overdone.
As in there’s too much room for abuse with what you can do with it?
Absolutely. There’s just far too much room for error. There is no room for error in vinyl, either it’s a good sounding record or it’s shit. And it’s quite clear and obvious. If there is a problem, physically it will not playback correctly and therefore it probably won’t get through quality control. But who’s to say what’s deemed acceptable in the days of CD mastering. There’s very little quality control. Well, [they’re] certainly not played and checked by someone when the CDs are being pressed.
Is that why we listen to our masters in their entirety before we send them out?
That’s correct.
However….
In saying that, I think that CDs can sound very much like we want them to sound. Warmer, much more in characteristic with, the sound that you get from a vinyl record. A mastering engineer who has actually cut records for a long period of time and who understands the process and has the right equipment, whether that equipment be analogue or digital, can master a record sensibly and not make it harsh and un-wanting.
Because of their experience more so than anything else?
Yes, experience.
When you’re mastering nowadays for vinyl as opposed to CD, are you taking a different approach to each master?
Yes, definitely. There’s a requirement of the way people want their stuff to sound as far a CD is concerned. And then there’s the complete no-go zone for mastering it for vinyl, where you just can’t get away with that sort of stuff. So, the difference between mastering specifically for vinyl and CD is that you have to pay very strict attention to the low frequencies. You have to whittle out all of that dangerous overly wide stereo low frequencies and you have to pay serious attention to the high frequency transients and make sure that they’re not too fast or not too abrasive or don’t contain too many extraneous unwanted high frequencies. So you, musically I suppose, smooth it over a bit and make it a little bit softer. There’s also no need whatsoever to apply any of the digital gain structuring, such as the look-forward limiting to turn it up because it’s completely useless, because there’s only a certain level you can cut that vinyl record out at, which is dictated by its duration. So then comes the artistic and loving application of compression. Whether that be analogue or digital, whichever you choose. But in good old school compression and good old fashioned limiting, it makes up this lovely musical piece of mastering. But I tend to utilise the approach of mastering for vinyl, and mastering for CD, in everything I do.
Either it sounds right or it sounds harsh and brittle. And depending on the original source recording, unfortunately some of the recordings you get aren’t really done to their best possible advantage, but you get what you’re given to work with and you try and bring the best out of that as you possibly can, with the equipment you’ve got.
When you’re mastering for CD, you’re pretty much hearing in the studio how the CD is gonna end up, right?
Very much. I mean there’s not gonna be much difference between what you’re hearing in this studio and what you’re hearing at home. CD replication and duplication is so good these days that what you give is what you get.
How about vinyl?
With vinyl, we try and make the assumption with garnered knowledge as to what’s necessary to get that song onto a piece of plastic and playing back the best it possibly can.
Is there a bit of imagination as to how ‘what you do now’ affects the final Vinyl pressing?
CBS vinyl automatic presses (1968-1991)
There is a little bit of imagination, some knowledge that you’ve gained from having done it before. But it’s also good to know exactly where you’re sending it to be cut. If you’ve already got that place in mind and you’re fully aware of their capabilities and the equipment that they use, you can pretty much guarantee that what you send them, you’ll get back. But that can’t always be the situation, particularly if you don’t have control over where it is being pressed.
One of the most important aspects of mixing a vocal and getting it to sit in your mix is the amount and type of reverb you apply to it. Reverb is critical to create depth and space around your vocal. A favourite technique of mine for a lead vocal (especially in pop music or hip hop) is to use 2 reverbs, where the vocal needs to be way up front but still sound connected to the rest of the mix.
First up we want to create a mono aux send and place a clean and modern sounding reverb, in MONO. My favourites for this are Waves RVerb, UAD Dreamverb,
Valhalla Room or the old faithful D-Verb. You want to have this panned directly in-line your vocal (9 times out of 10 this is going to be dead centre). Set your reverb up with a short pre-delay 2-3ms on a small room setting with a short time setting that decays away nicely with your vocal. When you turn up your Aux send, you should hear something between a slapback and a room sound. The idea with this reverb is, to actually bring the vocal forward in the online mix, an effect that is created by the short pre-delay. If you walk towards a wall talking/singing you will notice that when you get really close to the wall there is a noticeable short slap. By creating this reverb with a short pre-delay, we create a feeling of standing right in front of the vocalist. It is important that this reverb is in mono as we don’t want it to spread the vocal out at all in our stereo field. One plug-in worth mentioning at this point is the UAD Ocean Way; it is capable of this effect with amazing clarity and can really add “that” sound to your vocal – it’s expensive but totally worth it!
For the second reverb we want to create a separate STEREO send, and place a vintage style plate (or spring). I like to use the UAD EMT 140 but the Valhalla Vintage is cool as well. The setting can be a little less precise here with basically a long plate verb that fits your mix in terms of time and tone. The only key setting is a long pre-delay 30-50ms. You want to set the level of this verb to just where it starts to disappear in the mix, although how much you add will depend on the style of your track, i.e. more for a ballad, less for a rap. This will help your vocal sit back and blend the rest of the elements. You can also send other parts of your mix like, pads, rhythm guitar or drum overheads to this stereo verb, which will further gel the vocal with the other elements by putting them in the same “space”.
If you use this technique and tweak it to your mix you will end up with a vocalist that sounds like they are standing right in front of your face in a large space. Giving you that in your face sound, without appearing separate to the rest of your track.
[Jack Prest is an In-house Producer/Engineer at Studios 301]
Hi, my name is Harvey O’Sullivan and I’m the Mastering Assistant here at Studios 301.
The nature of 301 is very dynamic and being an assistant requires a “Jack-of-all-trades” attitude. My responsibilities cover the daily maintenance of our 3 dedicated Mastering rooms, as well as preparing production masters.
A typical day for me could be breaking out the Studer to transfer some 1/4 inch tapes, replacing a broken woofer driver in one of our monitors or helping our workshop technician, Steve Crane, test modifications to our custom built AES digital signal router, the DES. Every day has its own set of tasks, be it scheduled or unexpected.
With so many projects being worked on by our mastering engineers, on multiple computers, we heavily on our network to power the backup system, nicknamed ‘Captain Tom’. This means ensuring everything is always in sync and constantly backed up across the entire complex.
That said, a lot of the Mastering Assistant’s job is, quite frankly, plugging stuff in, and testing if stuff works. It certainly helps to have a good understanding of technology and knowing how to troubleshoot on your feet.
Here an example of the ever-expanding album of “photos I take at work”:
The core of my role however, is making up Production Masters. The majority of masters end up as one of two formats: a DDP or PMCD.
A DDP is a file format that is sent off to CD manufacturing plants to press. A PMCD is a standard audio CD that has been burnt under special conditions to avoid any errors during the burning process. Its a physical object that operates as the master disc.
DDPs offer a number of advantages over the PMCD format in that they are simply a file format, which can be stored, backed up and sent digitally. It’s a specialised format requiring special software to read and playback. It’s at this point I will also enter additional track information data such as CD-TEXT and ISRC codes (serial numbers for music files) into the DDP.
PMCDs have to be treated with care, though they do come with a reference audio CD for listening to. You wouldn’t want to be chucking your PMCD in the car stereo.
Before sending these to the client, I’ll listen over the entire project, whether it’s a single, an EP or a full album; listening for any small glitch that might have snuck its way through. This requires a keen ear for detail and a great deal of concentration. This task is the absolute last step in the mastering process and is a deadly crucial one – because failure here could potentially result in an audible glitch being present on thousands of CD that have just been manufactured at great expense!
At the end of the day, what I love is getting to work with music every day and being surrounded by creative and talented people.
[Harvey O’Sullivan has been the Mastering Assistant at Studios 301 since January 2013]
SSL and Neve are the two most recognised names in professional mixing console history. For decades, engineers and producers have debated which sounds better, which is more versatile, and which delivers the best results. The truth is that both are exceptional, but they are exceptional in different ways.
At Studios 301, our engineers have spent years working on both SSL and Neve consoles across thousands of sessions. Here is how the two flagships actually compare, from the engineers who know them best.
The Sound of SSL
SSL (Solid State Logic) consoles are known for their clarity, precision, and bandwidth. The SSL sound is often described as “clean” or “transparent,” with a wide open frequency response that allows every element of a mix to occupy its own space.
Key characteristics of the SSL sound:
Wide bandwidth. SSL channel strips handle the full frequency spectrum with minimal colouration, giving the engineer a neutral starting point. This makes SSL consoles particularly well suited to mixing, where the goal is to balance many sources without adding unwanted colour.
Defined low end. The bass response on an SSL tends to be tight and controlled rather than warm or rounded. This is an advantage in genres where low-end precision matters, such as pop, hip-hop, and electronic music.
The “SSL edge.” Many engineers describe a subtle brightness or presence in the SSL signal path. It is not harsh, but it adds a sense of definition and forward energy to a mix.
As Studios 301 mastering engineer Leon Zervos notes, the SSL sound is “less coloured” than the Neve, but it has a certain “edge” that gives mixes forward momentum.
The Sound of Neve
Neve consoles are known for their warmth, harmonic richness, and a distinctive “musical” quality that engineers often describe as three-dimensional. Where SSL aims for transparency, Neve adds colour, and many engineers consider that colour to be one of the most desirable sounds in recording.
Key characteristics of the Neve sound:
Fast transient response. Despite the warmth, Neve preamps have a very fast slew rate, meaning they capture transients openly and accurately. Engineer Mitch Kenny, who has worked extensively at Studios 301, points out that this makes Neve preamps particularly effective for tracking, where capturing the detail and energy of a live performance is critical.
Warmth and thickness. The Neve signal path introduces subtle harmonic saturation, particularly in the low mids, which gives recordings a sense of depth and weight. Leon Zervos describes the Neve 88R’s sound as “warm and thick, with a nice element of presence when the EQ is enabled.”
Transformer character. Neve microphone preamps use input transformers, which shape the signal in a way that adds musical complexity. This is a significant factor in the “Neve sound” that engineers and producers value so highly.
How They Compare: Recording vs Mixing
One of the most consistent observations from engineers who have worked extensively on both is that each console has a natural strength:
Neve for recording. The combination of transformer-based preamps, harmonic richness, and fast transient response makes Neve consoles ideal for tracking. Vocals, drums, strings, and acoustic instruments all benefit from the depth and character that the Neve signal path introduces.
SSL for mixing. The SSL’s clean signal path, wide bandwidth, and more forgiving dynamics processing make it an excellent mixing environment. When you are working with 40 or more tracks simultaneously, the SSL’s neutrality allows more to “fit” in the mix without elements fighting for space.
Engineer Jono Baker once ran the same session through both a Neve and an SSL. His conclusion: the SSL preamps sounded “muddier” by comparison for recording, while the Neve preamps were “cleaner, more detailed, and better suited to recordings where the sound needs to be as open as possible.” This was particularly evident on orchestral and acoustic material.
This is why, as producer Ivan Gough once put it, the conventional wisdom is: “Track on Neve, mix on SSL.” It is a generalisation, but it reflects the natural strengths of each platform.
SSL vs Neve: The Engineering Differences
Beyond the subjective listening experience, there are concrete engineering differences between the two console families:
Feature
SSL (e.g. 9000 series)
Neve (e.g. 88 series)
Mic preamp design
Electronically balanced, no transformer
Transformer-coupled input
Signal path character
Clean, transparent
Coloured, harmonically rich
EQ voicing
Precise, surgical
Musical, broad strokes
Dynamics section
VCA-based (punchy, aggressive)
Diode-bridge or VCA (varies by model)
Automation
Intuitive, industry-standard
Sophisticated but complex
Best suited for
Mixing, post-production
Tracking, orchestral recording
It is worth noting that the Neve sound varies significantly across different eras and models. A vintage Neve from the 1970s sounds quite different from a modern Neve 88R, and there have been several models in between with substantially different designs. In the SSL camp, the evolution from E-series to G-series to K-series has been more gradual, with the core SSL character remaining more consistent across generations.
We also asked some friends out there on their thoughts:
“Tracking on a Neve is nice and creative, SSL for mixing. Having spent many years working with Spike Stent on his G-Series with non-linear summing, it’s a revelation!”
Lee Groves, Producer/Mix Engineer
SSL vs Neve in Plugin Form
For many producers and engineers today, the SSL vs Neve question extends beyond hardware. The sonic characteristics of both console families have been meticulously modelled as software plugins, making their sound accessible to anyone working in a DAW.
Notable SSL plugin emulations:
Waves SSL E-Channel and G-Channel (channel strip)
UAD SSL 4000 E and G series
Brainworx bx_console SSL 4000 E and G
Plugin Alliance SSL Native channel strips
Notable Neve plugin emulations:
UAD Neve 1073 Preamp and EQ
Waves Scheps 73 and V-Series
Brainworx bx_console Neve 88RS
Plugin Alliance Lindell Audio 80 Series
These plugins capture the tonal characteristics of their hardware counterparts with impressive accuracy. While the experience of mixing through a physical console involves more than just the signal path (the tactile feedback, the summing behaviour, the room), plugin emulations give producers a reliable way to access the SSL or Neve “flavour” within a digital workflow.
Many professional studios, including Studios 301, use a hybrid approach that combines analog hardware with digital tools. The plugins serve as creative shaping tools in the mix, while analog outboard processing and monitoring chains provide the depth and dimension that hardware delivers.
Whether you are working with hardware or plugins, the goal is the same: finding the tonal character that serves the music. If you would like our engineers to bring that character to your recordings, explore our online mixing service or learn more about what mastering involves.
Which Console Is Right for Your Music: SSL or Neve?
The SSL vs Neve choice is ultimately about what serves the music. Here are some practical guidelines:
Consider SSL or SSL-style processing if:
You are mixing dense, multi-track productions (pop, hip-hop, electronic)
You want a clean, precise foundation that lets every element sit clearly
Your mix needs tight, controlled low end
You prefer to shape the sound surgically with EQ and compression
Consider Neve or Neve-style processing if:
You are recording live instruments (drums, strings, vocals, acoustic guitars)
You want warmth, depth, and harmonic richness in your source recordings
Your production style values character and texture over clinical precision
You are working with sparser arrangements where tonal quality is front and centre
Of course, many records use both. It is common for an album to be tracked through Neve preamps for the warmth and detail they bring to the recording, then mixed on an SSL (or with SSL-modelled processing) for the clarity and headroom the mix stage requires.
Frequently Asked Questions
What is the main difference between SSL and Neve consoles? SSL consoles are known for clarity, precision, and a transparent signal path that is well suited to mixing. Neve consoles are known for warmth, harmonic richness, and transformer-coloured preamps that excel at recording. Many engineers describe the difference as “clean vs coloured.”
Which is better for recording vocals, SSL or Neve? Most engineers prefer Neve preamps for vocal recording because of the warmth and harmonic character they add. The transformer-coupled input stage gives vocals a sense of depth and presence that many listeners find immediately appealing. That said, some engineers prefer the clarity of an SSL preamp for certain vocal styles.
Can I get the SSL or Neve sound with plugins? Yes. Both SSL and Neve channel strips have been modelled as high-quality plugins by companies including Universal Audio, Waves, Brainworx, and Plugin Alliance. While plugins do not replicate the full experience of mixing on a physical console, they capture the tonal characteristics with impressive accuracy.
Is SSL or Neve better for mixing? SSL consoles have been the industry standard for mixing for decades. Their clean signal path, wide bandwidth, and punchy VCA compression make them ideal for balancing complex mixes. Neve consoles can also be used for mixing, but their stronger tonal character means the engineer needs to account for the colour the console introduces.
Why are SSL and Neve consoles so expensive? Large-format analog consoles represent decades of engineering refinement, use premium components, and are built to professional broadcast and studio standards. A new SSL or Neve console can cost hundreds of thousands of dollars, which is why they are found primarily in major commercial studios and why plugin emulations have become such a popular alternative.
Work with Studios 301
Whether you are looking for professional online mastering with engineers like Leon Zervos and Steve Smart, online mixing, or want to discuss a recording session at our Surry Hills studio, our team brings decades of experience across every genre and format.
Now this one isn’t exactly my tip, I get this one from watching Pensado’s Place, but it’s great so I wanted to share. Basically it’s a way to get that uber brick wall L1 limiting, without getting all the distortion that this plug-in can create.
Insert an instance of the L1 on your channel and bring the threshold/out ceiling down till you just start to see the smallest amount of gain reduction. Then push the out ceiling up to between -0.5dB & -1dB. Then tweak the release time to suit your sound source.
Finally, copy this L1 instance two or three times in serial, and there you go.
Epic brick wall, minimal distortion!
Jack Prest is an In-house Producer/Engineer at Studios 301
This is one of my favourite distortion units and its amazingly cheap (get it here http://www.dadalife.com/sausage-fattener-plugin/). It’s great for creating super gnarly crunched up distortions, but one of my favourite things to do with this plug-in is to use it on the master bus, or even in mastering itself.
If you have a mix that is overall a little bit dull, stick this little bad boy over the stereo mix leaving the Colour at 0 – then bring the Fatness up to between 1-4%. This will had some extra harmonic content giving your track life without noticeably changing the tone of your mix.
Something to be aware of – the gain indicator is actually for the INPUT Signal level into the plug-in. If it’s going red, it means you are digitally distorting the plug-in’s input, which is (generally) a bad idea, so back it off till it’s not clipping.
Jack Prest is an Inhouse Producer/Engineer at Studios 301.
Here’s a little trick I found the other day with one of my favourite swiss army knife compressors, the Waves C1. It’s especially good for snare drums and toms. If you find your drums are a little bit too snappy, especially with a really hard stick sound, this setting can work a treat to control that snap while retaining the drum sound’s dynamics.
First, you want to set the attack and release settings as fast as possible (one of the best features of this compressor is the wide scope for adjusting attack and release times), then crank up the ratio to at least 30:1 leaving the threshold and the makeup gain at 0. If you feel the need you can play with the ratio and release time, but pretty much it’s a set and forget.
Jack Prest is an Inhouse Producer/Engineer at Studios 301

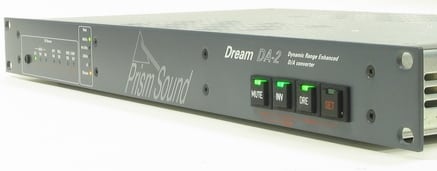
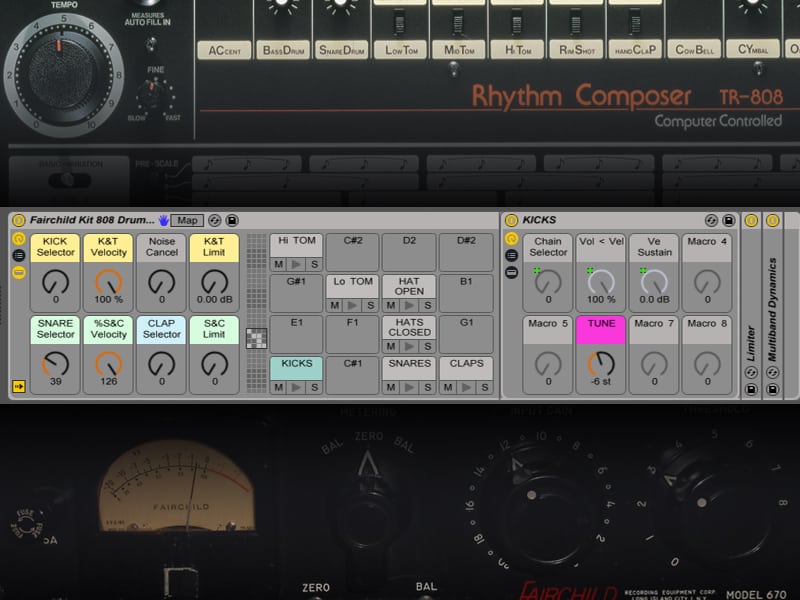
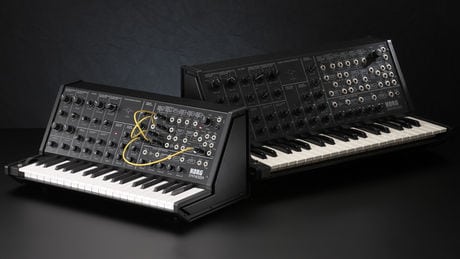
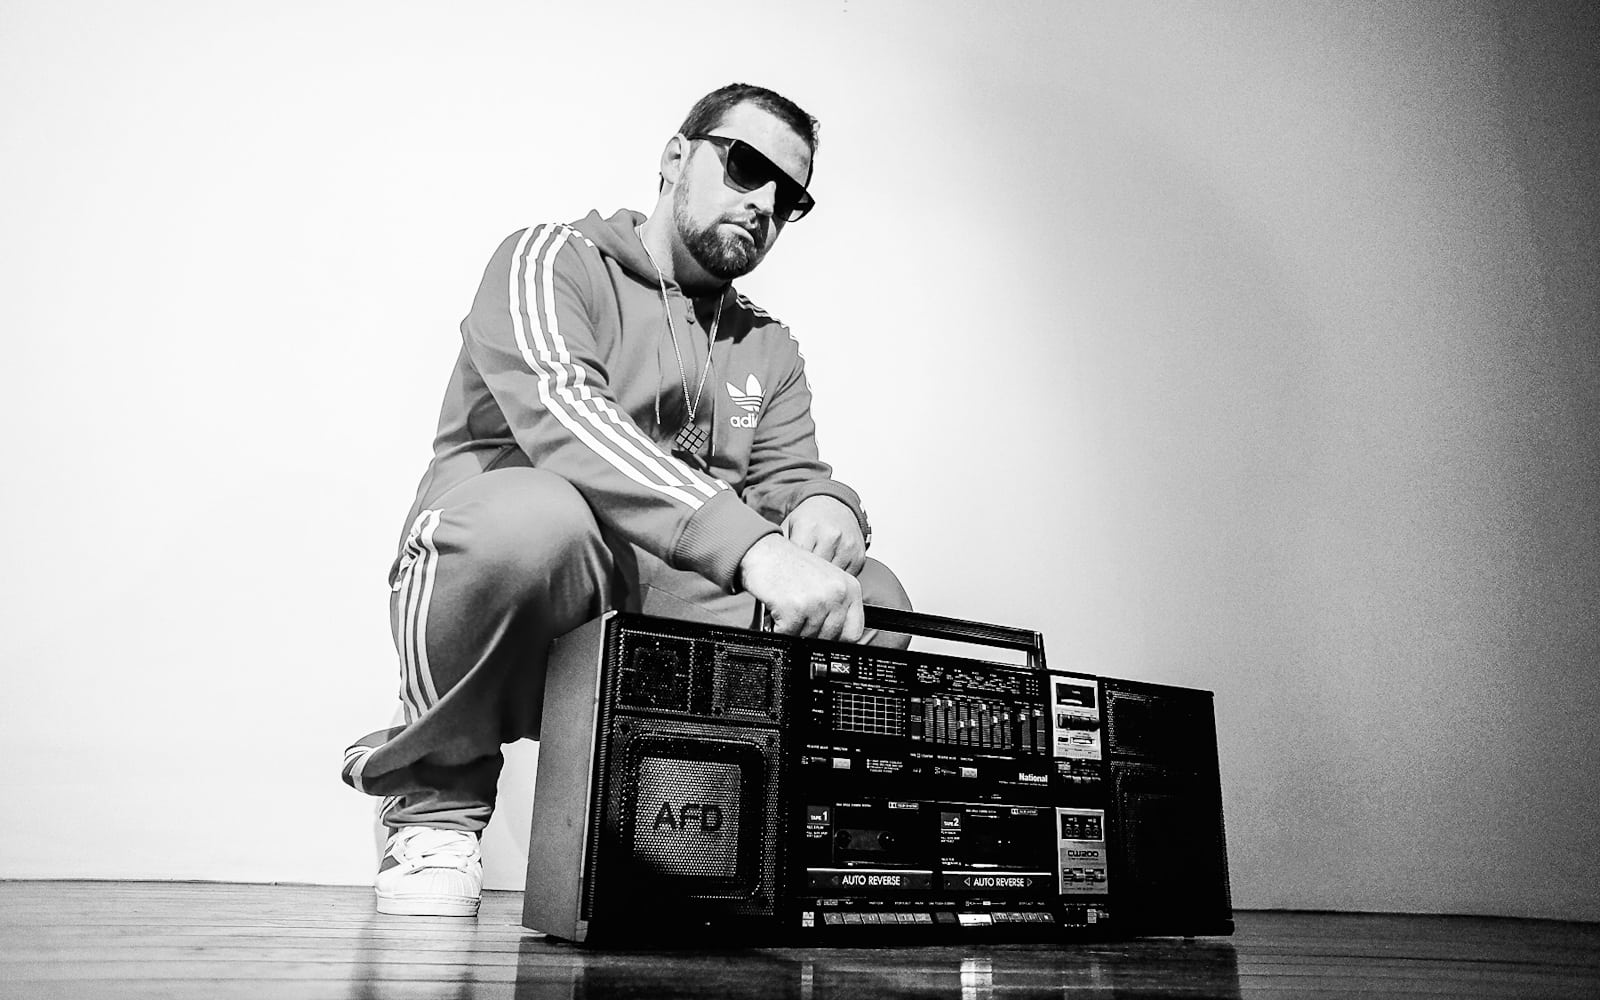

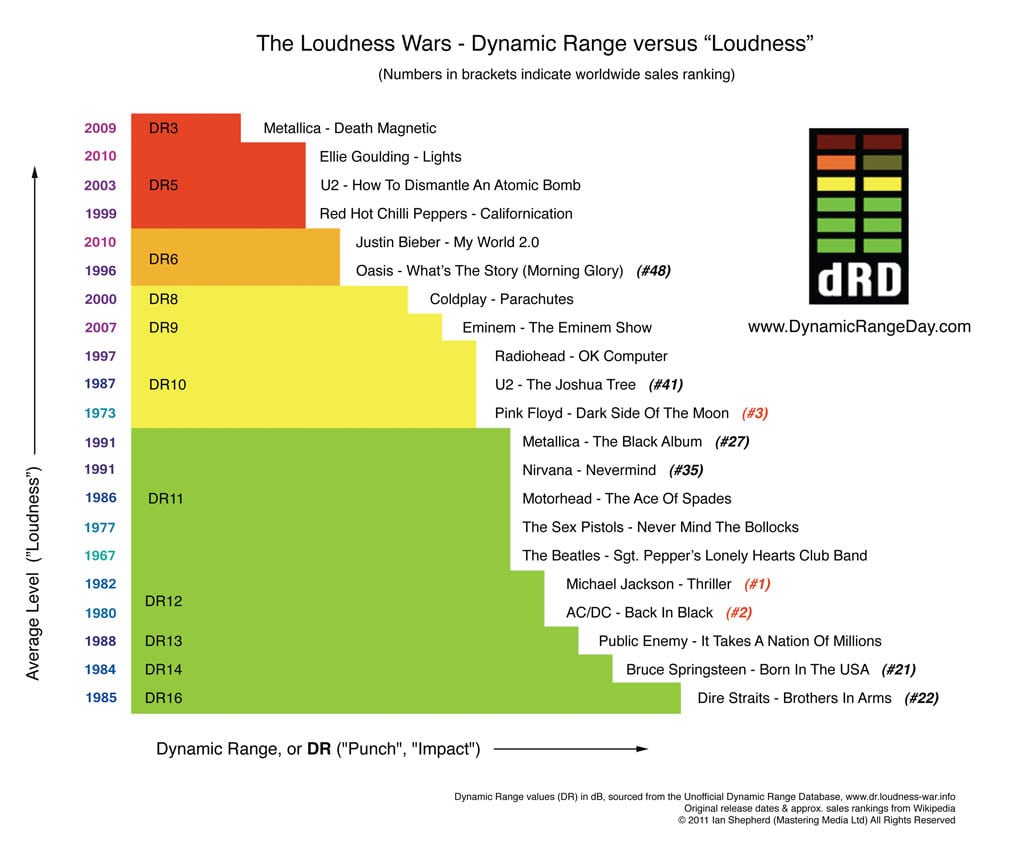
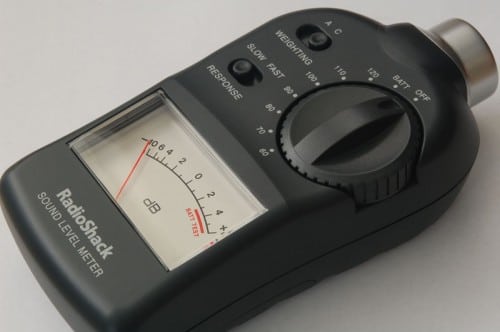
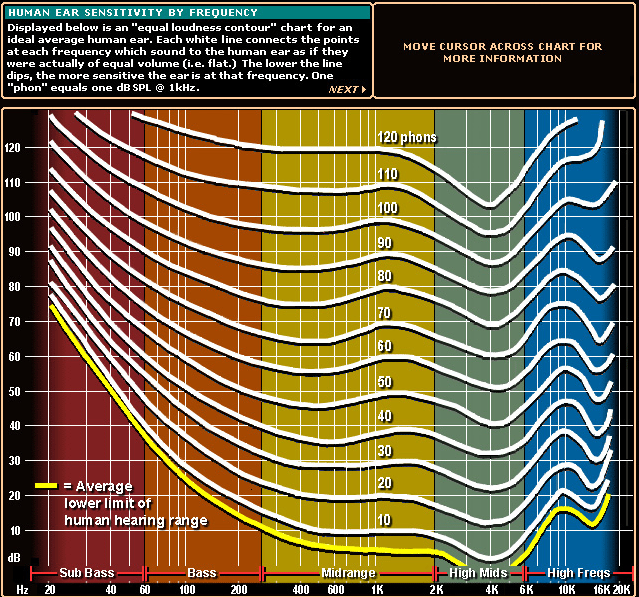
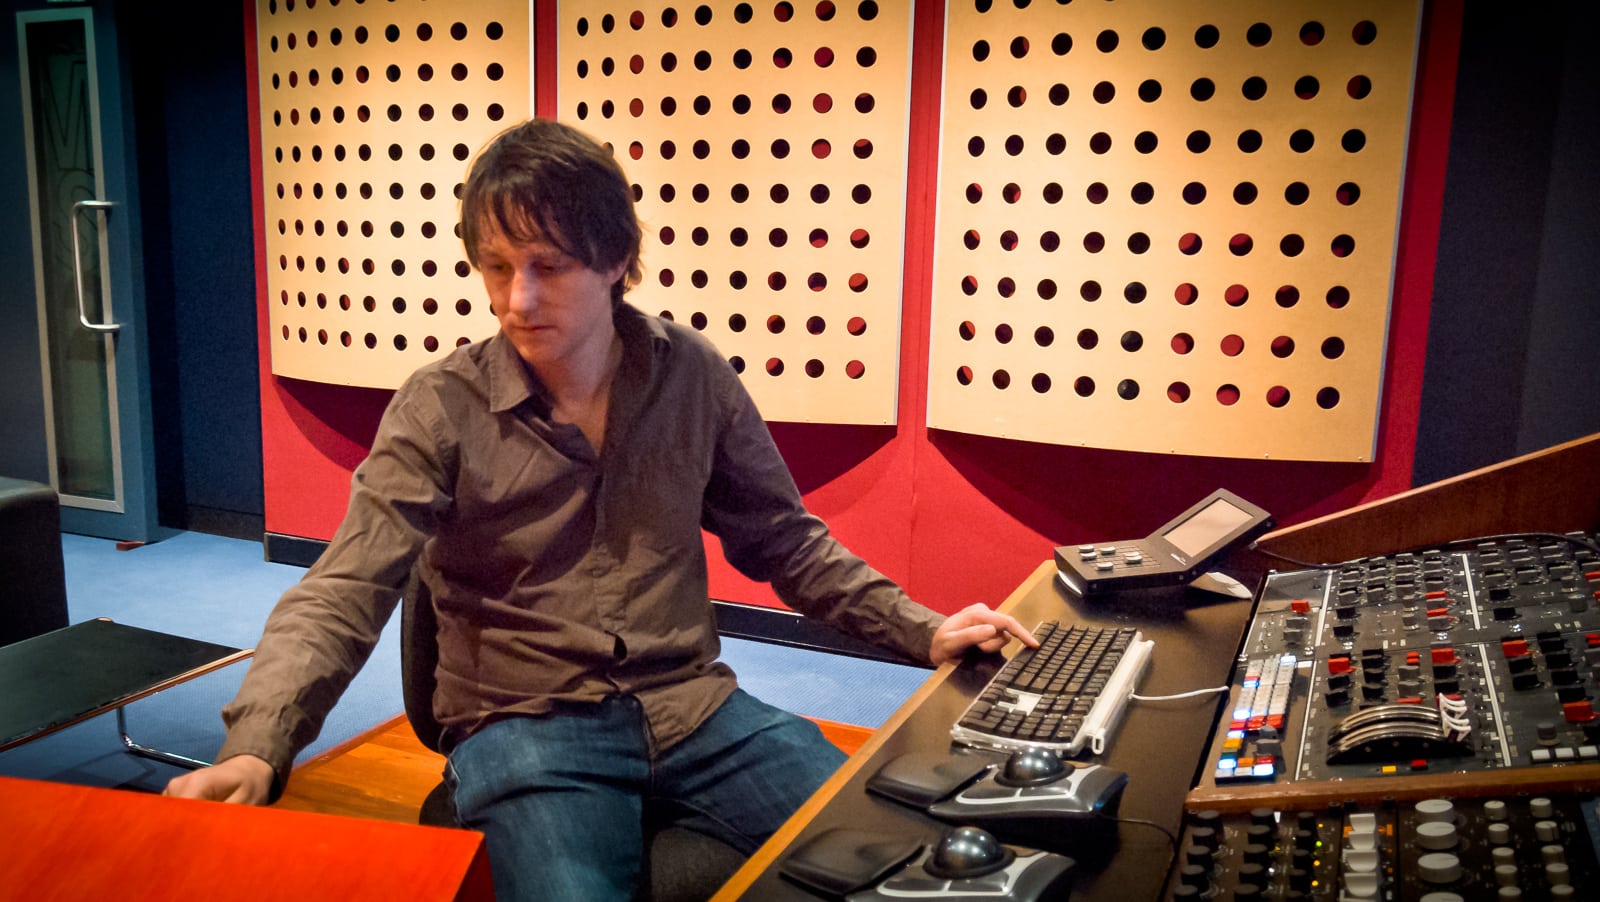
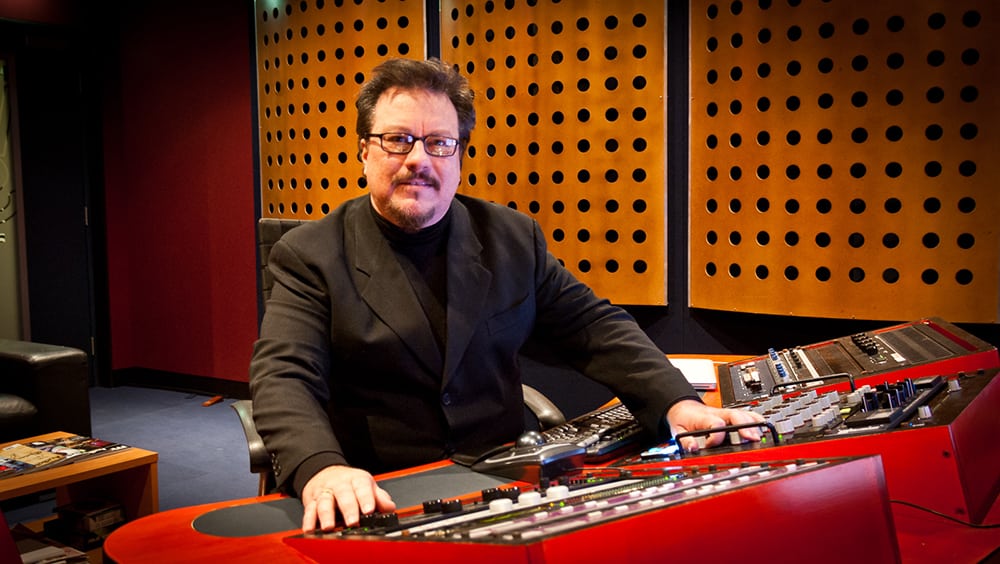
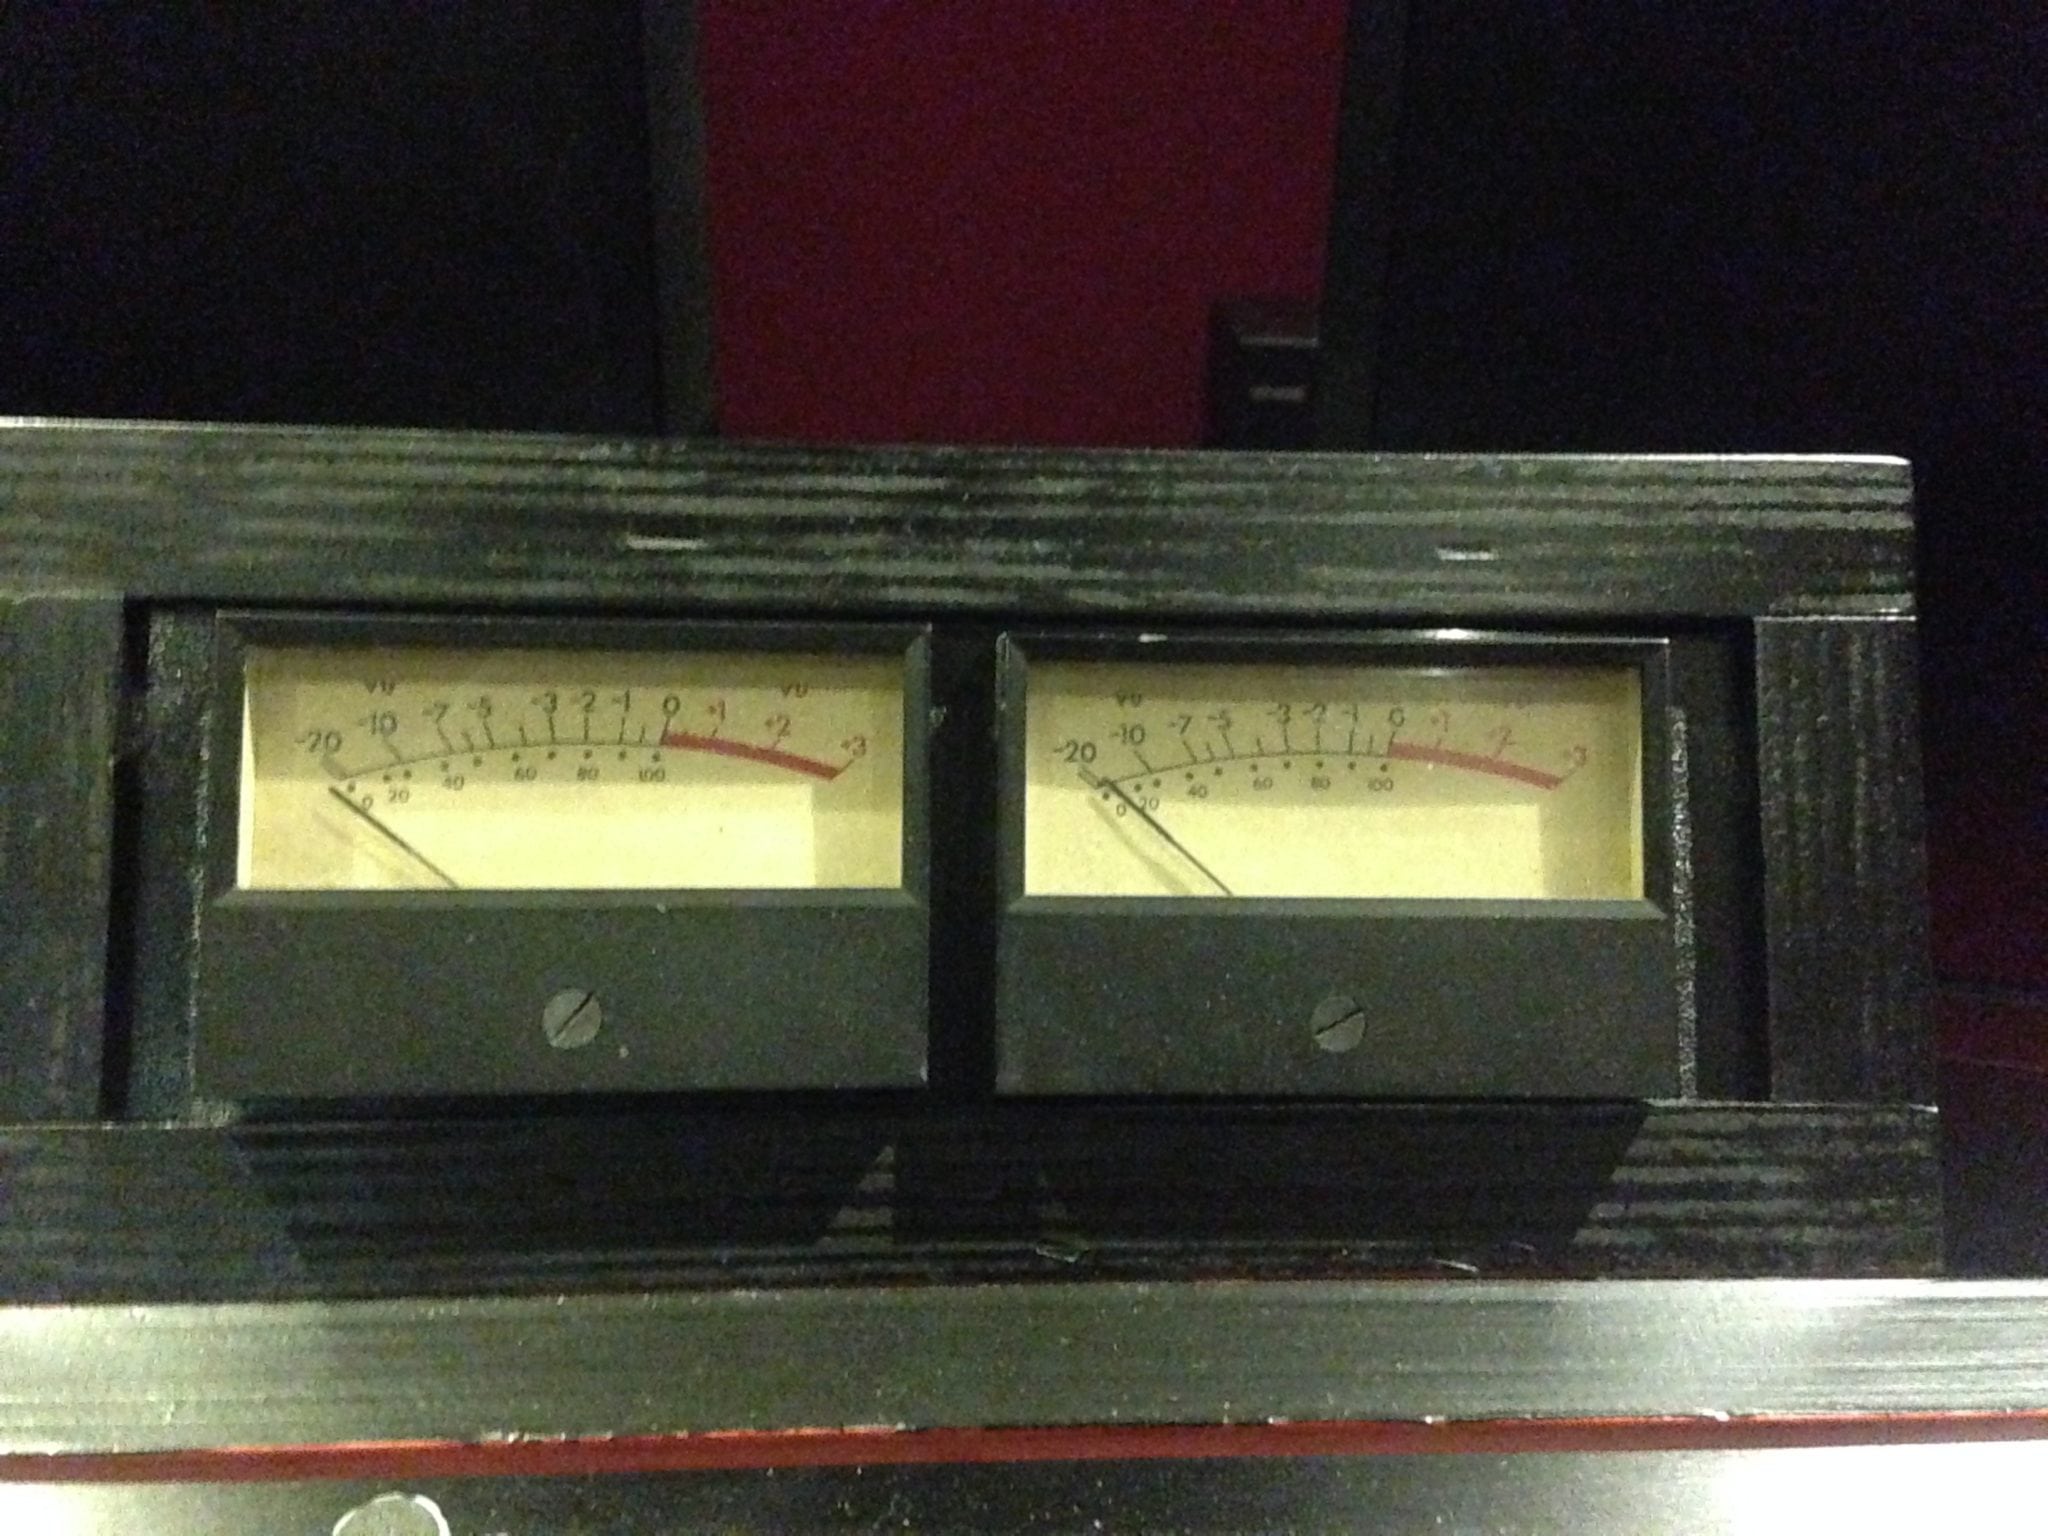
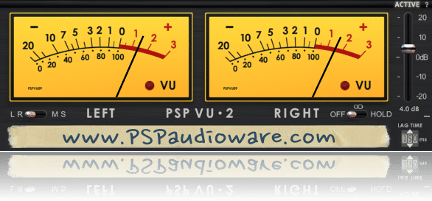

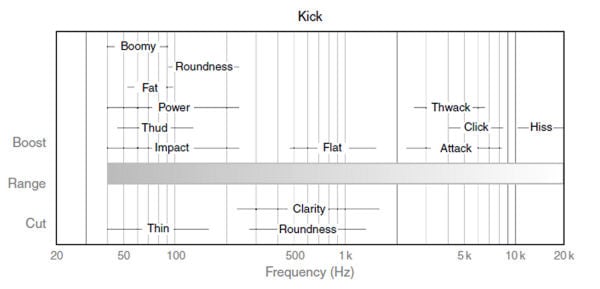
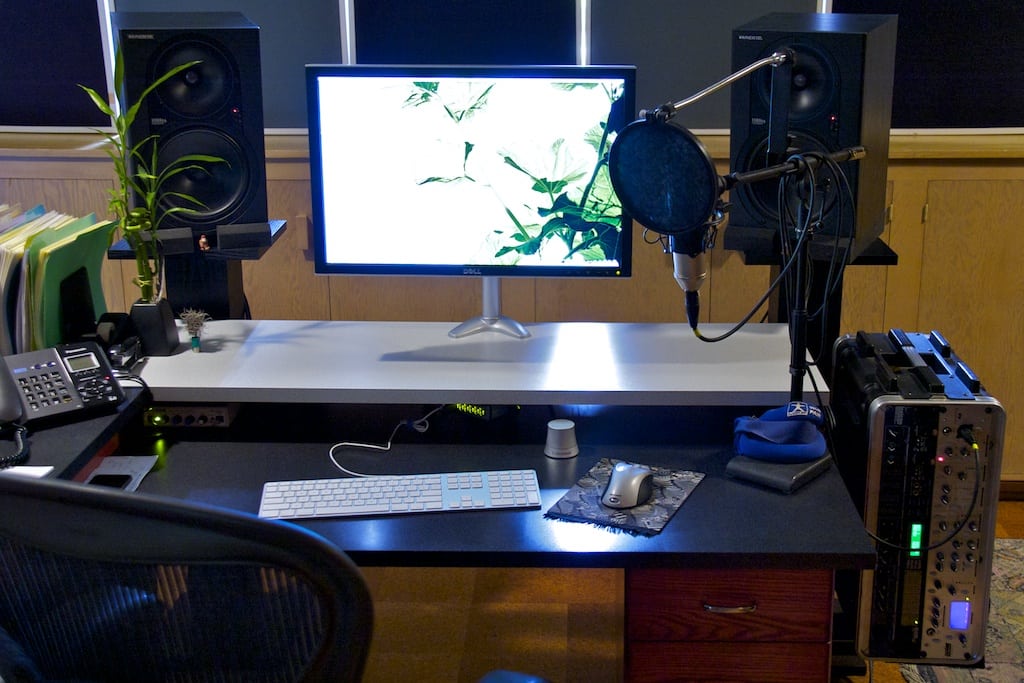
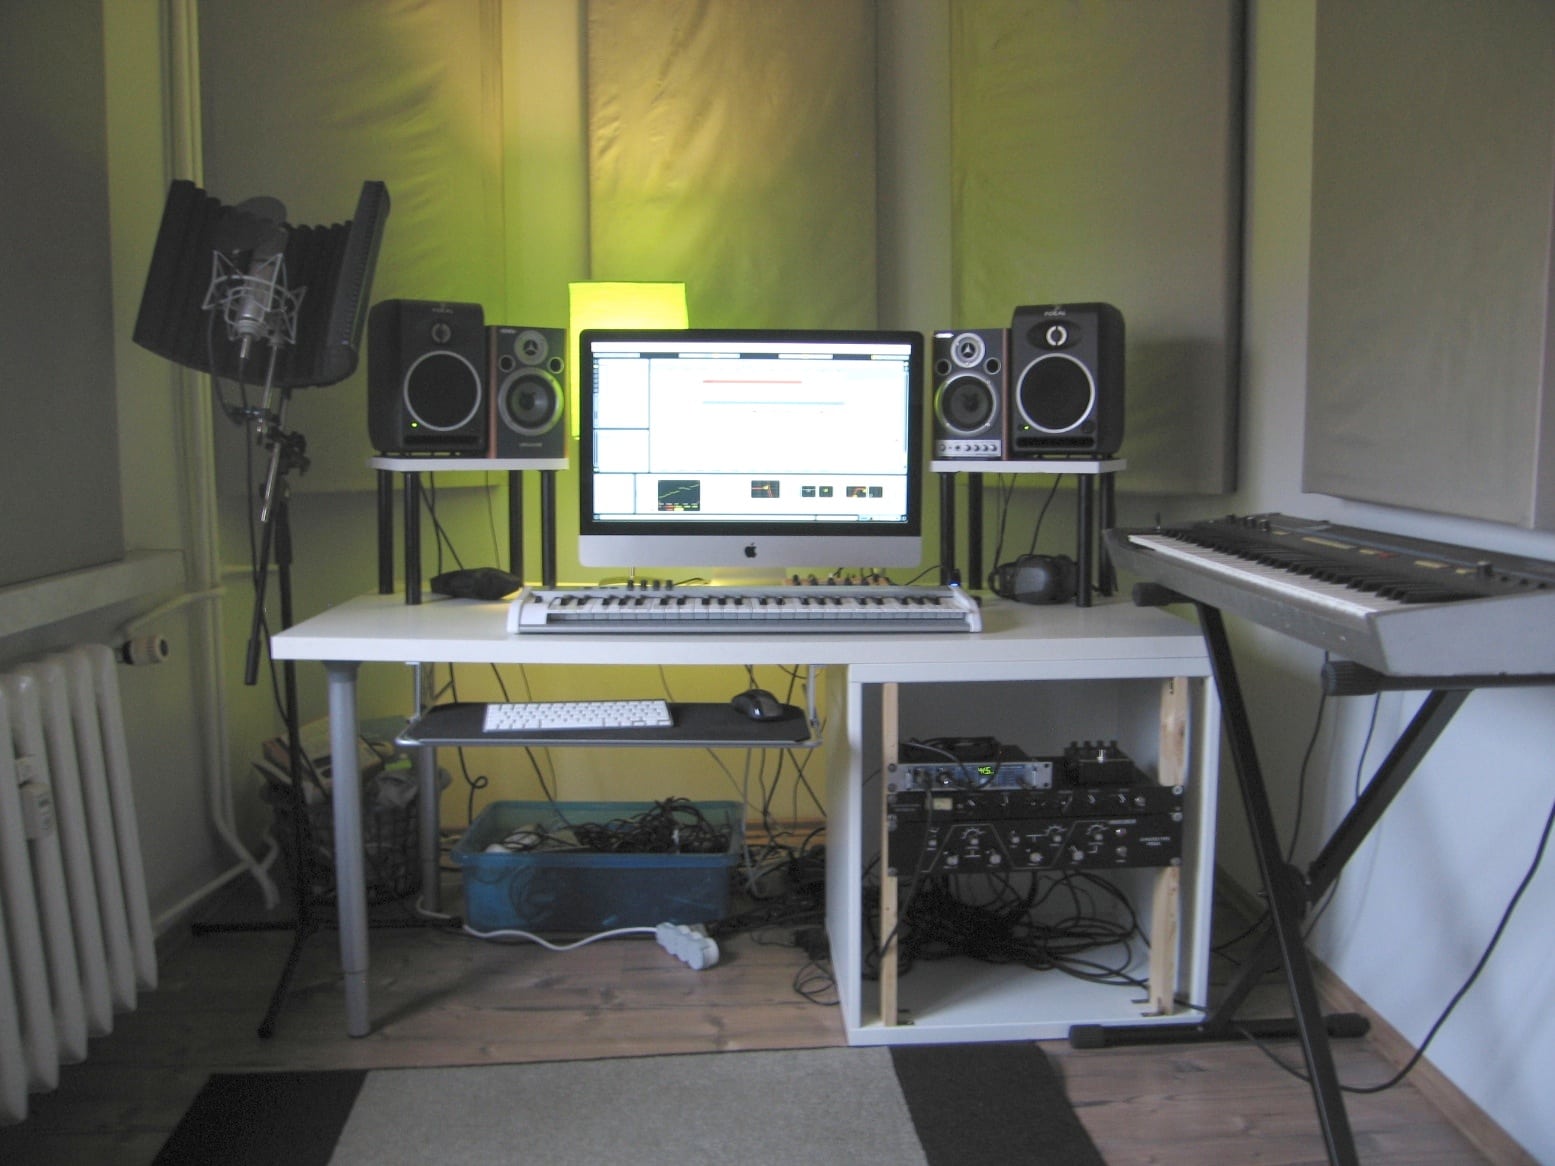


 it and edited the tape to get the arrangement. Once I was absolutely certain that the arrangement of the song on the tape was brilliant, I would then stripe it with code, and I would then sync it up to Pro Tools and transfer everything into Pro Tools. Then I would continue all my overdubs in Pro Tools. So I’d do all my vocals and vocal comps and guitar takes – and then once I finished, I would sync it up again. When I came to mixing, I would sync up the original 24-track analogue up to Pro Tools and I would mix. So about 50% of what I was mixing was absolutely analogue, analogue, analogue, all original. So the drums, bass, and main guitars were the analogue and all my guitar, keyboards, overdubs, vocal comps, backing vocals, and strings sections would be on digital. I did that for many, many years, probably ten years.
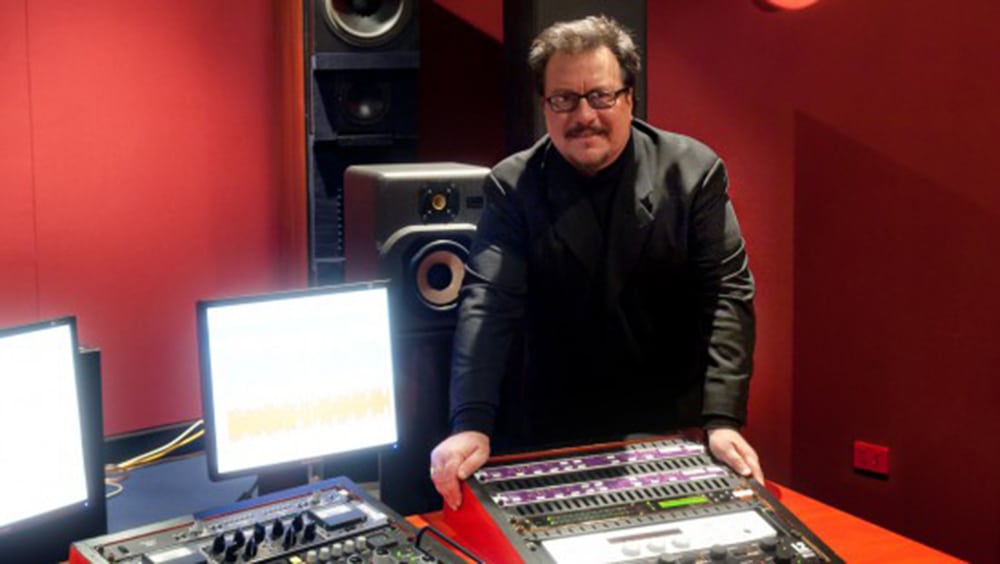

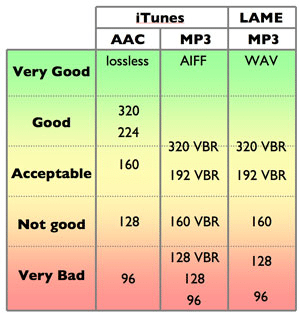


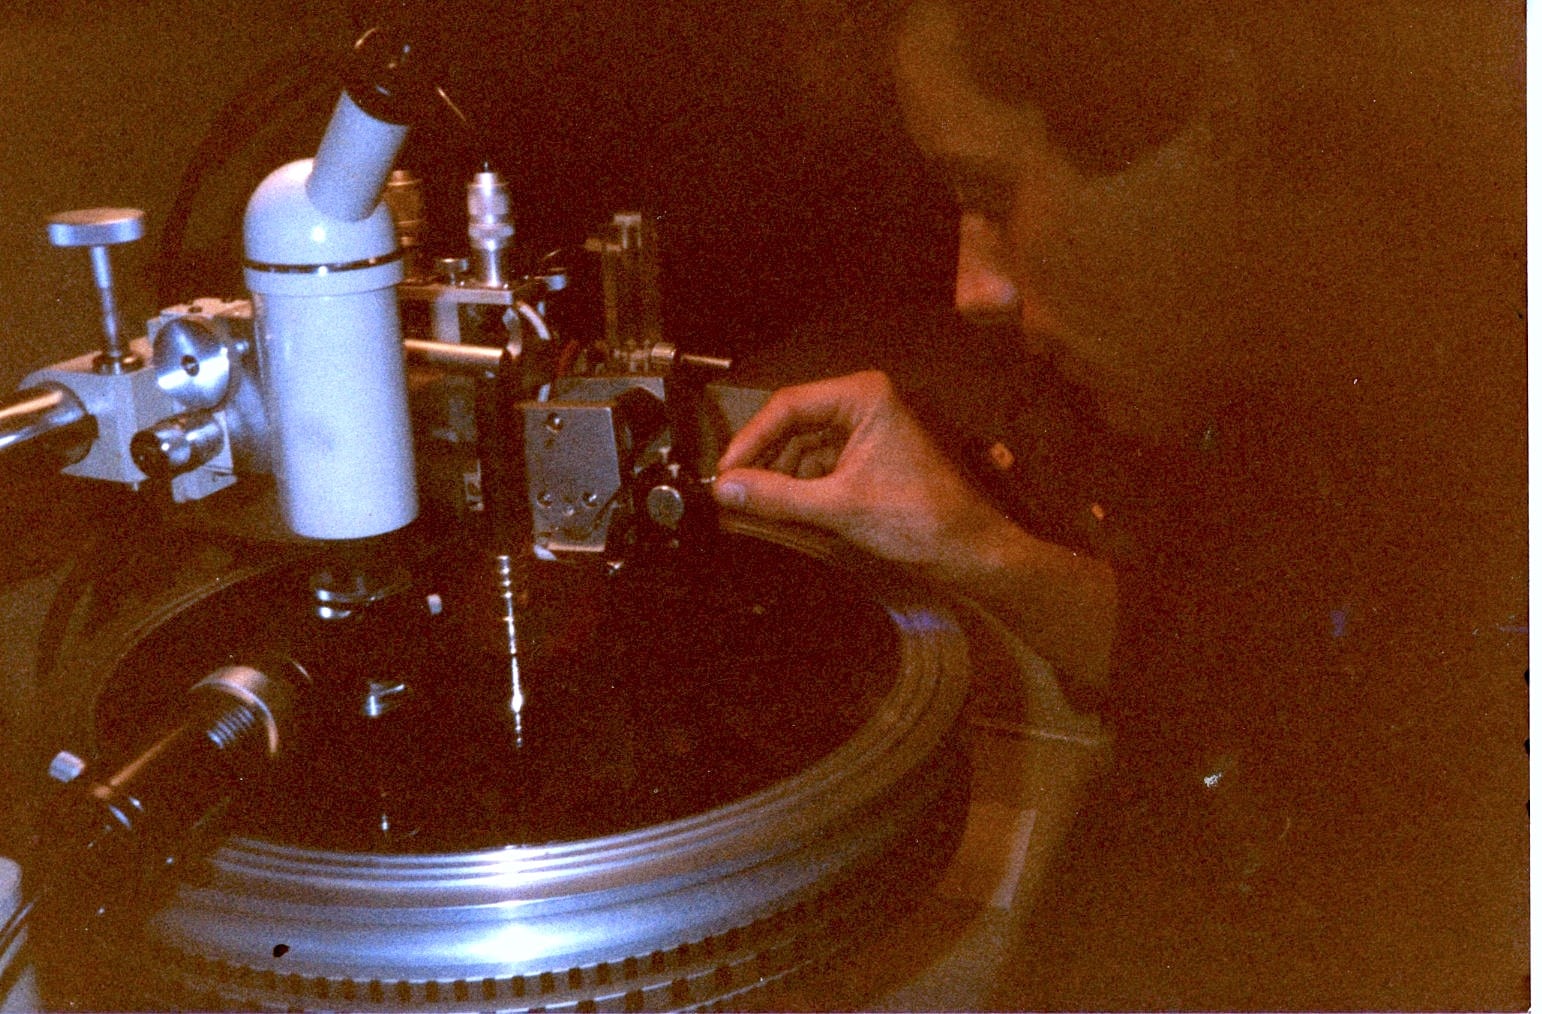

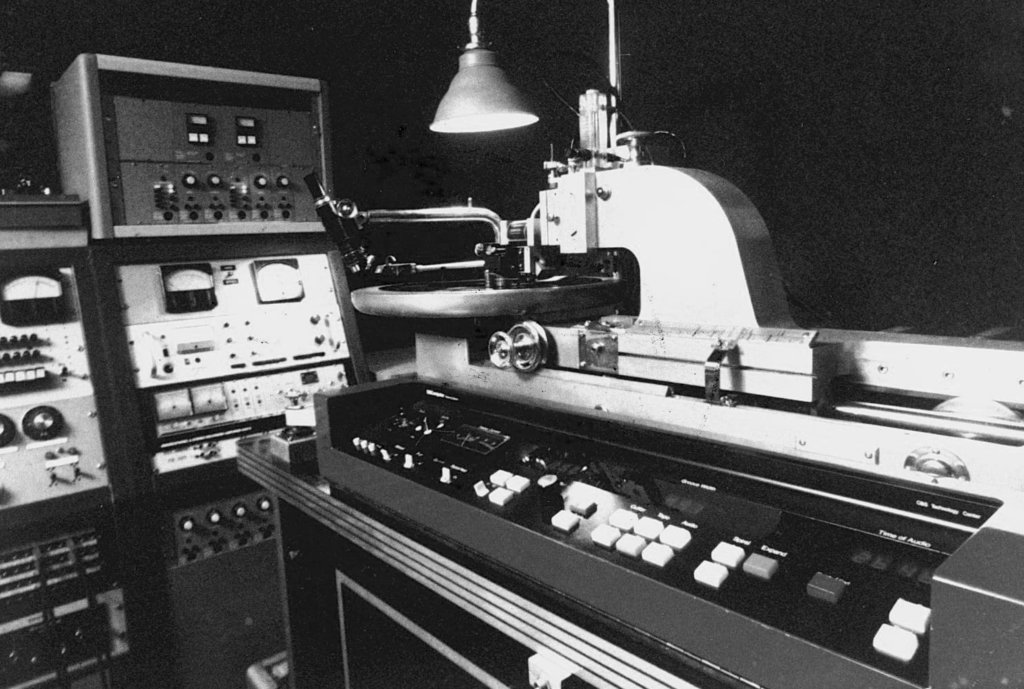
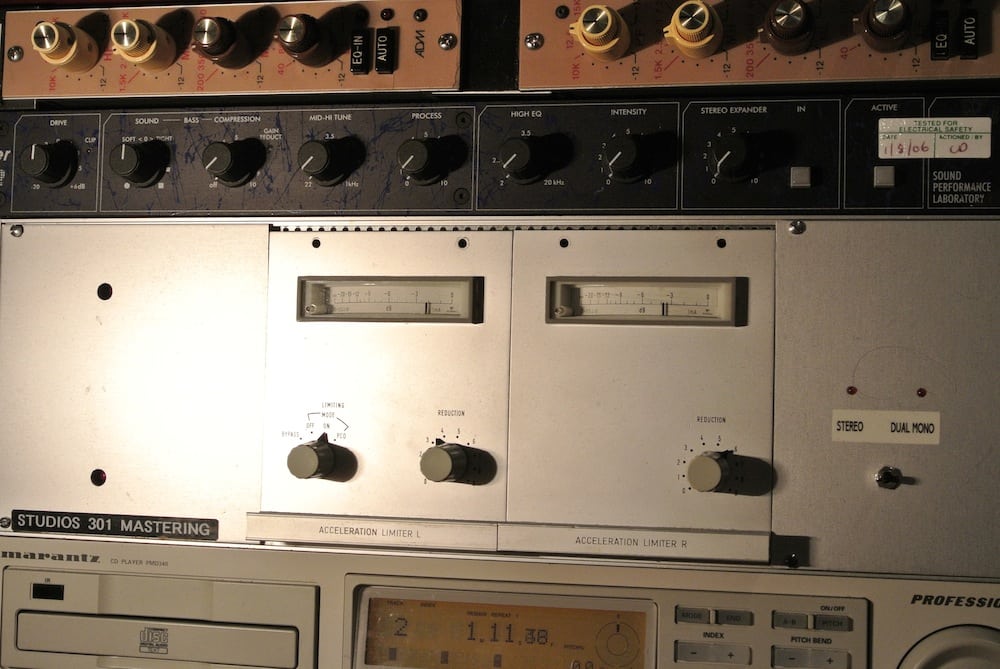
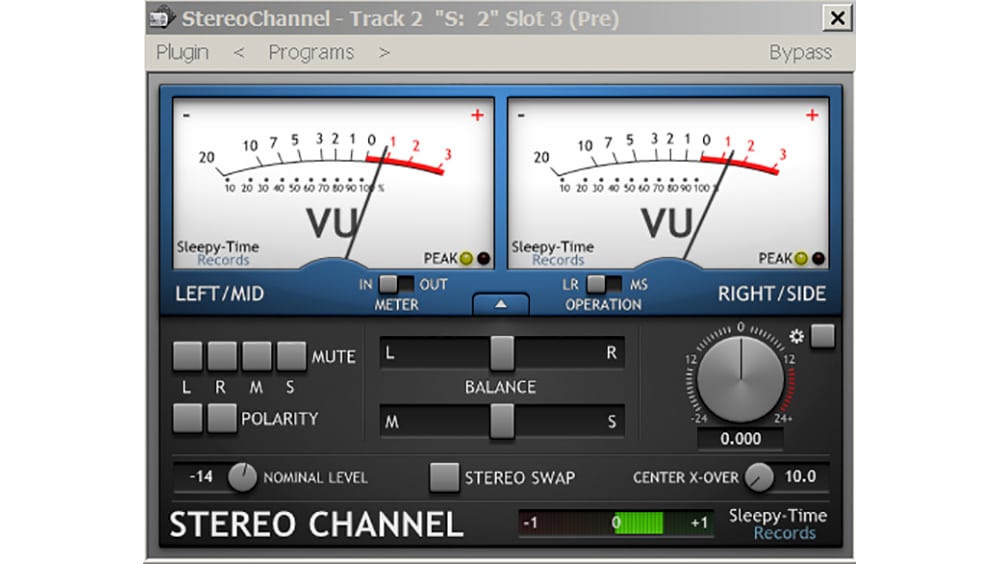

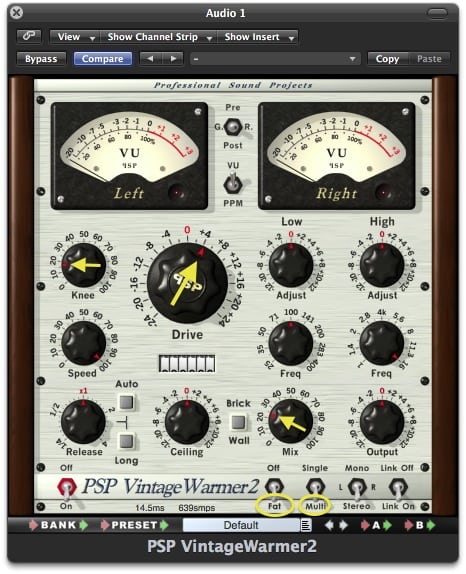
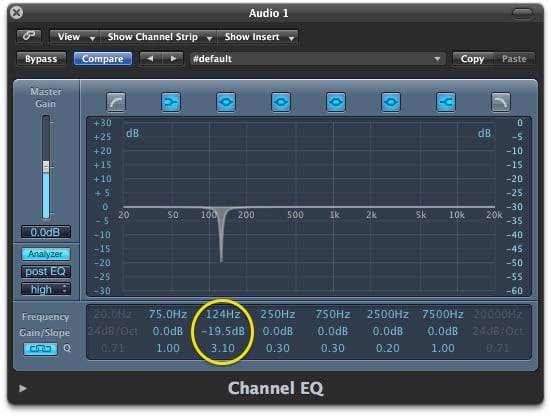
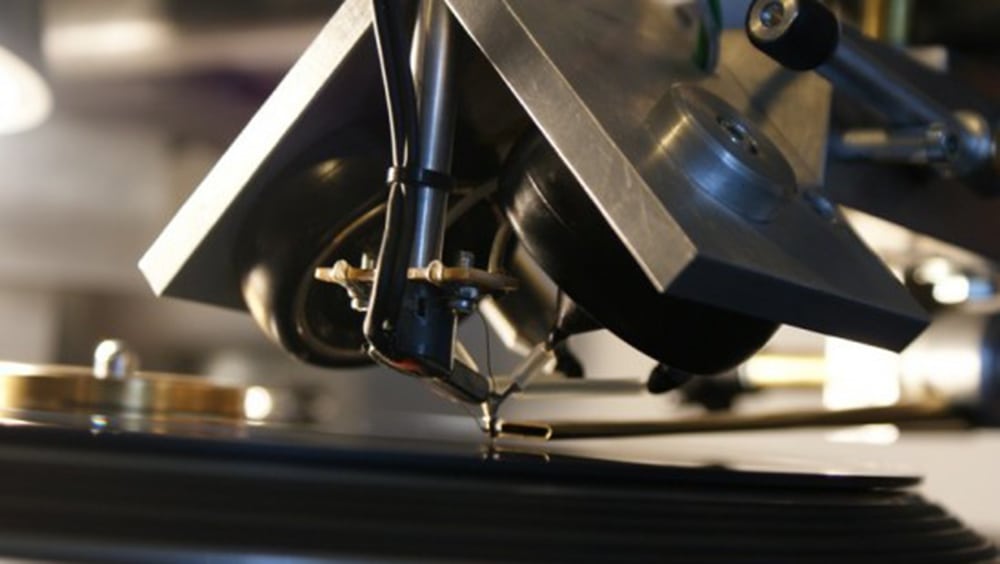


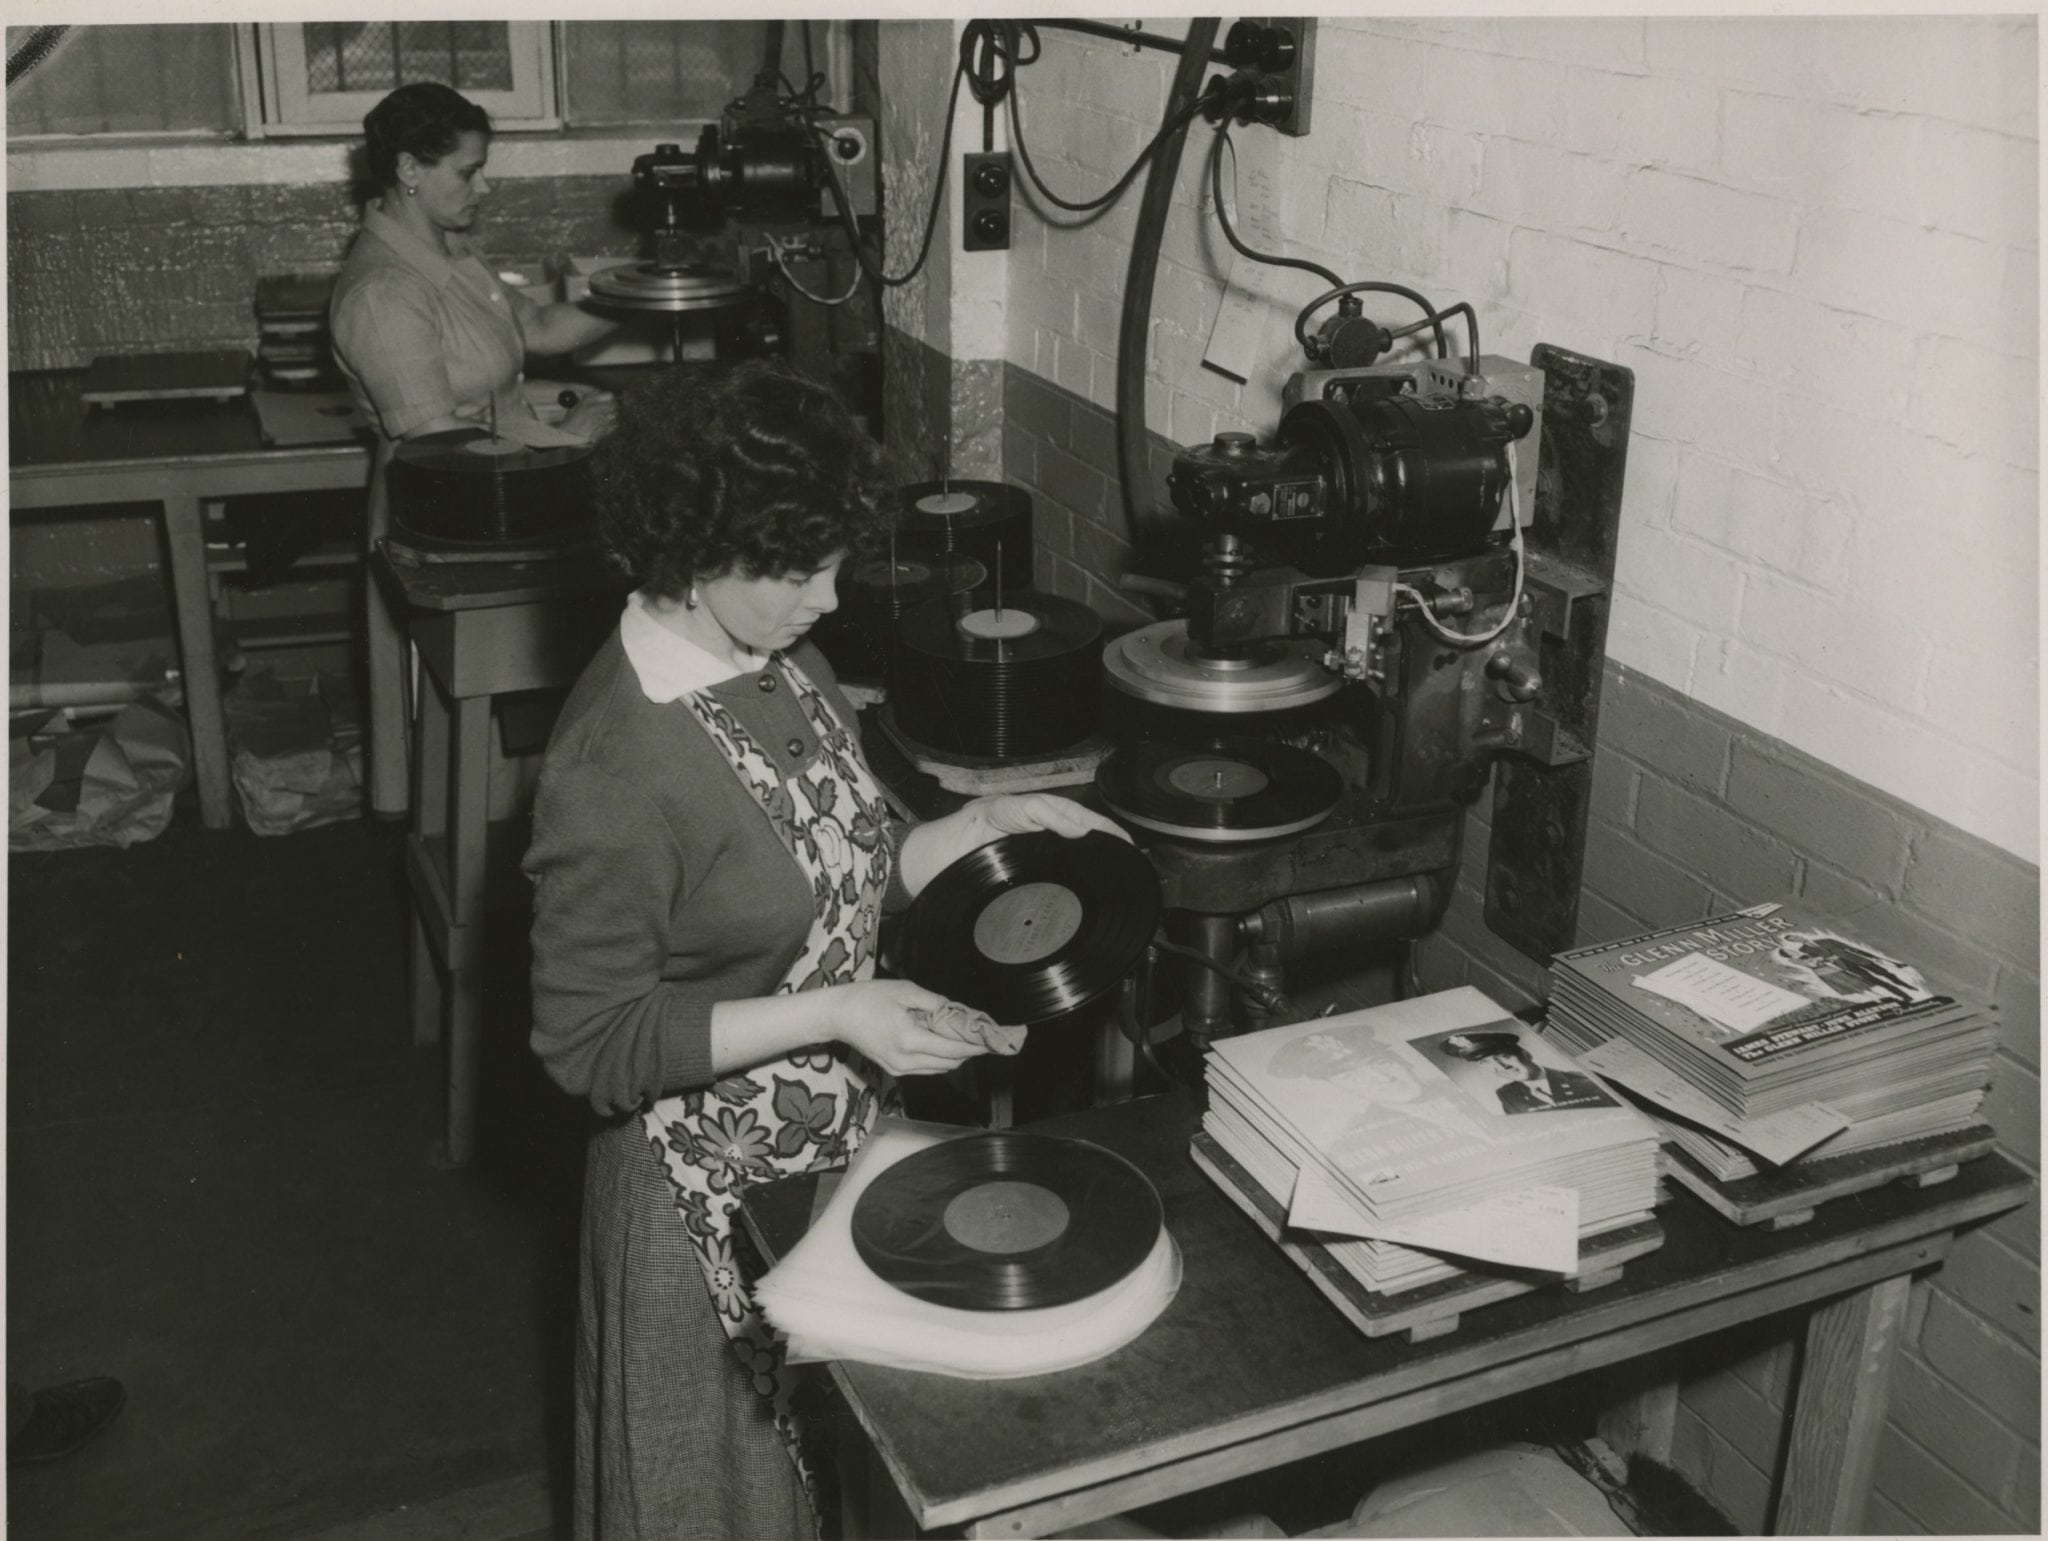
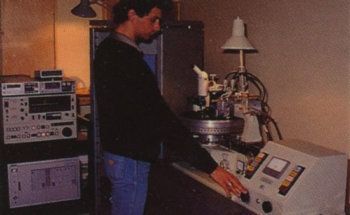

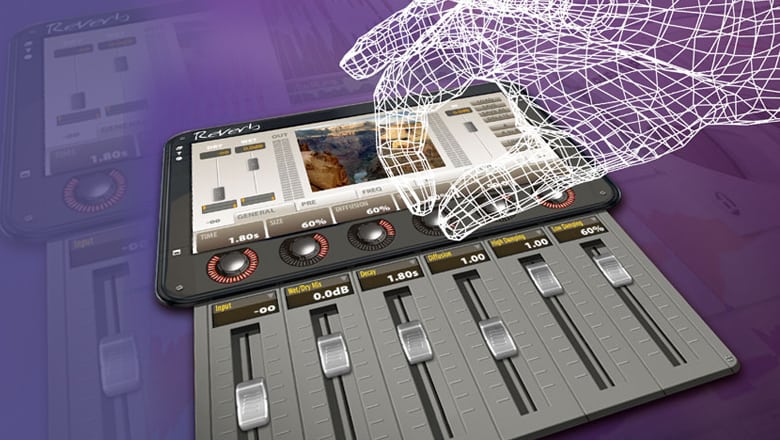
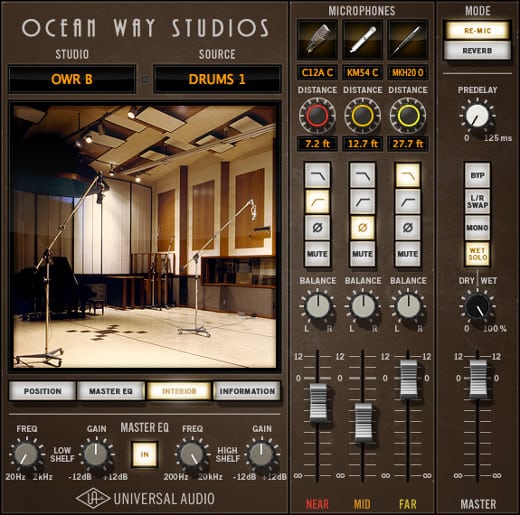 UAD Ocean Way; it is capable of this effect with amazing clarity and can really add “that” sound to your vocal – it’s expensive but totally worth it!