Archives

  • Australian Music Week Recap

    Australian Music Week Recap

    Studios 301 had a strong presence at the inaugural Australian Music Week music conference, held in Cronulla from November 18th– 22nd, with key team members featured as panellists among some of the most influential people in the Australian music industry.

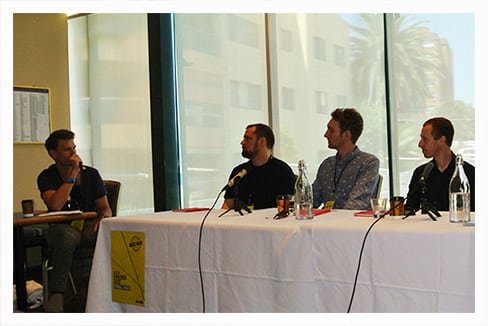
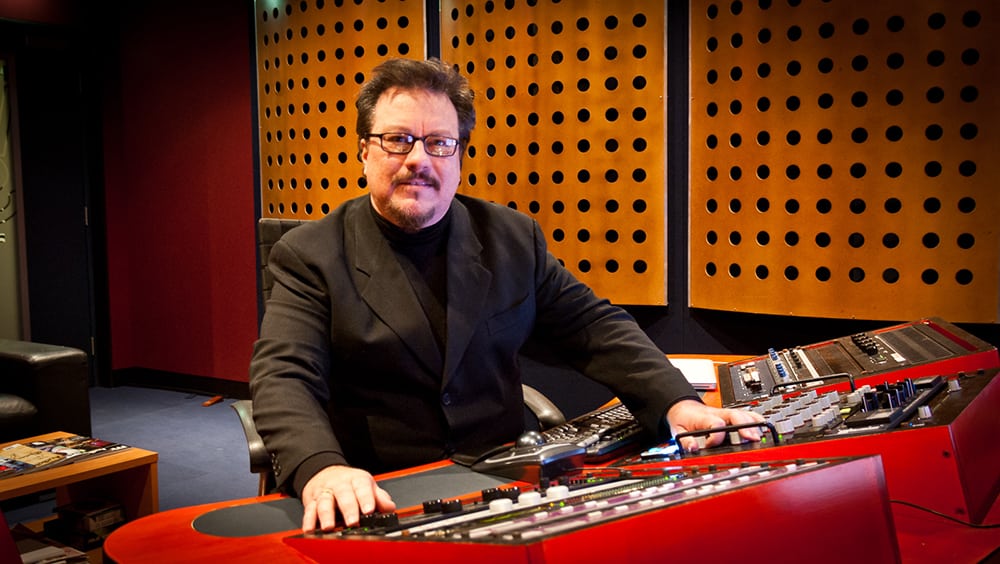
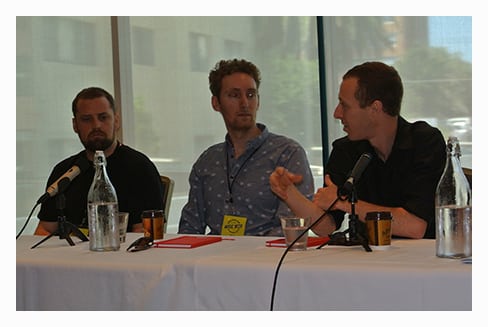
    In particular, the “Do You Need A Producer” panel was moderated by Studios 301 and Abbey Road Institute Director Gianni Michelini, and featured 301 producer/engineer’s Simon Todkill, Simon Cohen and Jack Prest, speaking on the role they play in the production process and how it can encapsulate that of director, conductor, arranger, A&R, confidant, engineer and often counsellor.

    In another panel “It’s All About The Song” our Operations Manager Ron Haryanto traded views on songwriting with Aussie hip hop artist Tuka

     http://themusic.com.au/news/all/2015/11/25/tuka-says-hes-bewildered-by-people-that-dont-embrace-technology-in-music/

    After a great turnout in it’s first year, we are looking forward to seeing Australian Music Week grow bigger and better in 2016.

    Main 1

    Main 2

  • Ben Feggans on Loudness – Part 2

    Ben Feggans on Loudness – Part 2

    Loudness Part 2

    In the second part of this blog on loudness I’m going to delve more into metering and dynamic range in order to compare your music to other releases.

    Level Matching

    I often receive feedback from people that their track doesn’t sound like it has the same low end impact and presence as others. Quite often this is due to one aspect- the track they are comparing to is louder. Because of the way our ears perceive high and low frequencies, even a tiny 0.5-1dB difference will make the louder track appear to have more bass and top end, making it sound a little clearer and fuller – or slightly better, in most people’s opinion. If you want to make a fair comparison, you have to level match. Doing this, you may find that the track you are comparing to may actually sound worse.

    Level matching is paramount in mastering when comparing your processed mix to the unprocessed mix. Incorrect or heavy handed processing will result in the mastered track sounding ‘smaller’ than the un-mastered track when level matched, especially noticeable by comparing the chorus or build-up of the track. When the chorus comes in the processing becomes even more apparent as it clamps down on the track. Using level matched A/B comparisons is the best way to check when your processing is improving the sound rather than just making it louder.

    Peak and RMS metering

    Loudness metering is generally done by a combination of ear and average level metering, such as the VU metering in Leon’s blog [link]. All software DAWs employ peak level metering to let you know about digital overs, which is very important to avoid clipping the signal, but will not give an indication of perceived loudness. Many also have average (RMS) metering now as well, emulating the VU meters found on analogue consoles. As they were traditionally mechanical, The VU metering rise time is slower than a digital Peak Programme meter (PPM), so the VU meter will represent an ‘average’ level rather than the instantaneous peaks, making the VU meter a more accurate representation of the perceived loudness. This is how people mix in the analogue world on a console.

    All good so far, but what happens if you have a huge kick drum that dominates the mix? A low frequency high level sound wave will push the average level right up and your metering will ‘ping’ off the stops, yet as we learnt in part one [link], this does not necessarily mean it’s loud- you have to take the frequency balance into account. A big 60Hz sine wave will have huge RMS level, yet many speakers will struggle to produce this and you have just eaten up your entire spectrum.

    When mixing, the PPM will show you the transients (like snare hits), and the VU will show you the average (RMS) level. If the average level is very high on certain bass notes or the kick drum, this is eating up all your available headroom and not letting the higher frequencies cut through, so you will lose clarity and impact. Try having more consistent energy in the sub region, and if you want a big sub, place that sound in isolation from other sounds in your arrangement. Use the PPM meters for transients. Again, try to keep these at a more consistent level so your transients don’t lose impact after peak limiting. Many meters now incorporate peak and RMS metering to help with mixing.

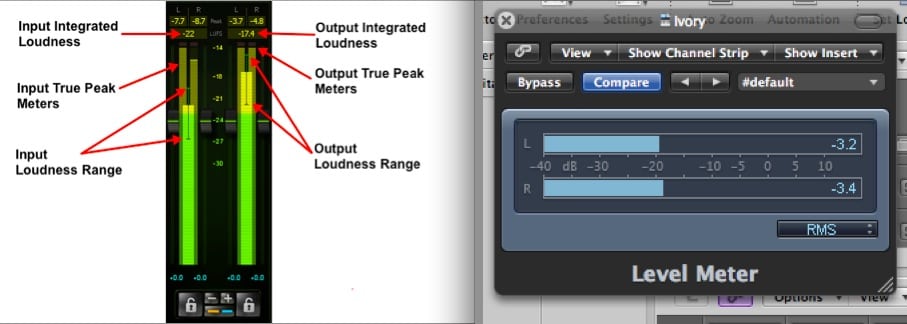
    Level Meters

    Dynamic Range

    This brings us to Dynamic Range. Dynamic range is the measurement between the minimum and maximum volume level, given in decibels (dB). The dynamic range of human hearing is around 140dB- This is from the threshold of human hearing to a jet engine. The dynamic range is directly related to the audio bit rate, for each bit you will theoretically get 6dB of dynamic range. So CD quality is 16 x 6 = 96dB.

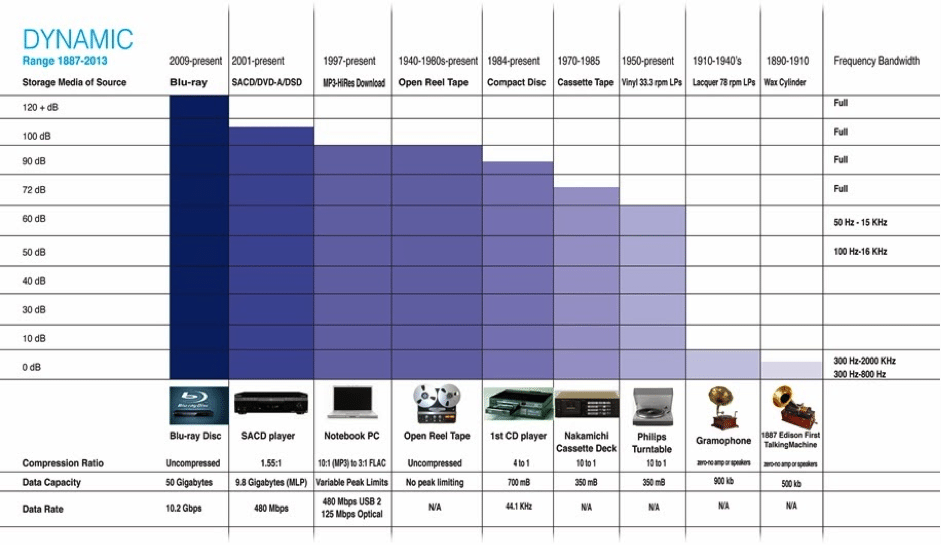
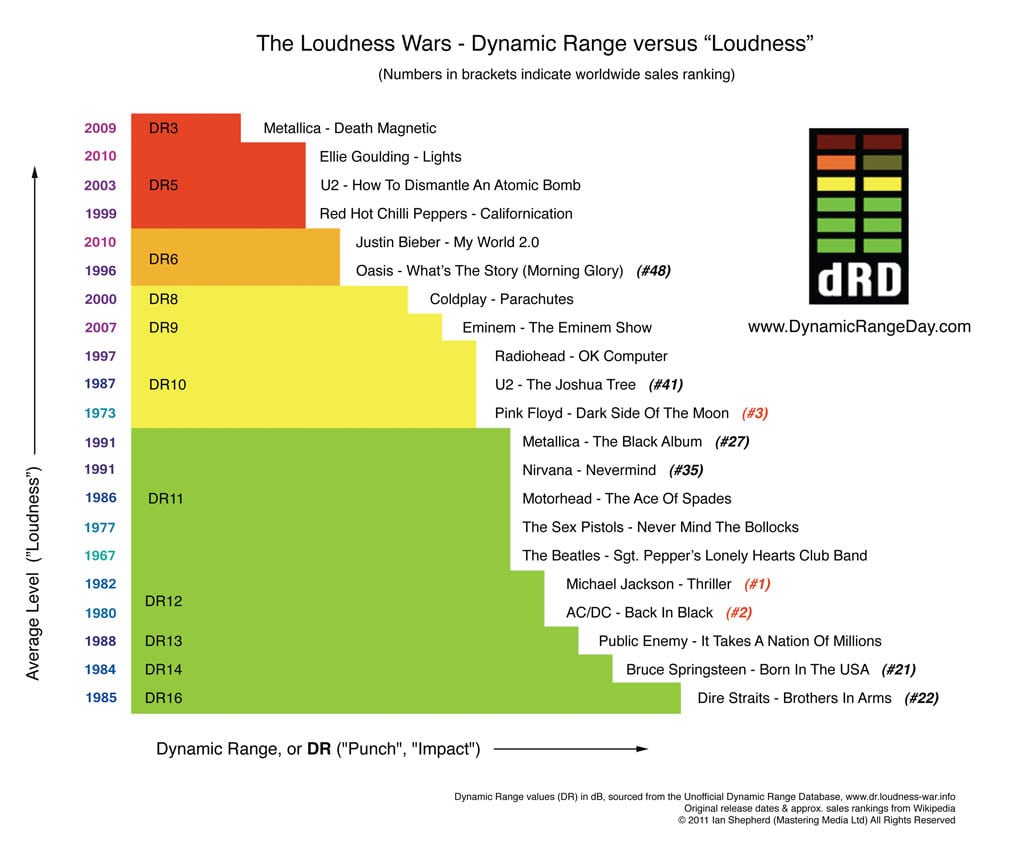
    In the past, the dynamic range was limited by the recording medium (see chart). In order to fit record sources with a high dynamic range, such as an orchestra, the dynamic range had to be reduced. However, if you are reducing the dynamic range you are also reducing the impact of the sound. So the orchestra recording with a small dynamic range will have much less crescendo impact, due to the difference between the quiet and loud passages being reduced.

    dynamic range chart

    Looking at the dynamic range chart, storage media has increased in dynamic range by up to 30dB since cassette. Yet modern releases have been reduced in dynamic range by using excessive compression, peak limiting and clipping for loudness.

    Now consumers are becoming more aware of this, and as you may have noticed, many artists are bringing back dynamic range into their masters with great success. You can search the Dynamic Range Database for your favourite artist here http://dr.loudness-war.info/

    Loudness Metering

    The latest loudness measuring tools take into account short term loudness, long term loudness, and frequency perception to give you a loudness number. There are many standards for metering, but the most common are EBU 128 and ITU BS.1770. Many software DAWs and mastering tools such as Ozone now have loudness metering standard.

    Here are a few meters that you can use in your DAW:

    http://www.meldaproduction.com/plugins/product.php?id=MLoudnessAnalyzer

    http://www.nugenaudio.com/vislm-loudness-meter-plugin-standalone-application-aax-au-vst_11

    http://www.orban-europe.com/products/data/lmeter/supp_loudmeter_1.html

    http://www.tcelectronic.com/lm2-plug-in/

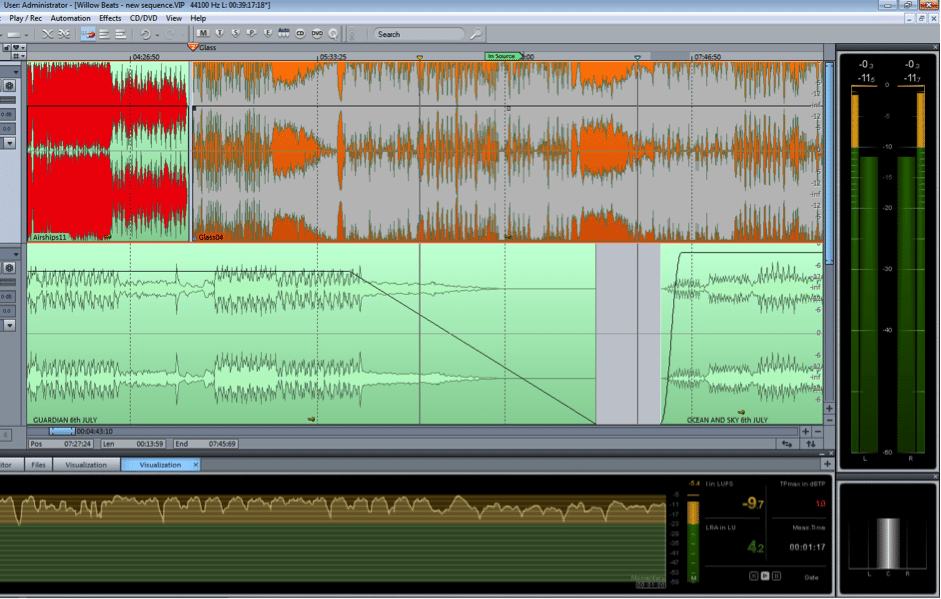
    Sequoia is designed for mastering and includes loudness metering.
    Sequoia is designed for mastering and includes loudness metering.

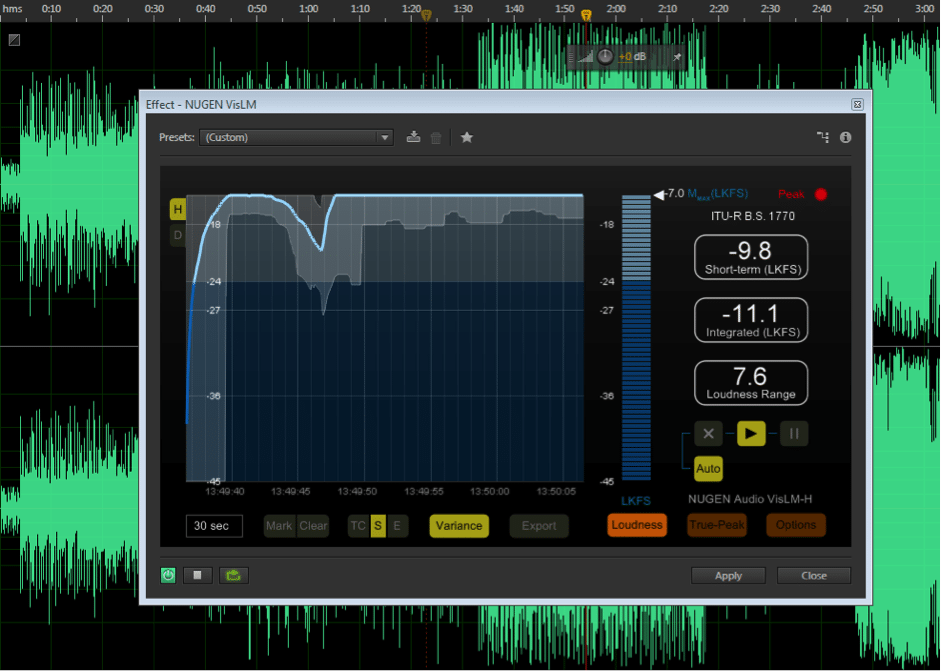
    EBU 128 will give you an Loudness units relative to Full Scale (orLUFS) reading and ITU BS.1770 will give you an Loudness, K-weighted, relative to Full Scale (orLKFS) reading. Without getting too technical they are essentially the same except for the gate time. What you are looking for is the integrated loudness. Using loudness metering will assist you in making accurate A/B comparisons. Another advantage of proper loudness metering is the TP max (True Peak Max) number. This will alert you if the intersample peaks will overload a poor quality DAC or lossy encoder.

    NUGEN VisLM is an excellent loudness tool
    NUGEN VisLM is an excellent loudness tool

    Conclusion

    I know, I know, you want your track to be louder than everyone else’s. Maybe because I work as a mastering engineer you are thinking I have a secret technique for loudness. In reality it mostly comes down to the mix. Mastering should enhance what is already there, and not change the mix drastically in the pursuit of loudness. Keep in mind that a good song will still sell regardless of how loud it is. Hopefully in these two articles I’ve demonstrated that loudness is a delicate combination of frequency balance, dynamic range, and the arrangement of your mix. If you are pushing for level and your mix falls apart, then your track has reached its “loudness potential”.

    Written by Ben Feggans.

    Ben Feggans - 301 Mastering

    Ben is one of our 5 resident mastering engineers, and works in Mastering Suite 2.

    To book Ben Feggans for a mastering session, contact Lynley via mastering@studios301.com or 02 9698 5888.

  • Creating punch and width in your mix

    Creating punch and width in your mix

    Creating width in your mixes.

    By Sameer Sengupta

    A lot of producers I meet are very interested in getting ‘width’ into their mixes, but there’s a common mistake that I frequently encounter in the mixes I’m sent for mastering.

    All too often, the producer’s obsession for width sees them dragging ‘stereo widening’ type plugins onto nearly every channel, to… you know… get width right? Wrong.

    Nothing can make house music more bland than doing something like this. The foundation of house music is the kick drum, which, for best results, should remain dead centre, and without any image processing applied, certainly nothing below ~350Hz. Then build the rest of your elements upon that.

    The problem with widening plugins is that they tend to leave a big hole in the centre image, which is just as important as the sides.

    Another problem with image processors, is that they will tend to homogenise any natural stereo content when applied.

    Mixing for ‘Stereo’ in its simplest terms, means taking into account how sound affects us as two eared beings, in sonic, psychological and physiological terms. Ultimately, we want to create a sonic picture that provides pleasant stimulation for our brains.

    Our brains and ears identify sound in the stereo field through subtle tonal and phase shifts. Widening processors create a ‘fake’ sense of width by modulating the phase in unnatural ways. Controlling these phase shifts also makes a sound less ‘exciting’ to the ear, and ultimately, it will become part of the background, like wallpaper.

    Its the visual equivalent of placing a Guassian blur over every object. If everything has this filter applied, then the whole image just becomes a blur.

    flat550x550075f blur

    If you must use these plugins, leaving a few elements in their natural state to juxtapose the blurred background can greatly enhance the focus, or ‘Punch” of the sound.

    flat,550x550,075,f.u1

    Placing an image widener on a kick drum will have an adverse effect on what you may be hoping to achieve, so it’s best to leave it out, especially on the important sounds.

    In fact using these plugins will create width, but remove all depth and movement, trapping the sound in a thin sounding layer… not unlike these guys:

    supermanii-space2
    Help – I’m trapped in a flat box of emotion!

    Another Approach

    The real secret to getting a much better sense of width, is to actually ditch the image wideners for the old faithful Pan pot. Panning elements in creative ways will give your mix a much more natural, and ultimately wider sense of ‘true width’.

    Again going back to how the ear reacts to sound, our ears like sense of movement through tonal and phase shifts. Instead of submitting every bit of percussion, synth and vocal layer into this blurred fake stereo, try panning each element in ways that allow your ears to discover the sounds across the stereo field in musical ways.

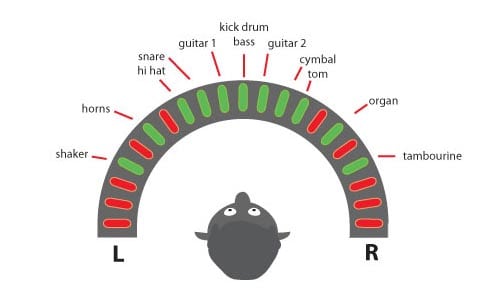
    For example, supposing you have two percussion lines that are rhythmically syncopated off each other, place one off the left and the other to the right, or maybe at the centre. Then place the closed and open hats slightly apart from eachother. Next, place that big reverbed clap that only happens once every 8 bars way off the right, and perhaps a little loud. It only happens occasionally, but when it does, it creates this shock of harmonic colour off to the right, and keeps the ear tuned in.

    You can do the same thing with vocals, placing the lead in the centre and extreme Left/Right, but then add a little bit of random harmonics by placing only one of the vocal harmonies at the 3 o’clock position.

    Fig-09-stereo-mix-1-GOOD

    This technique will let your sonic picture sound harmonically richer and a hell of a lot more exciting.

    Play around with placing one off sounds in extreme positions, or using a dynamic panner that pans around the field slowly/quickly. Try placing musical lines that are a call & response in different areas. Pretty soon, you’ll find the frequencies ‘dancing’ around the whole stereo field, giving you true width.

    It’s fun…. go and play.

  • Mixing with your Mastering Engineer with Steve Smart

    Mixing with your Mastering Engineer with Steve Smart

    Mixing with your Mastering Engineer

    By Steve Smart

    To book Steve for your mastering project, contact Lynley on 02 9698 5888 or mastering@studios301.com.

    In most mastering situations, stereo mixes are used for the final mastering session. But sometimes I go a little further than that…  And the producer or mixer brings in their computer, with their DAW mix sessions, into my mastering studio with them.

    The advantage of this from a mixing perspective is that we can play the mixes in the mastering studio speakers and listening environment, where the engineer has the opportunity to listen to the mixes in a very accurate room with pristine converters, amps and speakers. From there, we can get into the project in its entirety to adjust any problematic aspect of the final mix (e.g. individual instrument levels, equalisation and compression). In doing this, we are able to make fine adjustments in the mix, without having any side affects that may occur to the mix by simply using overall mastering eq and compression. Overall, the mix sounds better, the master sounds better as a result, and the producer or artist hasn’t had to pay much more (if any) for a better sounding song.

    As an example, in a track I was recently mastering, we had a great sounding kick drum with nice sub energy, but the bass guitar had large amounts of sub frequencies in it as well. Under normal situations in a mastering session, I would simply use a high pass filter or equaliser to tighten this up for a firm rhythm section… But the side effect can sometimes be that in tightening up the bass guitar, we loose the energy in the kick drum. In the situation where we have the mix opened up in the DAW, we can easily go in and make the adjustments to the bass guitar only, without any side effects to the kick drum!

    In another instance, the vocal was too bright but the percussion was slightly dull, so we were able to go to the vocal eq in the mix and reduce the high frequencies. This then allowed me to add brightness to the whole track with my beautiful Sontec mastering eq.

    And in another situation, we had guitar parts that were recorded using two microphones, but unfortunately one of them was out of phase. This gave us a really weak guitar sound, but having the mix at our fingertips, we were able to go in, find it, and phase flip it – which immediately ended up in a really strong sounding guitar. This is something I simply could not have fixed in mastering a normal stereo mix.

    Overall, the common problems I hear when mastering – over compression, clashing eq and phase problems to name a few – can all be fixed much faster and more effectively in the mix, rather than trying to work around it in mastering.

    Lastly, the benefits of this process for many mixers/producers have had longer-term benefits. By having the “fixed mix” saved in their DAW, and then referencing it back in their own studio, they have been able to use it as a reference to tweak their own studio monitoring systems for better results.

    Here’s what to do If you want to mix in my mastering studio…

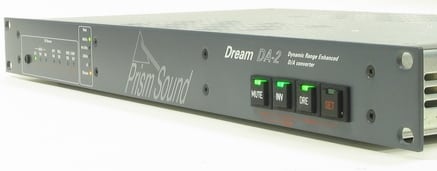
    In order for us to do this together, you’ll just have to bring your laptop or tower containing the software and relevant mix projects (but don’t forget your iLok and other dongles!). From there, we hook you into our USB > AES/EBU device that runs straight to my Prism Dream DA convertor… and into my analogue mastering chain from there.

    Displays, keyboards, extra peripherals, cables, etc. are all catered for at 301 – so you don’t need to pull your studio apart to make this happen.

    da2_fp_ang2

    How much does it cost?

    I charge my usual hourly rate to work this way. Sometimes it works out quicker when you bring in your DAW, because I can quickly fix a problem like above, and then keep on mastering without having to work around mix issues. On the flip side, lack of preparation, or half-baked mixes can cause a blow-out in time – so I strongly recommend that if you are considering working this way, to get your online mix sounding as best as you possibly can – and then I can simply enhance it, rather than having to re-“mix” it with you in my mastering studio.

    Finally, none of this is to say that all mixes need these adjustments, or this much intervention, but it’s a great option to have up your sleeve if you are looking for a lower cost way to improve the sound of your mixes (and thus masters.)

    All in all, stay confident in your mixing ability, take the mix to the point where you believe it’s at its best and then from there it can only get better…

    Steve.

    Lynley, our Mastering Coordinator, is happy to talk through this process with you in more detail if you are interested in mix-mastering with Steve Smart. You can reach Lynley on 02 9698 5888 or mastering@studios301.com.

  • Jack Prest on Analogue Vs Digital – Part 2

    Jack Prest on Analogue Vs Digital – Part 2


    Analogue Vs Digital Part 2 – Synths and Drum Machines

    Read Part 1 Here

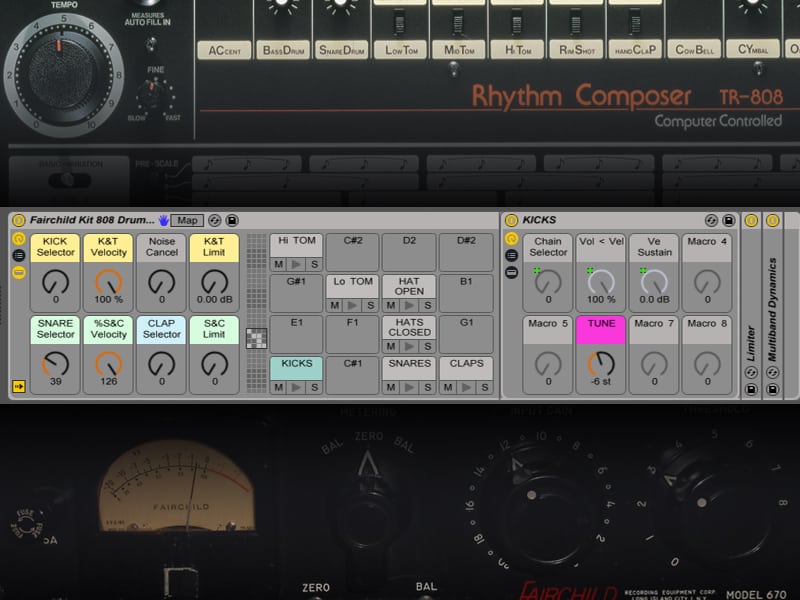
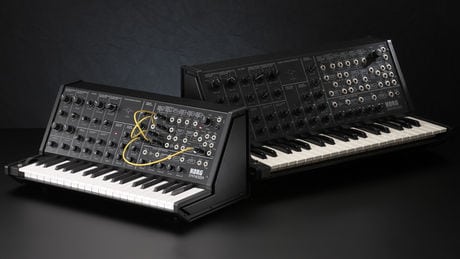
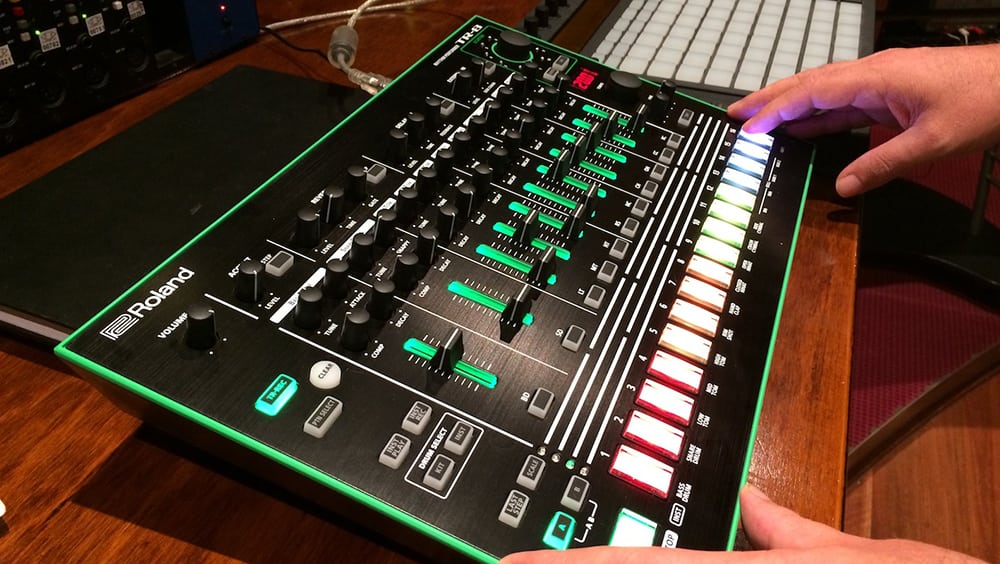
    For part two of the Analogue versus digital shootout we will be comparing (arguably) the worlds most famous drum machine, the Roland TR-808 with its software equivalent inside Ableton, and the monstrous Korg MS-20 with its software MS-20 from the Korg Legacy collection.

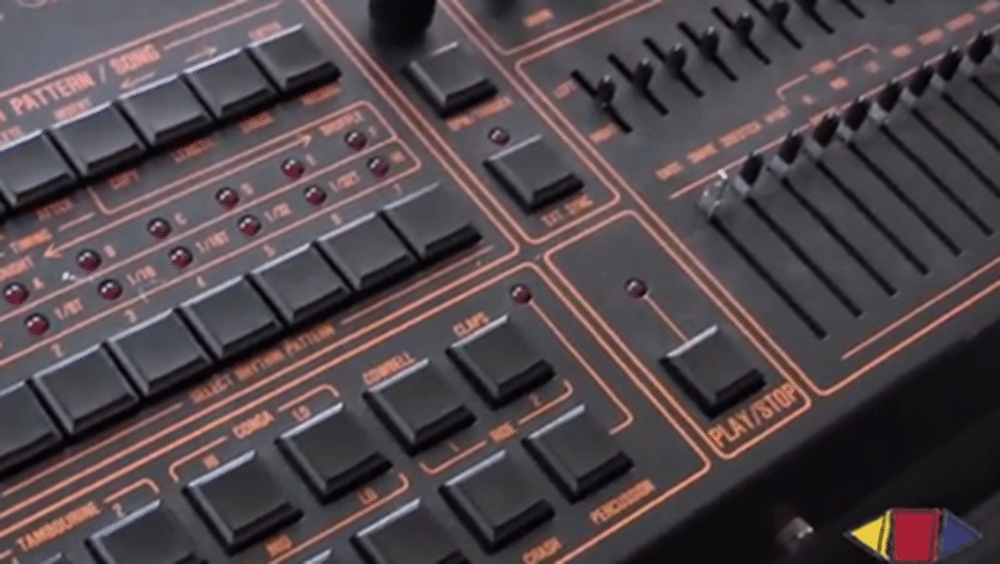
    Originally designed as an alternative for musicians who didn’t know (couldn’t afford) any drummers to perform with, the TR-808 (along with TR-909) went on to influence and shape and sound of a generation of electronic musicians. Testament to the universal appeal of the 808, in recent years it has become a staple of electronic production. Imagining club hip hop tracks without a booming 808 kick is like imagining garage rock without distorted guitars. The original TR-808 units have gained almost mythical status and fetch 10 times what they sold for when first released in the early 80’s; luckily enough we have one residing in Studio 6!

    For this demo, I have programmed the same beat on the Ableton sampled 808, by cutting up audio of the TR-8 samples made in Studio 2 and then on the TR-808 analogue drum machine. There is also a version of the sequence inside Ableton triggering the analogue drum machine.

    click on image to download the sample pack.
    Our TR-808 via Fairchild 670 Sample Pack

    For the MS-20, first I’ll A/B the basic waveforms with both the high and low-pass filters completely open. Then A/B of the high pass and low pass filters sweeping through their full range first with the resonance turned to 0 and second with the resonance turned to full.

    Here are the recordings for you to compare:

    For me this one is a no brainer, analogue hardware wins hands down. It’s the instantaneous feeling that you are working with a real sound. I find consistently when working with hardware that as soon as you get you sound right on the unit it requires little if any processing, where as I would need to work a lot harder to achieve a similar energy from a software instrument. In the case of the 808 the sequencer also brings something special with the groove and feel of the unit far out performing that of Ableton (although you can use groove quantizing to achieve similar results, the point is it’s already there to begin with on the hardware).

    korg-ms20-mini-main-460-80
    Korg MS-20 (software controller & hardware versions)

    The other reason I love analog hardware is it’s hands on nature of operation which enable you to work far more organically that tweaking settings with a mouse. If you’re an electronic music producer I strongly recommend you get yourself some analogue hardware, even if it’s a crappy old cheap Casio. The limitations of the device enable you to generate something that can help to define your sound and give your production a unified direction. At the very least get yourself a quality midi controller and make templates for your favourite soft synths to help at least bring the interface into the real world.

    [Written by Jack Prest who is an In-house Producer/Engineer at Studios 301]

    To book Jack for your next project, contact us on 02 9698 5888

    Jack Prest
  • Ben Feggans on Loudness – Part 1

    Ben Feggans on Loudness – Part 1


    Loudness Part 1

    One of the most common questions people ask a mastering engineer is “why is my track not as loud as everyone else’s?”

    In this article I’m going to explain in simple terms how humans perceive loudness and how it can be measured accurately.  Since the early Motown days of pressing vinyl, there has always been a race to have the loudest cut. This was a skill developed by cutting engineers and is the foundation of mastering records. The idea being that the song would sound louder on a juke box and on the radio thus making it stand out from the rest. The loud cut was limited by the physical medium of the record and the cutting head.

    When digital came along this all changed- there is a ceiling of 0 dBFS (decibel Full Scale) that is the maximum permissible limit of digital audio. Since the introduction of digital peak limiting and clipping in the 1990s the true “Loudness War” began, much to the detriment of listener enjoyment.

    The Loudness Wars

    Also see here another Visual History of Loudness.

    Television stations have been following loudness guidelines for years due to the many listener complaints that the ads were louder than the program content. In America this is known as the CALM act, and Australia is moving in a similar direction with OP59 standard. Most audio people know that the ads are louder do to the decrease in dynamic range of the ads compared to the normal program. Program audio has dialogue, music and background sounds so it needs to have some dynamic range in order to sound natural and also have impact for action scenes, whilst the ad is smashed to an inch of its life so the quiet parts are almost the same level as the loudest part.

    Measuring loudness is quite difficult, and due to changing standards for television, accurate loudness metering has only recently been developed. Fortunately the same way of measuring loudness for broadcast is creeping into music, so when you tick Apple “Sound check” or Spotify’s “normalize” function the level of music is will remain consistent from track to track. This will be a revelation for the music industry and may put an end to the loudness war, as tracks mastered purely for loudness will actually sound worse when volume matched to music mastered at a more conservative level.

    Human Perception

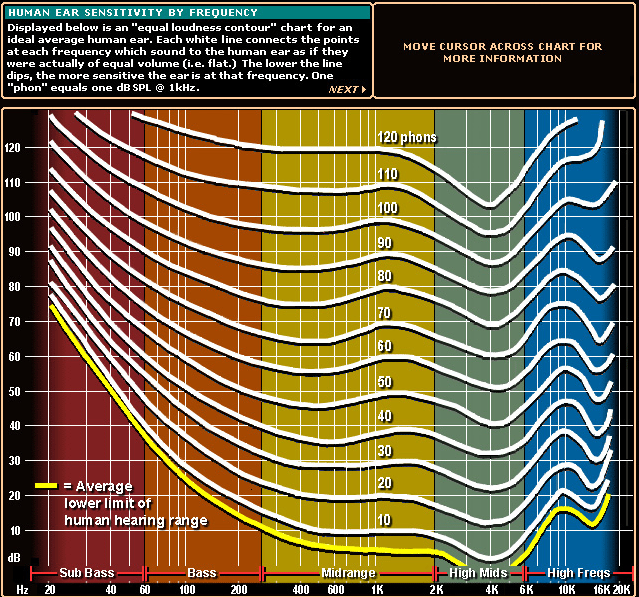
    Sound has two properties, wavelength and amplitude. The frequency of the wavelength is measured in Hertz (Hz), and sound pressure level (SPL) is measured in Decibels (dB). The human ear of a small child can hear from 20Hz to 20kHz, and the high frequency response decreases with age and more rapidly with loud noise exposure. Just talk to a live sound engineer over dinner and you’ll get my drift. What many people don’t know is that humans do not hear the entire frequency range at the same loudness level. Furthermore; as amplitude changes, so does our ears response to the frequency spectrum.To understand why different frequencies are not heard equally, you’ll have to look at the research by Fletcher and Munson reported in a  paper entitled “Loudness, its definition, measurement and calculation.”

    The Y-axis represents Sound Pressure Level (dB SPL) or volume, in simple terms. The X-axis represents the frequency range. As you can see, our ears are most responsive to the middle range of the frequency spectrum around 1kHz-4kHz range right where human speech is. At lower volumes our ear does not hear the low or the high frequencies and well as the midrange. At higher volumes the curve begins to flatten out and we begin to hear a flatter frequency response compared to lower levels. The flattest response is around 85dB SPL, which is also about as loud as you should have your monitoring for 8 hours to avoid hearing damage.

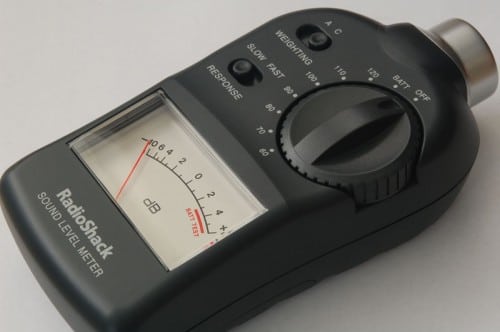
    spl-meter-500x332
    an SPL meter.

    Grab an SPL meter from Jaycar, which should set you back $40 and sit in an equilateral triangle between your monitors. Ensure your monitors are away from wall and the corners of the room or you will have an inaccurate boost in the bass response. Put the meter on C weighting and play some pink noise from your DAW at -18dBFS. Once you are around 85dB SPL this is your listening reference level. You can even measure your room frequency response if by downloading test tones http://realtraps.com/test-cd.htm

    Frequency Balance

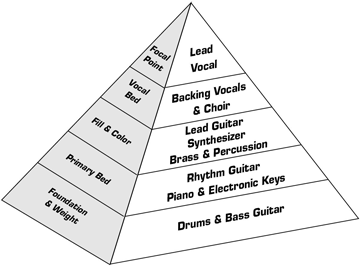
    What does this have to do with music loudness? Think about the different frequencies of instruments in your mix and where they sit in the audio spectrum. Here is an excellent frequency range chart that can also show you how each range is related to our hearing response:

    More here: http://www.independentrecording.net

    Equal loudness

    When people say to me “why is my track not as loud as everyone else’s” I point them to the mix, not the mastering. I’ve noticed over the years as clients mixes improve (meaning, they both sounded better in the control room AND in the real world), they also become louder.

    Look at it like this: if you’re mixing a hard rock tune, and your guitar and bass are masking your kick and snare, you need to turn the kick and snare up louder to give them the impact you need. That means transient material that is louder relative to the more steady-state (RMS) stuff. And that means a quieter mix. Now, if you carve out some low end from the bass that allows the kick to speak with impact at a lower fader level, and carve out some midrange from the guitar that lets the snare speak at a lower fader level, your transient-to-steady-state (peak-to-RMS) level will be lower, meaning a louder mix. You will also have better separation.

    rayburn

    Then you’ll find that when the track is mastered and pushed to commercial loudness levels, the mix balances don’t fall apart, compared to an average mix that is pushed too hard. A word of warning though- as our ears are most sensitive to midrange, this is the area that can become unpleasant with excessive midrange boost.

    The loudness of your mix mostly comes down to the frequency balance and where the spectral energy is. It also comes down to dynamic range, which I will discuss in part 2. The older VU meters and average level meters (RMS) will react strongly to low end, giving you a false representation how loud your mix is compared to others. Loudness meters take the way we hear into consideration with weighting filters and will give you a much more accurate number.

    More on this in part 2 in the coming weeks!

    Written by Ben Feggans.

    Ben Feggans - 301 Mastering

    Ben is one of our 5 resident mastering engineers, and works in Mastering Suite 2.

    To book Ben Feggans for a mastering session, contact Lynley via mastering@studios301.com or 02 9698 5888.

  • Jack Prest on Analogue Vs Digital – Part 1

    Analogue Vs Digital Part 1 – Custom 75 Console Demo

    To book Jack for your next project, contact Danielle on danielle@studios301.com or 02 9698 5888

    The analogue versus digital debate is always sure to draw some strong opinions. On the one hand champions of the old school will wax lyrical about the magic of analogue equipment and tape recording, while the new wave of ITB (In The Box for the uninitiated) producers and engineers love the control and clarity, not to mention the convenience of computer based production. Over the next two blog posts I will be exploring this concept first through the comparison of an ITB versus an analogue summed mix and second comparing analogue synths and drum machines against their software emulations.Screenshot 2014-06-18 11.40.43

    With a background in electronic music, I built my mixing chops in the software domain, it wasn’t until I began working for Studios 301 that I got exposed to top flight consoles and the hardware versions of the software I was using everyday. For me the benefits of the analogue equipment were undeniable, if somewhat unquantifiable. There is something that happens when those 1’s and 0’s become electricity running through circuits, transformers and valves that instantly gives you a “sound”. That said when working on some music (especially electronic based production) I would miss the definition and separation found when working ITB.

    Recently 301 acquired one of the new Custom 75 Consoles powered by Neve for our Studio 6 and it has quickly become my favourite console at the studios. It’s unique design of having a modern (SSL-style) and retro (1073 era Neve) signal paths switchable on every channel and the output bus, give you the necessary control over how much analogue goodness you want to add to your mix. This console will be the test subject for this demo (please comment if you are interested in seeing similar demo’s with the other Studios 301 consoles).

    To demonstrate what this console can do (and the benefits of analogue summing) I have done 4 bounces of the same ITB mix. The first is an internal bounce straight out of Pro-Tools. The other 3 are all summed through the Custom 75 as a set of 18 stereo pairs, with drums, basses, vocals, keyboards etc grouped together. All channel faders on the Neve are set to zero with the master fader set to drive the board in it’s sweet spot. The first summed bounce is using the modern signal path on all channels and the master bus, the second is modern signal path on all channels and retro on the output and the third is retro on all the channels and output. They have all been level matched and the edited together to each play the same 8 bars moving from ITB then the 3 summed mixes in order, then returning to the ITB mix. Make sure you listen on a nice set of speakers or headphones that you are used to.

    When listening to the analogue summed mixes the first thing I notice is the instant widening of the mix, I can also place every element of the mix more easily in it’s own space. I also find the mid-range and upper mids lose the slight harshness found in the ITB mix and take on a more pleasing glassy quality. My favourite part is it adds serious weight and depth to the low-mids and bottom end. When switching in the retro bus you will notice the mix glues together ever so slightly just taking the smallest amount of transients (listen especially to the snare) or air pulling all the elements together.

    Then with the retro signal path engaged on all channels you hear the familiar thickness and Neve magic throughout the entire mix (these changes are far more subtle than the comparison to ITB so you will need to listen close). Personally my favourite way to use this board is completely in modern mode. It gives me that extra width, definition and depth without compromising the clarity of my ITB mix, which IMHO makes it the perfect console for mixing and summing electronic music.

    Given the clear benefits of the analogue summing in this instance, this would appear to be a win for the analogue side. However, don’t forget that this is simply summing a mix that was completed entirely ITB. Given the amount of processing used I would have needed 3 times the hardware in our biggest studios, hours of painstaking tape editing not to mentioned processes like Auto-Tune and Vocalign that were virtually impossible in the analogue realm (I have heard stories about people tuning vocals with an Eventide harmanizor but I for one am glad I will never have to do that).  Add to that the time it would have taken just for me to recall this mix for this demo and things are starting to look a little more even.

    For me this highlights the key point when talking about analogue versus digital in the recording and mix realm, it’s not about one or the other it’s about taking the best from both worlds to achieve the best result you can.

    READ PART 2 HERE

    [Written by Jack Prest who is an In-house Producer/Engineer at Studios 301]

    To book Jack for your next project, contact Danielle on danielle@studios301.com or 02 9698 5888

    Jack Prest - Studios 301

  • Leon Zervos: Why I use VU meters.

    Leon Zervos: Why I use VU meters.

    To book Leon for a mastering session, contact Lynley via mastering@studios301.com or 02 9698 5888.

    Help me make your mixes tighter.

    If you can make your mixes sound tighter when you are mixing, then I can take it the next level when mastering.

    If you listen to the old vinyl “sound” that everyone loves, one of the reasons it sounds so pleasing is that it is mixed to accommodate the boundaries of disc cutting. When I first started out, mastering was disc cutting… That is, the master you would deliver to the factory would come back as a vinyl LP or single. As well as the mastering engineer, mixing and recording engineers always worked with the finished vinyl at the back of their mind. So, with the technical boundaries that vinyl had, engineers were watching all the peaks, controlling everything that jumped out (inevitably causing problem on vinyl) – and that’s why everything sounded so nice, round and tight.

    (We also used more de-essing when we were cutting to lacquer, because the medium wasn’t very friendly to top end and would cause “sibilant” distortion, especially on vocal s’s, high hats and anything with an excessive amount of top end. So not only did you have limiters controlling the sound for tightness and roundness, you had de-essers which were giving the mix a nice rounded top-end.)

    In order to achieve nice tight mixes nowadays, these techniques from working with vinyl still apply, and this is where VU Meters come in. A VU meter is like a rev counter in a car, it gives you a feel for what the car is doing, and the VU gives you a feel for the song, and how tight and “round” it is sounding.

    What are VU Meters?

    VU (Volume Unit) Meters essentially display an average of what we hear, rather than the very fast peaks that we don’t. Average level is important, as controlling this will make the mix sound tight. For example, with a kick drum, if you have a VU meter, you can see if the kick drum is adding kick and punch to the mix, or if it’s adding a lot of wooliness and getting in the way of everything else.  If the VU meter is moving radically, just working on the kick drum, then you know by looking that you are losing tightness.

    In the particular instance of a kick drum, (or other low end elements in your mix) your room acoustics might be deficient in low frequencies – and this is also where VU meters are indispensable. They are like your third ear – they will show you the energy in the low end, and if there is radical movement, then you probably have an issue with frequencies that you aren’t hearing.

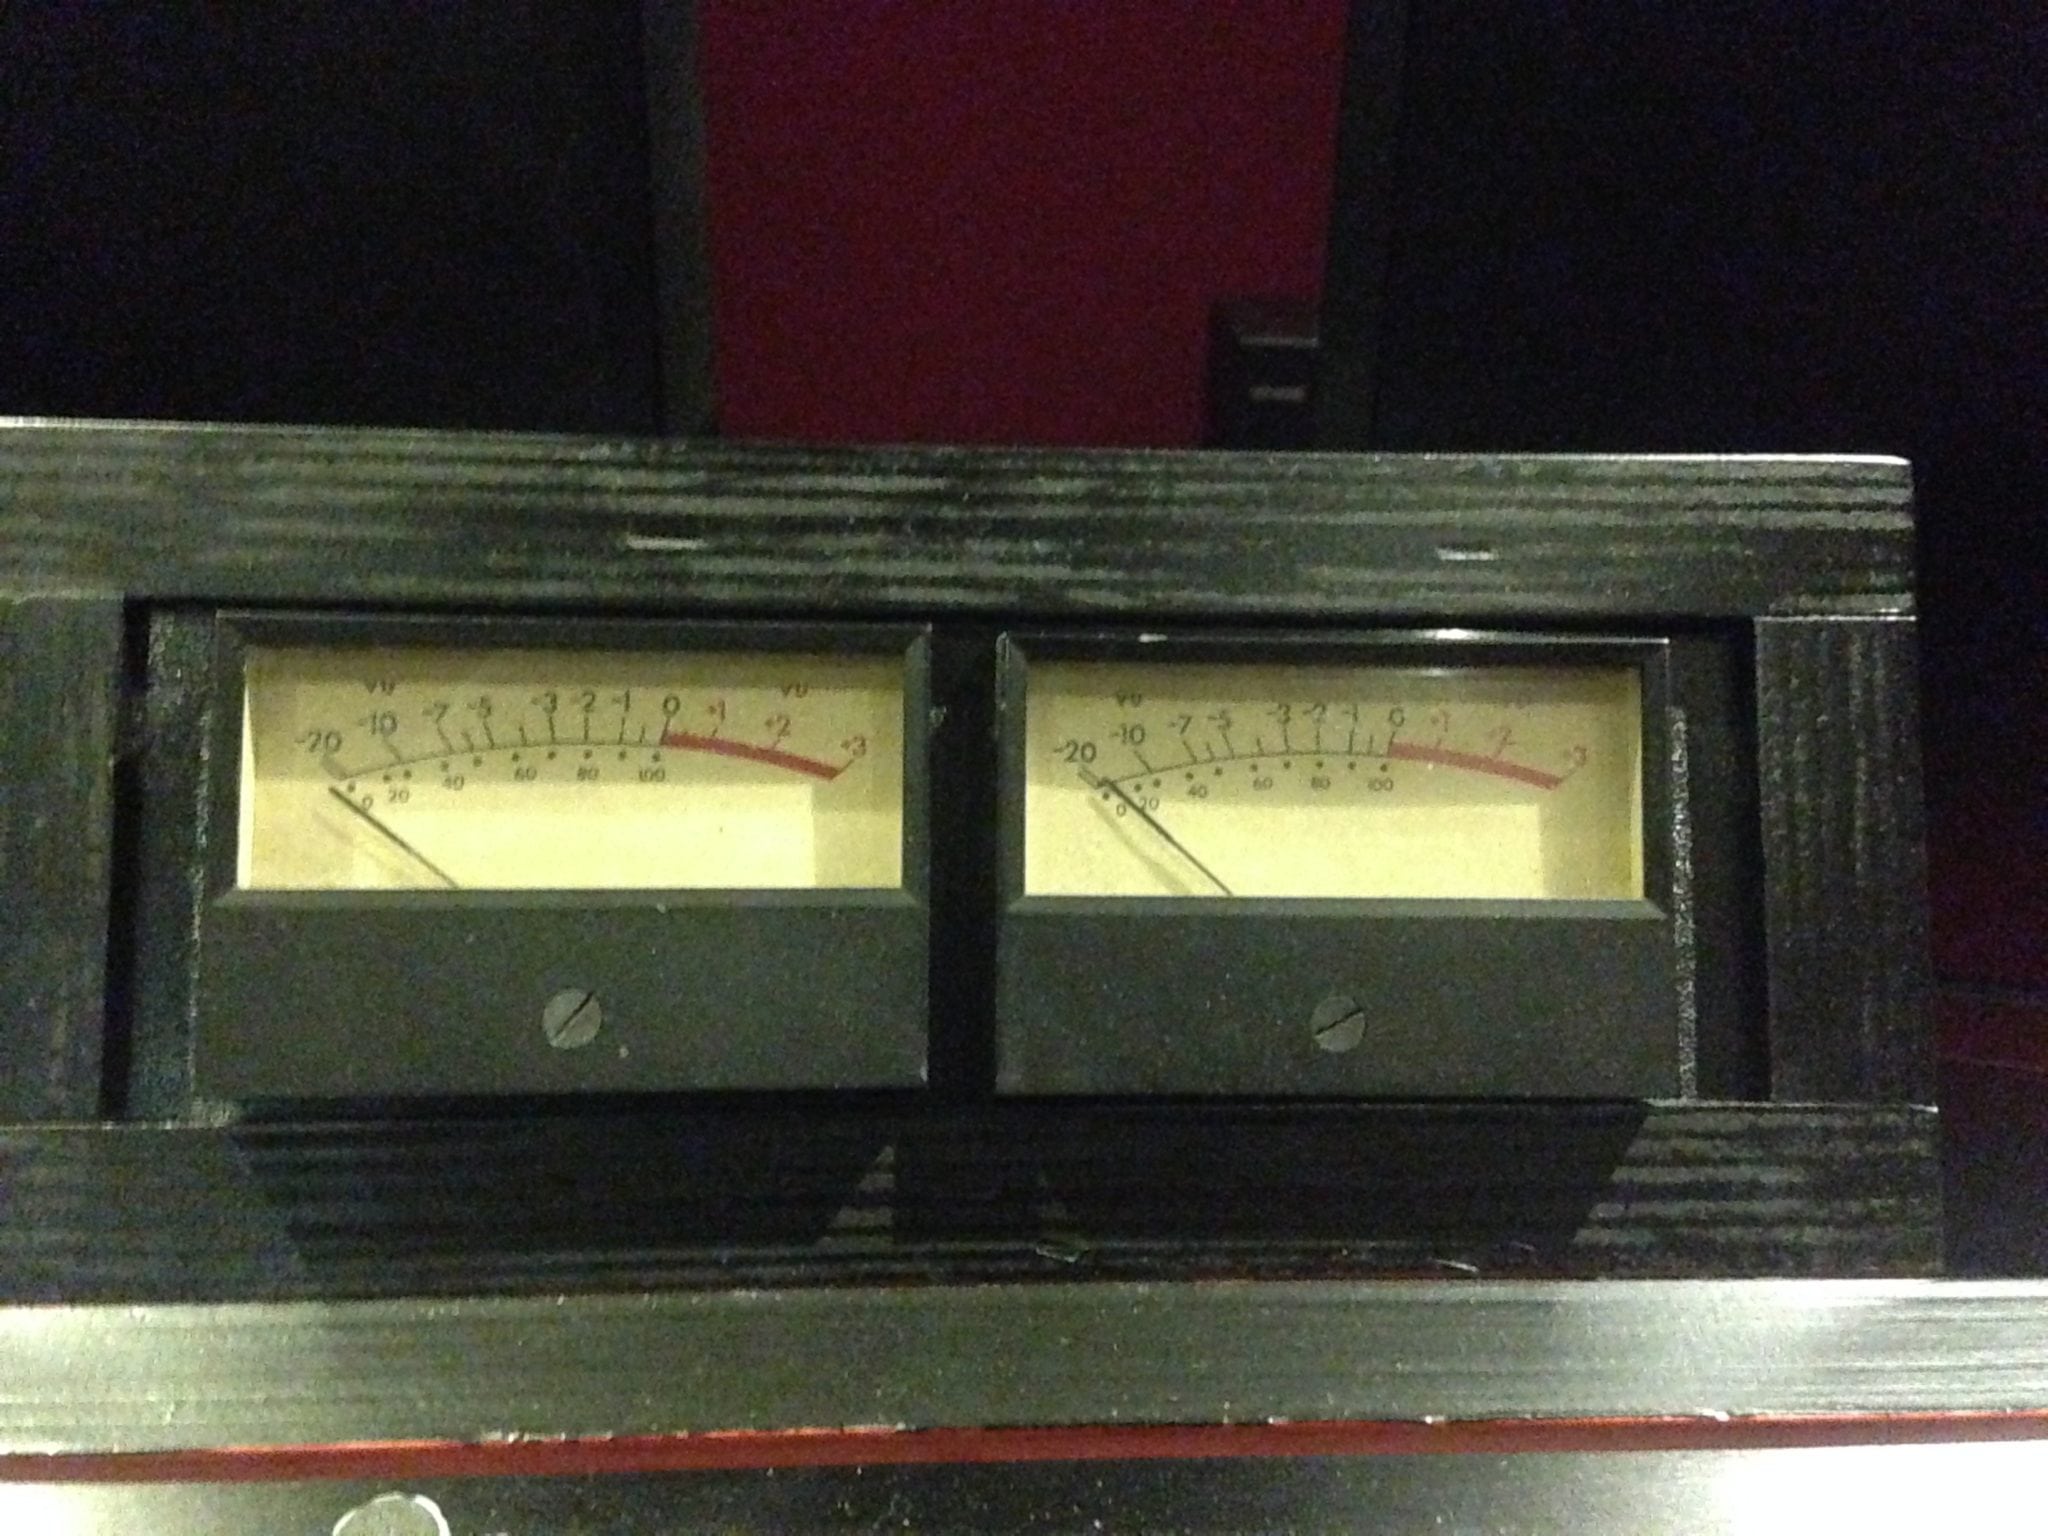
    Leon's custom VU Meters built by Stephen Crane.
    Leon’s custom VU Meters built by Stephen Crane.

    Watching the VU Meters move.

    In order to achieve mix tightness, VU meters should “dance” smoothly and in a gentle manner, usually in time with the music, rather than in big jumps and erratic, out of time movement.  This erratic movement implies that there are drastic level changes, which will be hard to control in mastering. A common, but undesirable, scenario when I’m mastering a track is when the tom fill comes in, the VU’s have excursions of 10dB.  I can go in and fix that in the stereo mix, however at that point it is going to effect the rest of the mix, because when I push the toms back down, everything else in the mix will also be pushed down.

    When I get mixes from the great engineers, I usually only add a little, if any, peak limiting in mastering because it’s all been taken care of during the mix. 9 times out of 10, this was done on the individual channels of the mix (as opposed to a buss output compressor). In this instance, VU meters will show you when levels and compression are adequate in the mix.

    Don’t confuse limiting or tightening with squashing. In this manner, limiting should just be controlling the peaks rather the squashing the entire signal, and your mixes will by default sound louder. Again, this is where VU meters come in – they help you see the erratic movement caused by peaks and will help you apply just enough dynamic control.

    Choosing your VU Meters.

    There are different types of VU meters out there, and I have spent many hours experimenting to find the ones I liked best. I encourage you to do the same – some will move faster, some slower, and you should find the ones that behave the best for your individual preference and purpose. On top of this, VU meters can usually be calibrated for both speed and volume level, and these settings are essential for getting the best out of them, though again, the particular settings are very much personal taste. The VU meters I use are custom built by Stephen Crane at Studios 301.

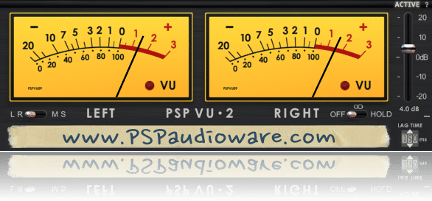
    PSP_VU2

    As far as software meters go, there are many options out there and I’m still experimenting with them. The main stumbling block I have found is finding software meters that behave how I want to “see” the signal, and are adjustable for the right reference level. So far, my favourite is the PSP VU2 meter plugin.

    Everything is important about the gear and the studio you use it in, but if I had to pick my essential tools, they would be my monitoring – and my VU meters.

    Written by Leon Zervos.

    To book Leon for a mastering session, contact Lynley via mastering@studios301.com or 02 9698 5888.

  • EQ Shootout with Ben Feggans: Dangerous BAX Hardware vs UAD’s BAX plugin

    EQ Shootout with Ben Feggans: Dangerous BAX Hardware vs UAD’s BAX plugin

    To book Ben Feggans for a mastering session, visit our Online Mastering Booking page.

    Dangerous BAX verses UAD BAX – Shootout.

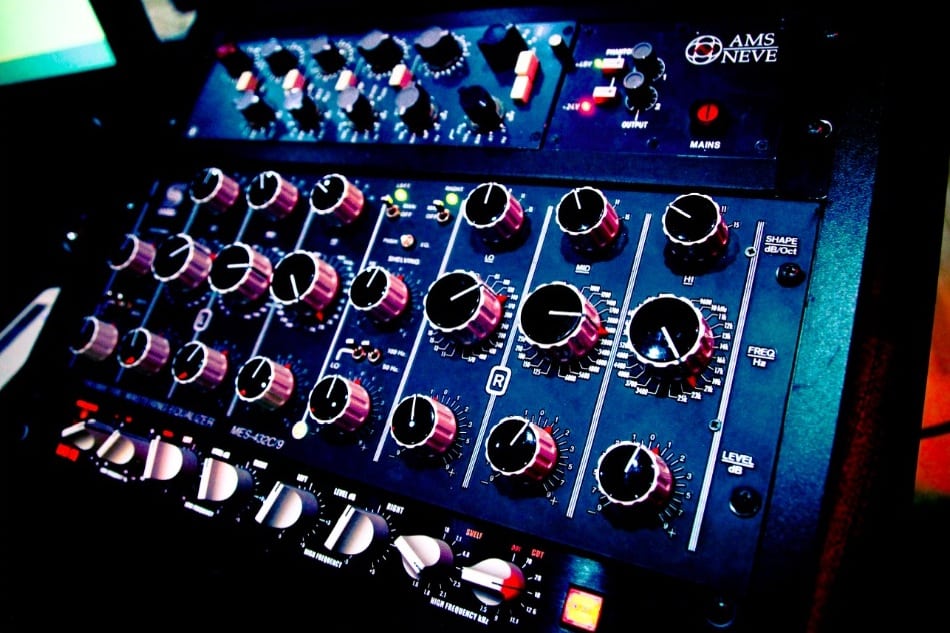
    The Dangerous BAX EQ was released in 2009 and is based on the famous “Negative Feedback Tone Control” by P. J. Bandaxall designed in the 1950s. This circuit is used in many hi-fi equipment bass and treble “tilt” controls. The advantage of these curves is that they of a constant shape, being very gentle and do not “flatten off” at the limits of their audio range. It is similar to using a standard shelving equalizer with an extremely wide “Q”.

    In order to further shape the upper and lower ends of the spectrum, the Dangerous BAX also offers transparent 12dB/Oct high pass and low pass filters. The designer of the Dangerous BAX, Chris Muth, spent many years on the prototypes in well-known mastering studios in order to get the most suitable frequencies. The Dangerous BAX quickly became renowned as a transparent and un-obstructive tone control, with turn over frequencies that were highly tuned for mastering.

    Having owned the Dangerous BAX hardware since they became available in Australia, I can confidently say it’s the one piece of hardware that I could not do without. I would happily pay the price for the high pass filter alone. It’s one of the few equalisers that can instantly tighten the low end without affecting the punch of the kick and bass. The 12Hz and 18Hz works wonders on an 808 kick drum. Admittedly I use the BAX more for cutting rather than boosting, and mostly in the low end, although the high shelf boost can be very clean and can add that extra sparkle on mixes if required.

    Screen Shot 2014-06-02 at 10.26.34 AM

    It also works very well after another parametric equalizer such as the GML or Sontec, as you can boost the low end in the sub region then use the BAX high pass filter to cut the extreme subsonic frequencies that may cause smaller speakers to distort. Conversely, you can use a high shelf boost on the BAX and use the low pass filter to smooth the extreme top end and make it sound more natural.

    It looks deceivingly simple yet can be very powerful once you understand the depth of what the curves are capable of. I would describe the sound of the Dangerous BAX equaliser as quite transparent; it has a hint of the modern Op-Amp sound giving it a slight mid forward texture, and is fast with no loss of transients.

    BAX high and low shelves

    Now Universal Audio have released the Dangerous BAX on their UAD-2 platform. I’m a big fan of the Universal Audio emulations, especially the Massive Passive, which I used to own; so there is no “analogue is better” bias in this comparison – I’m approaching this with an open mind. The one caveat is that Universal Audio outsourced this emulation to Brainworx in Germany, so it’s not quite the same team that coded the Massive Passive emulation.

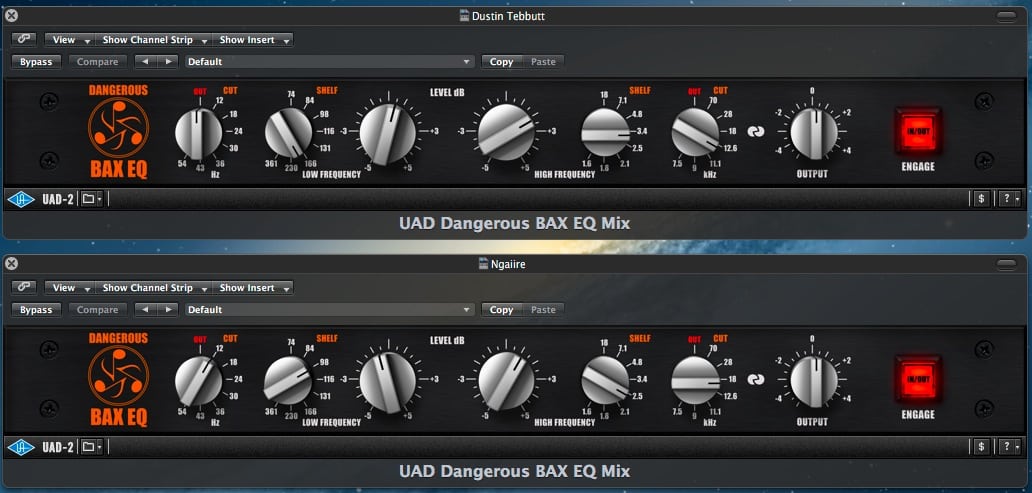
    In order to make the comparison equal, my methodology was to use the same signal chain for the software as the hardware. The UAD BAX went through an analogue loop out if the DAW via the Prism DA-2, through the Dangerous BAX in relay hardware bypass, and into the Prism AD-2.  Then the UAD BAX was bypassed and the hardware BAX inserted into the chain. This was all recorded into sequoia as a 24-bit 48kHz file. I used a variety of material that were all mastered using the hardware BAX, including folk, acoustic, electronic, and hip-hop from artists Ngaiire, Dustin Tebbutt, Flume and Suburban Dark.

    Screen Shot 2014-06-02 at 10.32.39 AM

    The results were then compared in Studios 301’s Mastering Suite 2 on the Duntech Sovereigns and Adam S2X’s.

    Listening to the results, my immediate impressions were that the UAD version did not sound as transparent as the hardware. The high frequency shelf needed more boost on the software to sound like the hardware, and the low boost was more exaggerated on the software compared to the hardware, so I had to dial in less low end on the software for an accurate comparison. The hardware had more open, silkier highs and more tightness in the low end, especially when using the filters. Whatever settings I used, the UAD plug-in had a tendency to sound darker and thicker than the hardware, with much less perceived depth.

    MS2angle

    This is one of the main issues that I encountered using the UAD for mastering; the front to back depth was flattened, something which I always aim to retain or even enhance with mastering grade hardware. The stereo width was quite close. It sounds like the plug-in has tried to capture the essence of using hardware, yet this is precisely why the Dangerous BAX is so good – it doesn’t really have much of a sonic footprint. On complex material the UAD almost sounds compressed compared to the hardware.

    I’m going to give an elusive non-scientific opinion, but the software just doesn’t have the same subtleness or musical involvement as the hardware.

    The UAD BAX does have some more tricks up its sleeve, as you can use the equaliser in mastering mode, enabling mid/side processing. This enables you to cut or boost the mid or side channels separately and opens up the BAX for many more possibilities, especially on problem mixes. For example, you can strengthen the kick or snare on the center channel without affecting the panned instruments in the stereo channel. Conversely, you can tame a panned high hat or sibilance in the out of phase whist not affecting the center channel. This is one advantage of the UAD BAX.

    So by now you may have gathered that I’m rather fond of the Dangerous BAX hardware, and not so taken by the UAD BAX. I just don’t think Brainworx have nailed this emulation. After recording and comparing the files on a variety of systems, I would say that the average listener could probably not tell them apart. That may be good enough in online mixing situation. However, in a mastering studio you always want that 5-10% improvement, and this is where software emulation falls short.

    Written by Ben Feggans.

    Ben is one of our 5 resident mastering engineers, and works in Mastering Suite 2.

    To book Ben Feggans for a mastering session, contact Lynley via mastering@studios301.com or 02 9698 5888.

  • LinnDrum samples, Powered By Neve

    LinnDrum samples, Powered By Neve

    For the next release in our drum samples series, and with our friends at Ableton Liveschool, we lined up a classic LinnDrum and sampled it through our Powered By Neve Custom Series 75 recording console, located in Studio 6 in Sydney.

    Enter your email address below to be sent a download link (Your email address will be added to the 301 & Liveschool mailing lists, you can opt out later).

    You can also download an Ableton Live Pack here on the Liveschool blog.

    Download the samples

    NOT AVAILABLE

  • Bass on a Budget

    Bass on a Budget

    I recently wrote this piece for our friends at Liveschool, but realised its relevant to our audience too.

    A wonderful thing about music production these days, is that you can do it without the need for a big studio. But if you’re interested in making bass heavy music, then there’s nothing more important than getting to know your bass better.

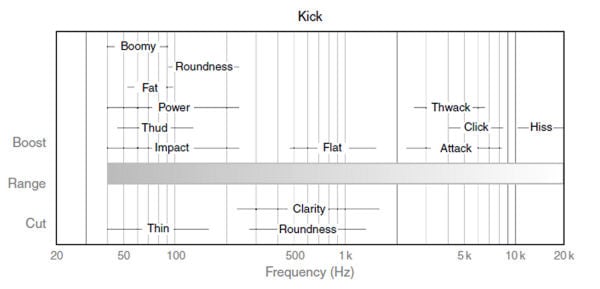
    kick-frequency-chart

    One of the main reason people struggle with getting their mixes to sound tight and punchy is because of poor monitoring environments, especially in the bottom end.

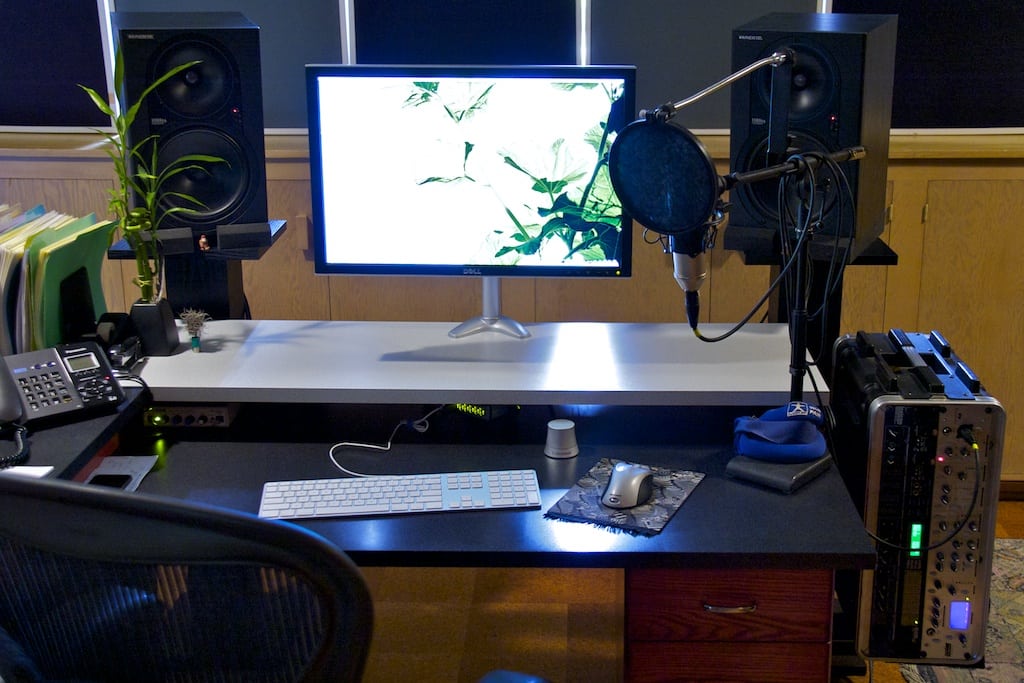
    test-environment
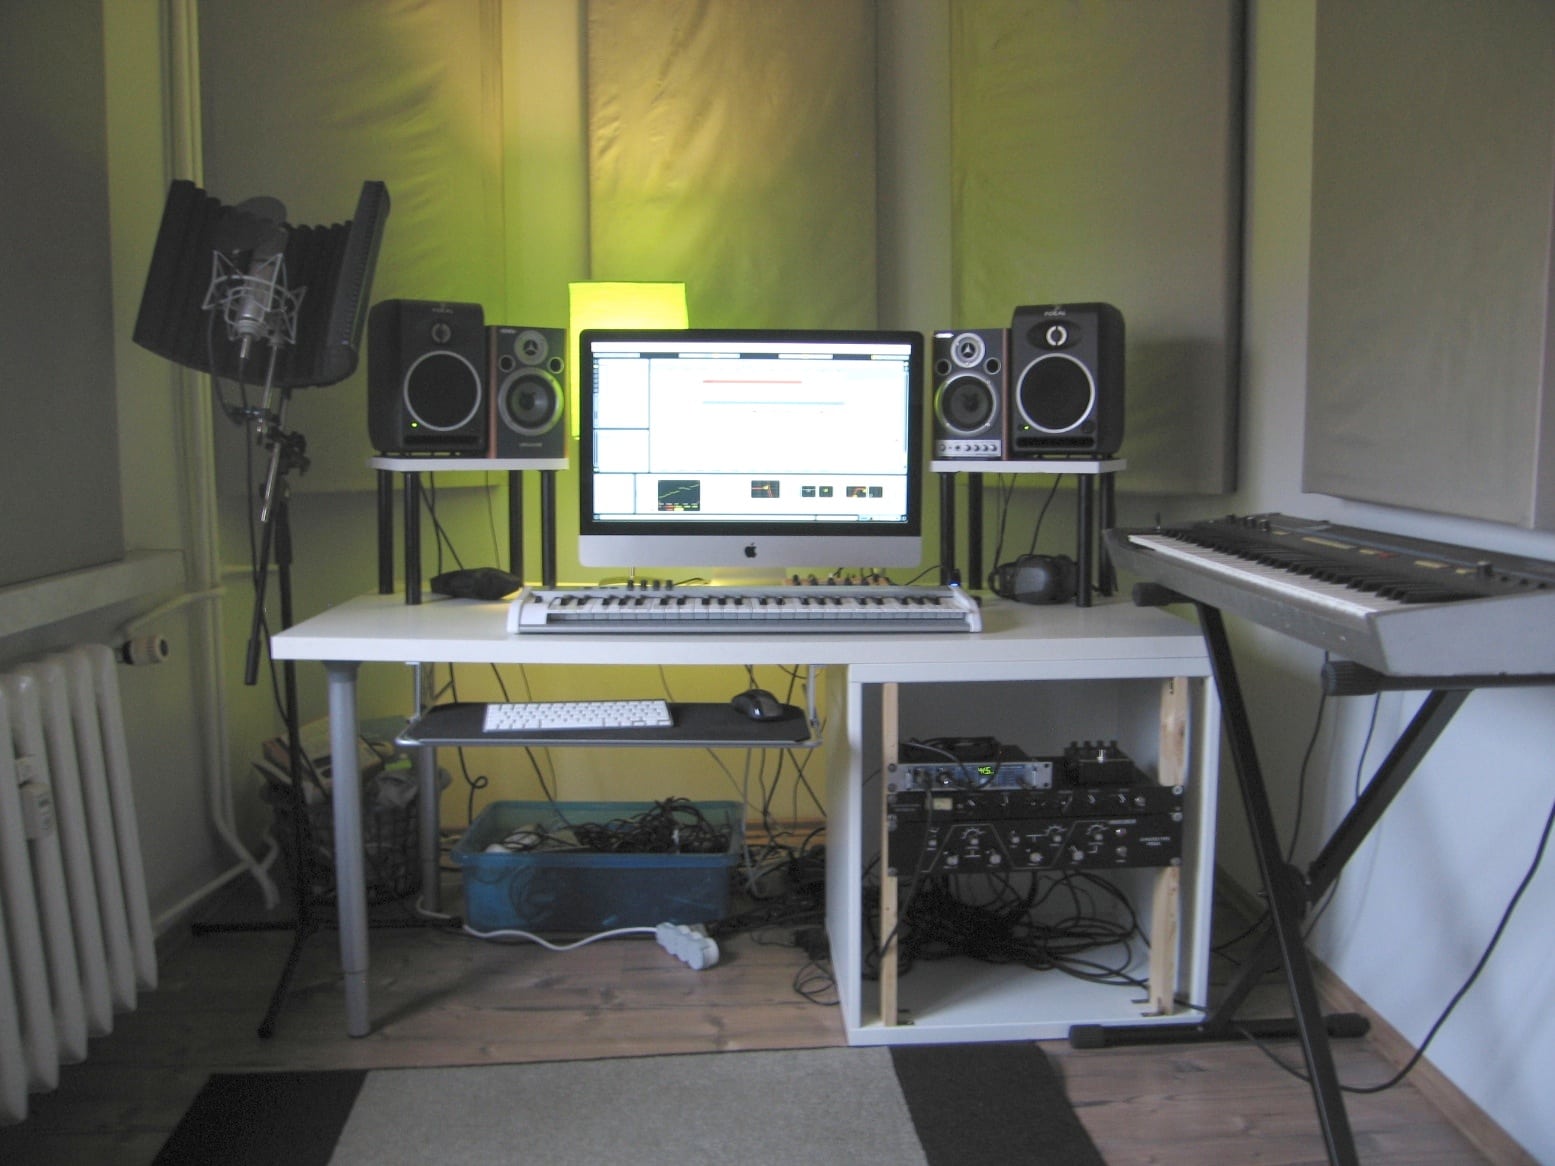
    Example of a simple home studio environment.

    One way to hear whats down there is to turn it up, and if you don’t have the luxury of an acoustically isolated space, you’re going to piss off your neighbours, girlfriend, parents, etc. Another way to do it would be to fork out on absurdly good headphones or a subwoofer (and again, piss off your….).

    But there is cheap and effective solution!

    I discovered this years ago by accident but got so used to it, that I still rely on it to this very day.

    I used to place my monitors on my desk in a fairly small room; this created all sorts of negative issues, such as causing the table to resonate, and given how close the speakers were to the back wall, the entire room would sometimes resonate at certain frequencies, especially at higher volumes.

    IMG_3287
    Another example home studio.

    But at lower volumes when the room didn’t resonate, I noticed something else. The speakers were sitting directly on the wooden table because I couldn’t even afford any acoustic sponge to sit them on. This in turn caused low-frequencies to vibrate directly through the table. Another way to do it, is to actually touch the speaker cone, ever so carefully. This gives you a very precise sense of any bass movement, but be sure not to apply too much force, or you could damage the drivers!

    Through this, I found myself *feeling* the bass. This became especially useful even when they were turned up, because even though I didn’t have a subwoofer, I could feel what was going on below 40Hz.

    Another way is to actually look at the woofer. If at a moderate volume, you can visibly see the woofer moving back & forth (~5-15Hz) then you need to hi-pass something.

    giphy
    Feel the bass!

    Doing this, I was able to have a sense of how fast the low-end was moving, or feel the separation between the kick and bass. I could also feel just how low the bass went. This in turn affected sound design and mix decisions… and when you get the low-end sounding good, the rest is a lot easier to build.

    At first, it takes some getting used to… ie, knowing how much movement is *just right*, but you eventually pick it up, and it never leaves you. In fact you’ll start to be more aware of sub-sonic in clubs and other loud spaces. Lastly, you may have seen this technique in this part of that film “It’s All Gone Pete Tong” – I still use do this today and swear by it.

    Written by Sameer Sengupta.

  • Dithering – Andrew Edgson explains

    Dithering – Andrew Edgson explains

    To book Andrew Edgson for a mastering session, contact Lynley via mastering@studios301.com or 02 9698 5888

    Any attempted discussion of dithering usually results in the collective groan by audio engineers everywhere; it is one of the most uninteresting and banal topics in the spectrum of audio production. However it is also one of the most common questions asked when submitting music for mastering. It is because of this that I will cover this topic, hoping to answer any of the questions that do come up.

    So what is dither?  A search on the Internet will very quickly tell you that dither is one of a few techniques that can be used to minimise a special type of distortion, called quantisation error. It does this by adding randomised noise to an audio signal during the process of quantisation… The three questions immediately drawn from this are:

    • Why would I want to add noise to my recording?
    • What is quantisation?
    • What are these errors all about?

    Adding noise to your recordings?

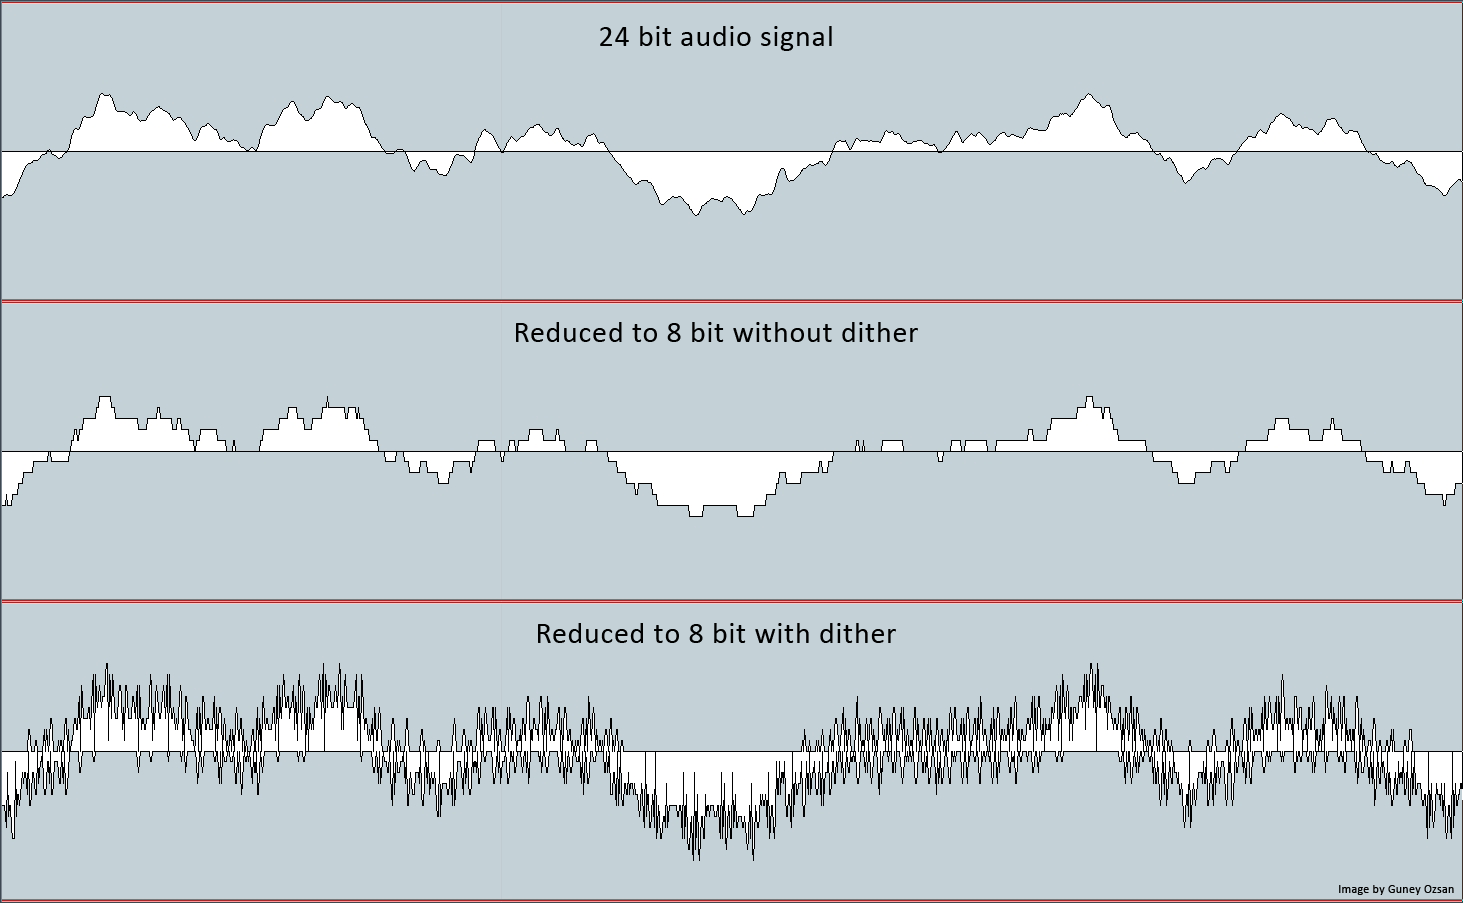
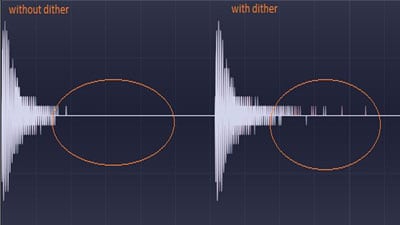
    The reason we would want to add noise to your recording is really only to enhance the absolute quietest parts of the music. Imagine when a piece of music is fading out to nothing (such as the tail of a piano note), there will become a point during quantisation where for a given input there will be a result of no output (at the final quietest step, from something that is able to be heard, to nothing being able to be heard). This is an example of quantisation error, and because this is a step, anyone would hear this as an unnatural, albeit given the right playback volume.

    Quantisation error increases as the number of bits used to make a recording decreases. Dither in effect smooths out the inaccuracies of the recording system, by disguising the steps between different values of amplitude.

    Audio bit reduction from 24-bit to 8-bit with and without dithering
    Audio bit reduction from 24-bit to 8-bit with and without dithering

    Put simply, quantisation is part of the process that an audio signal will go through when being sampled and it is how a signal will be given a value for its amplitude (volume level). There are really two occasions when quantisation happens, either during conversion from an analogue waveform to a digital binary signal, or during a stage of digital signal processing.

    The importance of dither is very much related to the level that a recording is made at, and hence the number of bits you use. It becomes more important with the quieter, or fewer number of bits used to encode the signal. When we make a 24-bit recording there are 2 (binary) to the power of 24 (number of bits) or 16,777,216 discrete values for amplitude that could be encoded to each digital sample. This covers an amazing 144dB of dynamic range, and really is more than you should ever need (just think that the noise floor of most equipment is around -95dBFS).

    Examples of Dithering

    Below are some audio examples that I have prepared to demonstrate dither and quantisation error, along with an unaffected source for you to compare.

    Please note that these examples simulate recording a signal at a very low volume, to better demonstrate the quality degradation experienced when using a small number of bits to encode a signal. This issue can easily be overcome by recording at an appropriate level, which under normal circumstances, will cause the effect of dither to be far less obvious. I have created these examples by following these steps; you can recreate the same results if you follow them too:

    1.  Import the source audio into your DAW of choice.
    2.  Use a gain plugin to change the volume of the source file by -70dBFS.
    3.  Export the file as a 44.1kHz, 16-bit, WAV; with and without dither.
    4.  Import the files created in step 3 into your DAW.
    5.  Use a gain plugin to change the volume of these files by +70dBFS.
    6.  Export these two files as 44.1kHz, 16 -bit, WAV; with dither applied.

    When to use Dither

    So I hear you ask, when should dither be applied to my music?

    The easy answer is… Whenever the audio goes through a process of quantisation. In practical terms, it means that dither should be used at the point of conversion from analogue to digital, and also it should be used at the final stage of any digital processing.

    It is worth mentioning that there are many different types of dither to choose from, too many to mention here. Their differences mostly lie in their sound, some will shift their noise away from the most audible frequencies. My advice on choosing the right dither for your music is to use your ears and make a decision that is based on your own preference. They all sound different and all have a subtle effect over the sound of your music. However there is no right or wrong and it comes down to personal taste. Many people even find they prefer the sound of no dither.

    Dither is applicable to mastering in the sense that it is the very last thing that will be done to a mastered audio file. For instance, if there was any change made to the file after the dither was applied (be it a fade, or a change in volume by even 0.1dB), the audio would need to be dithered again. The dither applied will then compensate for the re-quantisation the audio went through.

    This brings up an interesting question regarding the use of dither on top of dither and how this relates to the accumulation of noise within the recording. The truth of this matter is quite simply, when working with 32-bit, 24-bit, and even 16-bit audio; dither noise will accumulate within your recording. However the level of this noise is so low that any reasonable amount of accumulated dither noise will not be noticeable.775_front

    Furthermore, it is important to understand that dither is less applicable to program material that is focused on high volume. In a lot of modern music (especially applicable to electronic genres) where the instruments are digital, and hence, not captured via delicately placed microphones, the focus for these sounds is usually on their texture rather than their dynamics. Dithering on a pumping bassline which has been processed with saturators and heavy compression, for example, is less audible, and even immaterial, when compared to the effects of dither to preserve a piano’s sonic integrity. In short, dither is important about ‘very quiet passages’ and has little relevance to music that is all about being loud.

    Try it yourself

    If you want to experiment with dithering, here is where you can try it:

    • If you are printing your mix through an analogue board, recording back into software at 24-bit; dither to 24-bit at the analogue to digital converter (provided you can turn this on or off on your convertor);
    • If you are online mixing in the box and want to export to a 24-bit file; dither to 24-bits as the absolute last process;
    • If you are converting between bit depths; dither to the destination bit depth;
    • If you decide you want to make DSP based changes (no matter how small) to an already dithered file; dither again.

    Finally if there is any advice I can give to anyone – from budding audio engineers getting started, through to the most experienced engineers in the business… when it comes to dither, I would always advise using dither when it makes the music sound better. But in regards to real noticeable improvements to audio quality, there are so many things within your control that make a significantly greater difference, such as microphone choice, microphone placement, the instrument, the room, the performance or the song. All these things matter far more to the end quality of your recording.

    So with the finite amount of time that everyone has to commit to any project, I stress that you spend your precious time where it matters most. If you have any questions please don’t hesitate to ask us via mastering@studios301.com

    To book Andrew Edgson for a mastering session, contact Lynley via mastering@studios301.com or 02 9698 5888

  • ISRCs explained

    ISRCs explained

    Lynley, our Mastering Coordinator explains the what, why and hows on everything ISRC.

    If you would like to obtain ISRCs, or book mastering, contact Lynley on mastering@studios301.com or 02 9698 5888

    What is an ISRC?

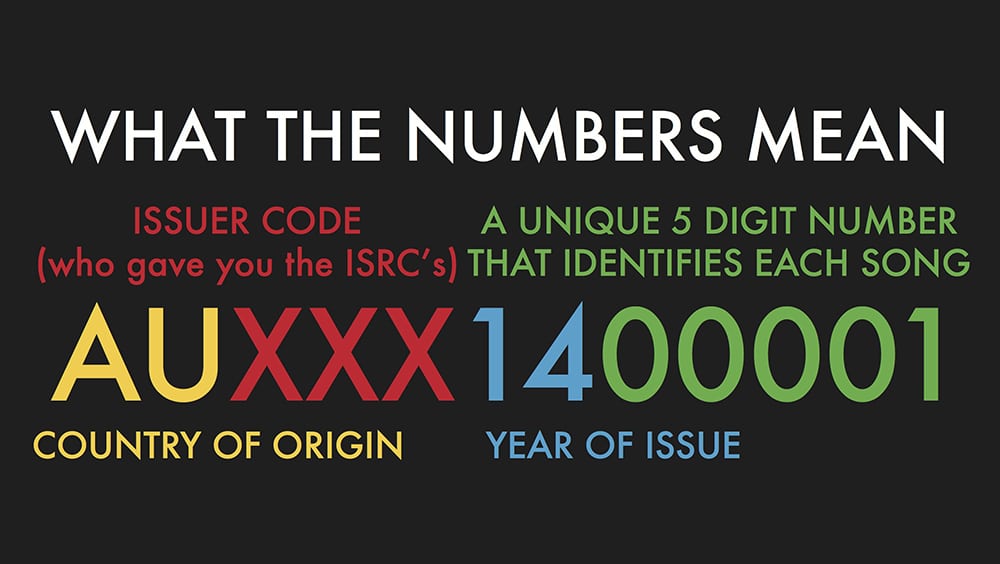
    ISRC stands for International Standard Recording Code, and is a unique 12 digit string of numbers that identifies a recording and the copyright contained within it. ISRCs are essential for uploading songs to iTunes, can be embedded in CD Masters and are used by broadcasters, record labels, publishers and organisations like APRA to track the playback and sale of music.

    What is an ISRC code used for?

    If you wish to make income from your recordings or songs, ISRCs make the tracking of sales and royalties more efficient. As well as this, ISRCs make life easier for the people cataloguing your recordings…. And we think it’s in your best interest to make those people happy!

    How do I get ISRCs?

    The easy way is to ask us… You’ll need to fill out a form, and pay $50+GST, which is a one-off project fee covering all ISRCs on your release. We can issue your ISRCs swiftly from there (usually within 1 business day).

    Get in touch and we’ll send you our ISRC form.

    OR… you get in touch with ARIA. They will issue you a “registrant code” which then allows you to make up your own ISRCs. This process takes a few weeks, but ARIA doesn’t charge.

    BUT… If you are a record label, or an artists signed to a label, usually the label organises ISRCs internally. Check with them before accidentally having ISRCs issued twice!

    I have my ISRCs, now what do I do with them?

    ISRCs can be included with:

    • CD Masters, when we are making a final DDP or PMCD master for CD production. In this instance, we embed the ISRCs into the master disk or file.
    • WAV files, when supplying them to your label, iTunes or digital distributor. In this instance, no embedding of the ISRC into the audio file is required. Simply supply your ISRC along with the mastered track when you hand it over.

    Do I need ISRC’s before I begin mastering?

    No, not for us to master your tracks.

    We recommend however you obtain ISRCs whilst we are mastering your songs. It’s recommended that you include them in your CD Master (which we make after the initial mastering session) and you’ll definitely need them to put your tracks on iTunes.

    If you would like to obtain ISRCs, or book mastering, contact Lynley on mastering@studios301.com or 02 9698 5888 or book online.

  • Korg Volca Beats – FREE Samples!

    Korg Volca Beats – FREE Samples!

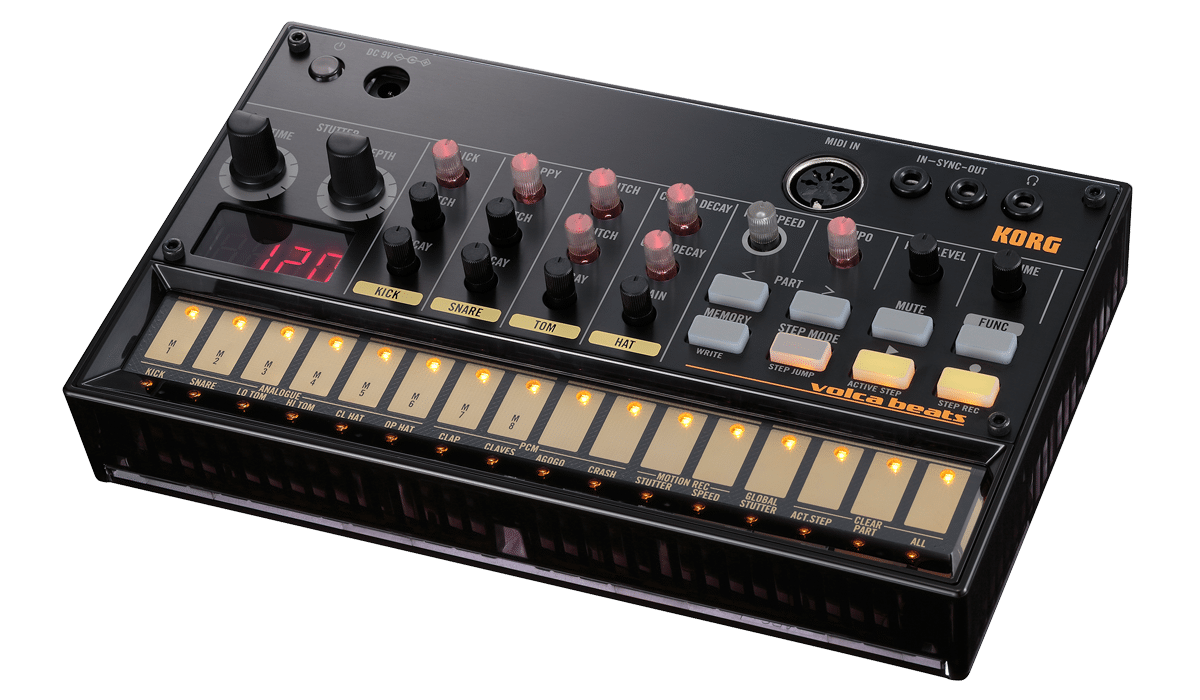
    Late last year we collaborated with Ableton Liveschool on an Ableton Live pack featuring the Korg Volca Beats. For those that aren’t using Ableton Live, we now have the raw .wav samples available for download.

    volca

    Also see below for a special offer on the purchase of any Korg Volca…

    The Volca Beats Drum Machine

    Despite its tiny size (and tiny price to match), this machine packs a lot of weight. Particularly the kick drum, which is as big as anything many times its size (and weight, and price). The design philosophy is similar to the original Roland TR-909, whereby some of the drum sounds are analogue (e.g. kick and toms) and others are pcm samples (e.g. crash). Also similar to the Roland TR units, there is some control over each of the sounds which allowed us to get some variety from the samples we made.

    The Signal Chain

    The signal chain for this sampling session was rather simple:

    Volca > API 512c pre (DI in) > SSL9000k channel (line in) > Apogee Rosetta 200 AD convertor

    Apart from the Volca, there were very few tweaks done on the other gear, once we got the gain right for each sampling pass into the computer. The colour in the signal chain really came from the API pre, which is known for packing a bit of punch.

    Why is it so punchy? We put it down to API’s own discrete op-amp and transformer combination, which can be found in many of their units.

    Special offer on purchasing 1,2 or 3 Korg Volcas

    With thanks to Korg, CMI and Sounds Easy, we are able to share special pricing on any of the Korg Volcas:

    AU$189 for any 1 x Volca series (Beats, Bass or Keys)
    AU$370 for any 2 x Volca series (Beats, Bass or Keys)
    AU$540 for all 3 Volcas (Beats, Bass and Keys)

    This offer is only valid until 30th April 2014!

    To redeem, contact them via their site, via email on sales@soundseasy.com.au or via phone on 02 8213 0202

  • Producer Insight: Nick Launay – PT. 1

    Producer Insight: Nick Launay – PT. 1

    Producer Insights – with Nick Launay – PART 1

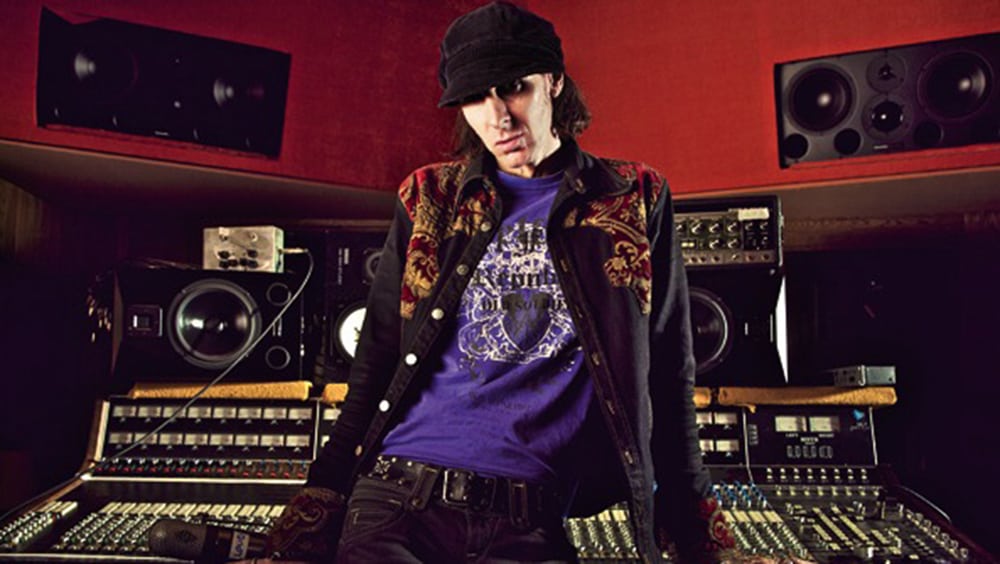
    We have just completed a very special interview with none other than producer extraordinaire, Nick Launay. Nick is a veteran of the tape medium, and having had a long standing relationship with both 301 and Steve Smart, he was very kind to offer us his time to share his insights and some hilarious (read: outstanding) stories over a mammoth talk we had with him.

    For those that may not know, Nick is an English music Producer, Engineer, and Mixer who has worked with everyone from Arcade Fire, Yeah Yeah Yeahs, Midnight Oil and INXS, to Grinderman, Kate Bush, Phil Collins and Talking Heads – basically, he’s a bonafide legend, and an awfully nice chap to boot.

    The focus for our discussion with Nick was to learn about his appreciation of tape – that being, everything from tape splicing, his techniques, the technology, right through to its glorified sound.

    To begin the series, he reveals his philosophy on “Analogue vs Digital”.

    301: Do you find yourself going back & forth between mediums? For example there are artists like Lenny Kravitz who have gone and bought famous old desks and tape machines, only to dive into large ProTools systems, then later gone back to tape.

    Nick: I don’t go back and forth. I would say I go forth only.

    301: And what direction is forth?

    Nick: Well, I record through vintage equipment all the time, always and only.  I capture onto digital through the best A/Ds [analogue to digital convertors] I can find, which are Lavry or Prisms.  Those are the two I like the best.

    301: Are you going through pre-amps of any sort?

    Nick: The studio I use in LA is one my friend owns, but I use all the time. There’s an API desk on its knees over there, and I have a rack of 16x Neve 1081s, so it’s half of a Neve and half an API that totals 48 channels. So I’m going through the best analogue that was ever made. I’m also using vintage tube and ribbon mics.

    301: Do you go to tape?

    Nick: I don’t print to tape anymore, I used to though. The thing with that is that I’ve worked out other ways of getting that same feeling. And let’s be very clear about one thing… Music primarily is about feeling.  That’s what it’s about. The difference between a record that people like or don’t like is the feeling. So the whole romantic thing about analogue tape is, “what feeling is it giving you”?  And I think once you recognise that and hone in on that… Is it then about the saturation of the tape?  Is it about the distortion of the tape?  Is it about the hiss?

    It is about all of those things, and those are the names that we can identify, and put onto these things that are important to us. But it’s the feeling that it gives us, versus the incredibly stark nature of digital – which is just this kind of square box instead of it having curves. So I think that there are ways of creating the feeling of analogue tape by cleverly using analogue equipment, and there are also lots of plug-ins that are actually very good.

    301: In that case, what is your view of tape emulation plug-ins?

    Nick: I think some of them are good. I haven’t used a lot of them. I, again, have different ways of doing things. I think a lot of the great feeling that we used to get from analogue was actually the saturation and distortion. So I use distortion a lot.

    301: What about analogue distortion?
    q2

    Nick: Well, I use Decapitator.  Decapitator’s great. I also use Radiator. The thing, I think, the good thing that I have is that I have this very, very strong memory and experience of analogue. So I know what I want to hear and I achieve those sounds and those feelings by using various plug-ins to create it.

    301: So when you are using plug-ins, you are referencing your hardware experience?

    Nick: Yes, in my mind.  I’m trying to get back that feeling and I think I managed to achieve it by using various plug-ins. I put things through Amp Farm and Sansamp. The Decapitator is my favourite because you can really vary it a lot.  I haven’t used lots of tape simulators like HEAT. I think there are a lot of clever people out there, inventing things within the digital domain now. And I think they’ve got it right. A big round of applause to them because they’ve kind of worked out….  ‘What is it about this analogue thing?’.

    For many years, I avoided digital. And then it came – when Pro Tools started being a tool, a very, very sophisticated editing tool, I couldn’t ignore it and I wanted it.  So what I ended up doing was recording my backing tracks to tape and my overdubs to Pro Tools. Bear in mind that whenever I work with a band, I always record the whole band together.  So let’s say with your average band, you’ve got your bass player, drummer, and two guitar players.  So I would do my backing  track, i.e. drummer, bass player, and two guitar players all playing at once, playing the song, and then record that onto analogue tape…. that’s 24-track tape. Then I got
    q3it and edited the tape to get the arrangement. Once I was absolutely certain that the arrangement of the song on the tape was brilliant, I would then stripe it with code, and I would then sync it up to Pro Tools and transfer everything into Pro Tools. Then I would continue all my overdubs in Pro Tools. So I’d do all my vocals and vocal comps and guitar takes – and then once I finished, I would sync it up again. When I came to mixing, I would sync up the original 24-track analogue up to Pro Tools and I would mix.  So about 50% of what I was mixing was absolutely analogue, analogue, analogue, all original. So the drums, bass, and main guitars were the analogue and all my guitar, keyboards, overdubs, vocal comps, backing vocals, and strings sections would be on digital. I did that for many, many years, probably ten years.

    And then about six years ago, I stopped doing that.  And the reason for that was when we went to 96kHz. I could hear the difference and it was satisfactory – it was because of two factors.

    Pro Tools got better sonically. The A/D converters got better.  Prisms suddenly existed and also this whole thing of using Pro Tools A/Ds with a library Clock or Big Ben made a huge massive difference.  Suddenly, digital didn’t sound quite as bad as it used to.  That’s one factor.  The other factor which I think you cannot ignore, is that iTunes suddenly became the main way that people are listening to music.  In iTunes, most people were listening to MP3s.  So in my mind, I just could not justify the little bit of difference that was now the difference between analogue and digital in ‘good digital’.
    Screen Shot 2014-03-19 at 12.26.44 PM

    On top of that, there’s also the expense of tape, which now costs about $400 a reel. And the tape machine lining up and realigning, and then the copying time – It was just eating up so much studio time.  For one album, you had to add almost two weeks of studio time just for tape transfers and rewinding.  The other thing that I started realising, is that young bands that were not used to analogue. Suddenly the singer would be in the mood, they’d do a take, they’d do a great take, and they want to do another one. No. With tape, you have to sit there and wait for the tape to rewind.  And then the vibe’s gone.  So suddenly I was like, “Hang on.  I’m weighing up this tiny bit of romantic-ness of tape versus the reality that most people are gonna listen to an MP3 on iTunes.” … it doesn’t add up.

    So that’s when I stopped using analogue recording.

    Come back soon for the next part in this series, where Nick discusses tape splicing.

    In the meantime, you can also read an interview with Nick in the latest issue of Audio Technology.

  • Steinway vs Yamaha Piano Recordings

    Steinway vs Yamaha Piano Recordings

    Recently we acquired a 1966 Steinway Model B grand piano for Studio 1 in Sydney, which lives beside our Yamaha C7 piano.

    To understand the strengths of each instrument, we gave three of our engineers, Simon Todkill, Jono Baker and Simon Cohen, the challenge of recording these pianos in the purest (is that the best?) way possible.

    The final recordings are below…

    Both pianos were recorded at 24/96 with a stereo pair of AKG c414b-uls and Coles 4038 microphones. They were hooked up to SSL Alpha pre-amps running into an Apogee Rosetta 200 convertor. Some recordings (as per their names) also have room mics, which were AKG c414xl2 microphones recorded through our Neve 88R console pre-amps. No compression, eq or other processing has been applied.

    You can download these recordings to hear them in their full glory!

    To book a recording session with these pianos, Please contact Kimberly on recording@studios301.com or 02 9698 5888

  • Roland AIRA TR-8 samples (free download!)

    Roland AIRA TR-8 samples (free download!)

    Together with our friends at Ableton Liveschool, we recently got hold of the yet-to-be-released Roland AIRA TR-8. Not only did we sample a selection of its awesome 808 and 909-style sounds, we then we ran it through our recently serviced and incredibly rare Fairchild 670 Valve compressor…

    Ooops! The samples went up a bit too soon. Join our mailing list to be notified of future sample pack releases.


  • Leon Zervos discusses mp3s and “Mastered for iTunes”.

    Leon Zervos discusses mp3s and “Mastered for iTunes”.

    It has been nearly two years since Apple launched “Mastered For iTunes” and almost as long since Studios 301 started mastering for the format. Over this time, Leon Zervos has mastered more releases for iTunes than most other mastering engineers combined, and as a result has a few thoughts about hi quality audio, good and bad mp3’s, and a bit of nostalgia for how it once was….

    To book Leon Zervos for your mastering project, contact Lynley on mastering@studios301.com or 02 9698 5888

    The beginning of mp3

    When all the downloading started, everyone was making/taking 128 mp3s and as a result, there was almost half a generation that got too used to listening to bad sound.  They were accepting that as how music should be listened to. I even remember getting some files for mastering and they’d converted from 128kb mp3 to 44.1kHz wav. You could hear it straight away.
    So I think we have to thank Apple for taking the initiative, for effectively saying “No, no, we’re going to shoot for the stars here. We want everything to be as high-res as possible.”
    The change in consumer headphones

    At the same time that poor quality mp3’s were being used; people were listening to music on tiny little ear buds that were shocking.  They weren’t even the slightly better quality ones from Apple we currently have. Now you look in the street and see guys walking around with big headphones – Beats, Sennheiser and many other higher quality brands.  It’s taking music, and the listening experience, to another level. So now people are demanding higher standards of audio and people are getting used to it.

    headphones3

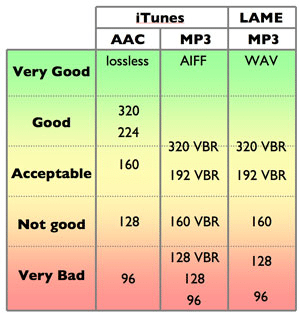
    The difference between a 128kb mp3’s, 256kb AAC (iTunes) and a hi-res audio file

    For a start, the stereo imaging is completely different.  The imaging in a high-res file is true, It’s got depth and clarity.  A 128 mp3 just sounds horrible.

    An iTunes AAC file (at 256kb) is a big step up. I still think a CD at 44.1/16-bit is better – much better.  But will the regular guy or girl in the street hear the difference?  I don’t know.  But in a studio environment, you can hear it straight away. There’s no guesswork, you can pick it.

    compressiontable

    How we got used to 128kb mp3s.

    I think a lot of people don’t know because they’re not in a professional environment like we are, where we can sit down and compare things.  I think if they were, they’d go, “Wow! That sounds so much better,” then they’d use that, they’d always demand that.  I mean, like I said, we’re always striving for the best.

    In the days of vinyl, record companies were cutting discs and they would get test pressings first, they would listen to it as well as the producer, musicians and engineers. If it wasn’t right, they’d re-cut, there would be more pressings, then re-pressings if needed, until it was perfect. There was this safety net in the process and everyone signed off on it when they were happy with the record. Nowadays, probably because of tighter deadlines, this doesn’t happen and there is no safety net. And then it comes out and then it’s down-sampled or converted and it sounds different again.

    Apple is now storing files at up to 24/96 on their iTunes servers.

    As part of their Mastered For iTunes initiative, Apple receive the files from the label exactly as we mastered them, at up to 24 bit, 96kHz for storage on their servers. These files don’t get sold to the customer (they go through Apple’s codec to convert to AAC), however it is intriguing that they are keeping these files on their systems. Why are they doing this?

    Maybe they don’t know themselves yet, perhaps they’re just future proofing. I think keeping everything at 24/96 is the best possible thing to do. In the future, when downloads become quicker and drive space is not an issue, perhaps we will be listening to everything at 96kHz. And that’ll happen, but you probably wouldn’t even need the storage space because you’ll be listening to something that’s getting streamed at 96kHz – which would be perfect.

    Referencing mixes at 128kb

    I get people occasionally sending me a YouTube link to “make it sound like this”. Streaming music from YouTube and Soundcloud (as opposed to downloading) is usually at 128kb and this is not desirable for me. When the client sends me a link, sometimes I don’t even go and listen to it because I’m just not prepared to reference lo-res audio, as a comparison to what I’m doing here in my studio. At full bandwidth and with the equipment I have – it just doesn’t stack up.

    Comparing a 128k stream to a hi-res file: comparing apples to oranges?
    Comparing a 128k stream to a hi-res file is like comparing apples to oranges.

    I think it’s really dangerous because, again, it’s going back to people getting used to a bad-sounding audio and thinking that’s how it should be.  If they had the high-res file (or even a CD) of the song, they could use that as a reference, because that’s what was done at the final stage and that’s what was approved by the producer/artist/label. Anything else as a reference shouldn’t be used because it’s gone through some kind of data compression and the sound has changed.

    I think if you’re going get to the point where you’re mixing, and you’re calling yourself professional, you should be doing it in a professional way. Streaming it on Soundcloud or YouTube is not professional.  Buy the CD or find some way to get the best possible high-res file you can get of that song.  I couldn’t listen to it streaming at 128kb and use that as the reference when I know there’s something much better out there.

    “Mastered for iTunes is a marketing ploy by Apple”

    I think, at a professional level, a company that wants to accept files that are only of a certain quality is very good.  Let’s face it, Apple are a company, they’re in business to make money.  And if this is a sales pitch and they’re making money off it, fine. But the upside for music lovers is that one of the biggest companies in the world is creating awareness of higher audio quality.

    url-1

    Hi resolution masters (24/44 and higher)

    If I were the artist, I’d want to have in my possession the best possible master that could be done.  And if it’s out there and it’s available at 24-bit, it might entice more people to download and listen to it.

    As engineers, we’ve always wanted to better what we do in audio.  Through the years, we had quarter-inch 15 IPS  tape, then we had quarter-inch 30 IPS, then it was half-inch 30 IPS. Then digital came in and has been greatly improved over the years, particularly with better convertors – always advancing. So I think it’s only natural that the industry should move forward all the time, instead of settling for something that doesn’t sound good.

    When cassettes came out, you had the choice of low-noise cassettes, chrome cassettes, metal cassettes, there were different brands, and you could go and get your preferred type.  With mp3’s, it’s almost like the music that was coming out a few years ago was coming out on ordinary cassettes and Apple are trying to make everything come out on noiseless metal tape.  So if I were an artist, I’d want my music to come out the best way possible.

    To book Leon Zervos for your mastering project, contact Lynley on mastering@studios301.com or 02 9698 5888